On long winter evenings, it's a pleasure to treat yourself to delicious slices of dried apples. Preparing them is not at all difficult. It's much easier than making jam, and cheaper, too. Drying the fruit doesn't require sugar. The time investment is also minimal. The end result is incredibly delicious and packed with vitamins. There are several ways to do this. How to dry ripe apples for the winter in an apartment or private house.
Features of drying apples
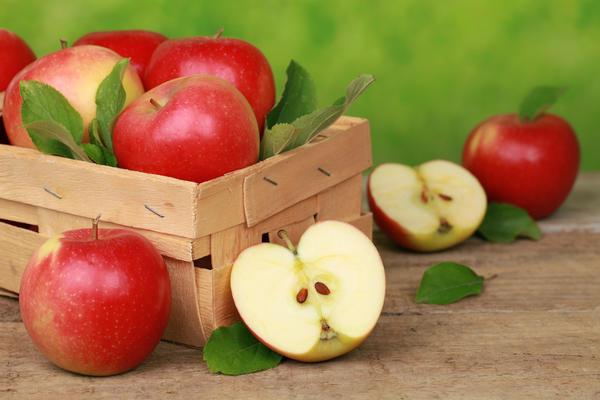
Choose fruits with white, firm flesh. They will be elastic and delicious when dried. The best varieties are Antonovka, Pepin, and Aport.
Important! Don't mix large and small fruit slices together. Some will take longer to dry, while others will take less time.
The best raw material for drying is a home-grown apple, grown in your own garden. Store-bought imported apples are treated with wax and chemicals, which are not lost during the drying process.
Don't use broken or spoiled fruit. They're already fermenting, so the finished product will taste unpleasant.
How to prepare fruits?
Wash the selected apples thoroughly and cut them into thin slices, each 3-7 mm thick. Core the apples with a special knife. This way, the entire process takes just minutes.
Due to the high iron content, the fruit pulp oxidizes quickly when exposed to air. Soak the cooked pieces in a solution of table salt (for just a few seconds) or sprinkle a little lemon juice on each. Then place the pieces in a colander to drain off excess moisture.
Now they should rest for a while on a dry towel.
Methods for drying apples at home
There are various methods for drying fruit, both indoors and outdoors. Some have been used for hundreds of years, while others are more recent. But no matter which method is used, the dried fruit slices are sure to be delicious and aromatic.
In a convection oven
Ovens with this feature are very convenient. They have a special fan on the back wall. Hot air is distributed in a uniform flow, ensuring apples are dried on all sides.


To dry, you will need to do the following:
- Preheat the oven to 50 degrees Celsius (122 degrees Fahrenheit). At higher temperatures, the apples will develop a crust, become brittle, and lose their elasticity.
- Line the baking sheets with parchment paper and arrange the slices in a single, even layer. Place the sheets in the oven. You don't need to open the door at the beginning of the drying process. If the temperature rises, you can open it slightly. The fan will promote rapid evaporation of excess moisture from the fruit.
- After about two hours, stir the slices. Then return them to the oven and dry for 30 to 60 minutes.

- As the apples dry, their volume will decrease. This is a signal to increase the temperature to approximately 70 degrees Celsius for the next hour.
- Then return the oven to the original temperature (50 degrees Celsius). You can leave the oven door slightly open and let the fruit dry for another 3 hours.
- After this time, remove a couple of pieces, let them cool, and then test them with your fingers. If they feel elastic and no juice is released, the drying process is complete. The apples should cool completely. These slices are perfect for a sweet compote or as a treat during the cold season.
In the microwave
In the summer, using an oven isn't always possible because it's too hot. A microwave is a great alternative. It reduces cooking time from hours to just 5 or 7 minutes.
To dry fruits, you will need:
- Cut the apples into slices and distribute evenly on a plate.
- Optimal power is 200-300 W.
- After a couple of minutes, remove the plate and turn each slice over to the other side.
- Let the fruit dry for another 2-3 minutes. This time is enough for very thin slices. If they are still oozing liquid, extend the cooking time by another 2-3 minutes.

In the sun
This isn't the fastest way to get ready-dried fruit. Keep in mind that the outside temperature should remain at least 30 degrees Celsius for several days. Drying apples in cloudy weather doesn't make sense.
Cooking process:
- First, find a spot that gets sun most of the day. Place a table there, covered with kitchen oilcloth and sheets of clean paper. It's best to avoid newspapers, as they'll smell of printer's ink in the hot sun.
- Then, spread the prepared dried apple pieces in a thin layer on the paper. The fruit's scent will attract wasps and fruit flies. Cover the preparation with cheesecloth.
- The apples need to be stirred periodically throughout the day so that they dry on all sides.
- It's recommended to bring the fruit indoors after sunset. If morning dew constantly settles on it or it rains overnight, your efforts will be in vain.
- It will take about a week or a little more to prepare the pretzels according to this simple recipe.


If drying apples outdoors isn't practical, you can string the slices and hang them indoors. A dry, clean attic or veranda is ideal. The key is to ensure constant circulation of fresh, dry air.
Tip! Make the slices thicker, otherwise they'll break when you thread them. Leave some space between the pieces. The product will be ready in 2 weeks.
In an electric dryer
This appliance is specifically designed for drying fruit. Cut the apples into slices the same thickness as the dehydrator tray. Otherwise, the fruit will not dry evenly. One half of the slice will be fully cooked, while the other half will not.
To prepare dried fruits, you will need:
- Carefully arrange the slices on the trays. Then place them in the dehydrator at different levels and turn on the machine.
- It is necessary to ensure that the temperature indicator is no higher than +55 degrees.
- The minimum drying time is 7 hours.
- After this, turn off the appliance. Once the apples have cooled, check for doneness.
- If the juice from the pieces has not yet evaporated, the drying time is extended by 2-3 hours.

Using an air fryer
This device gives you more flexibility. To create a fragrant dehydrator, simply sprinkle fresh apple slices with ginger, vanilla, or cinnamon. The flavor will be amazing.
Cooking process:
- For this device, apples need to be cut into thicker slices (5 to 8 mm).
- Any food in the air fryer is placed on the grates, not on the bottom.
- Now the timer is set to low airflow mode and a temperature of 100 degrees.
- You can check the readiness of the apples after 50–60 minutes.
- If you have any doubts about the product’s readiness, you can extend the cooking time by half an hour.
How to properly store dried fruits?
The ideal conditions for dried apples are dry, cool, dark, and constantly exposed to oxygen. In a warm, musty environment, the product will quickly spoil.
Never use plastic bags or containers. Such packaging can cause mold to form on dried fruit.
Small bags made of thick, breathable fabric or old cotton pillowcases are better suited.
Take a look Also


Cardboard boxes, wicker baskets, or small wooden crates are a good solution. Line the bottoms with sheets of paper. Just make sure to keep bugs and other insects out.
It's recommended to regularly sort dried apples. If they become infested, don't throw them away. You can re-dry the apples in the oven (about half an hour at 60 degrees Celsius) or keep them in the freezer for a while. Clean the container thoroughly and place fresh sheets of paper between them. If you're using cloth bags, wash them and iron them with a hot iron.
If all conditions are met, dried fruits will be stored safely for several years, with virtually no loss.
Preparing dried fruit is a simple process. Appetizing apple slices can be used to make compotes or added to tea. They also make a wonderful filling for all kinds of baked goods. These dried fruits add a unique flavor when paired with pumpkin. Their culinary uses are entirely up to the cook's imagination. They will also be an indispensable source of vitamins and minerals throughout the winter.
Related posts:
 27 Best Homemade Apple Jam Recipes for the Winter
 The best recipes for pickled apples at home for the winter in a 3-liter jar, using the cold and hot methods
 10 Best Recipes for Cooking Apples in Syrup for the Winter
 Is it possible to preserve apples for the winter at home and how do they last?
 Simple recipes for thick apple jam and confiture for the winter at home
 How to properly freeze apples for the winter at home in the freezer and fruit storage rules
 Step-by-step recipes for pickling whole and sliced apples at home for the winter in jars
 13 Best Recipes for Making Amber Apple Jam in Slices for the Winter