Before choosing a basil variety, it's important to know how to grow it on a windowsill. The plant thrives not only in summer but also in winter, and doesn't require any special growing conditions. Its aromatic, spicy leaves have many beneficial properties. The herb adds a special piquant flavor to any dish.
When growing, the most important thing is to follow planting and care guidelines. Harvesting and storing the harvest are also crucial.
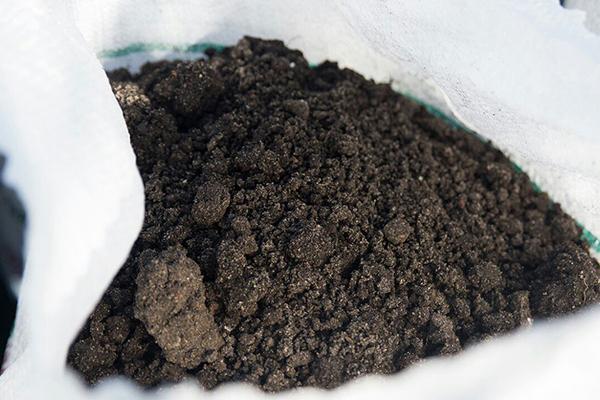
Soil selection
Basil grows well on a windowsill in fertile, but loose and light soil with good aeration:
- A simple option would be to purchase a universal flower soil, which is mixed with soil brought from the garden.
- Peat is also added to the mixture of ready-made universal and garden soil.
- A mixture of ready-made soil for indoor flowers can be mixed with vermicompost.
- Garden soil mixed not only with peat, but also with compost is suitable.
- The ideal option is considered to be a composition of garden soil, rotted manure, river sand and wood ash.
Even purchased soil must be prepared beforehand. It should be heated in the oven at 110 degrees Celsius for 40 minutes. You can disinfect the selected soil by soaking it in a solution of potassium permanganate. Then, apply a complex fertilizer.
There are three main ways to plant a herb grown at home on an insulated balcony or windowsill:
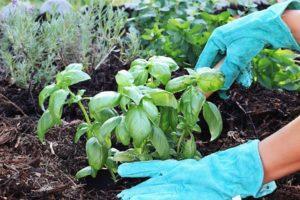
- Repotting a mature plant. This option is suitable for those who grow basil in their garden. Young seedlings are dug up with their roots, leaving a small lump of soil. They are then planted in prepared soil.
- Growing from cuttings is considered simple. The top or young side shoots are cut from a mature plant. The cut shoot is placed in water. As soon as the first roots begin to appear, the plant is planted in soil. The next harvest begins within 2.5 weeks. The disadvantage of this method is that after just a couple of months, another shoot will have to be planted.
- Growing from seed involves several stages. The greens will be harvested after several months, but the plants will take a long time to grow.
Each basil planting method has its advantages and disadvantages. In any case, to obtain a rich and healthy harvest of the herb, care and the right conditions are necessary.
Container for growing basil
How to plant spice seeds at home is up to each person. The container should be larger than 2 liters and more than 14 cm deep. They can be planted in flower pots, large wooden boxes, or individual plastic cups:
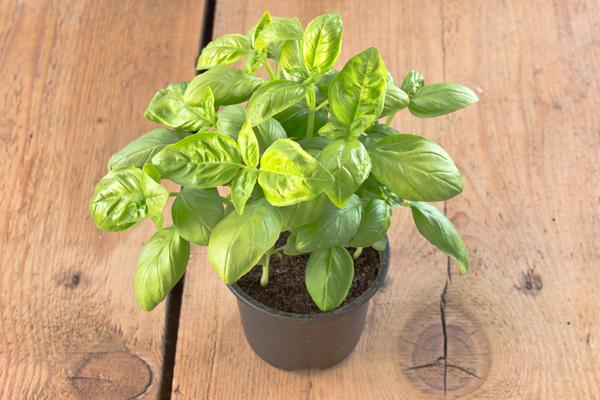
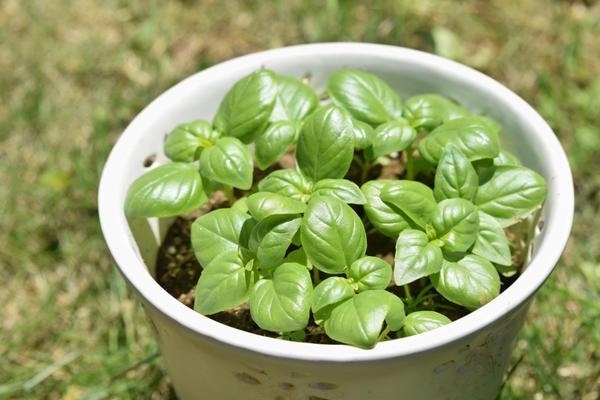
- Growing basil in a pot is easy because it doesn't require transplanting. Choose a pot with a large volume and diameter.
- You can plant the seeds in small plastic cups. Once the seedlings reach 6 cm in height, they can be transplanted into a separate flowerpot. The advantage of this planting option is that the container doesn't take up much space while the plant grows.
Punch holes in the bottom of the selected container and add a 2.5 cm layer of drainage (small pebbles or expanded clay will do) to prevent excess moisture from stagnating. Only then add the prepared soil and water with settled water.
Tip: Don't fill the pot with soil all the way to the edge. Leave 3 cm to allow for additional soil later.
Pre-sowing seed preparation
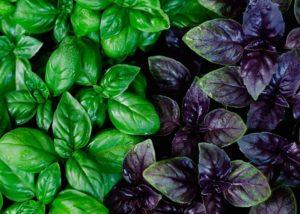
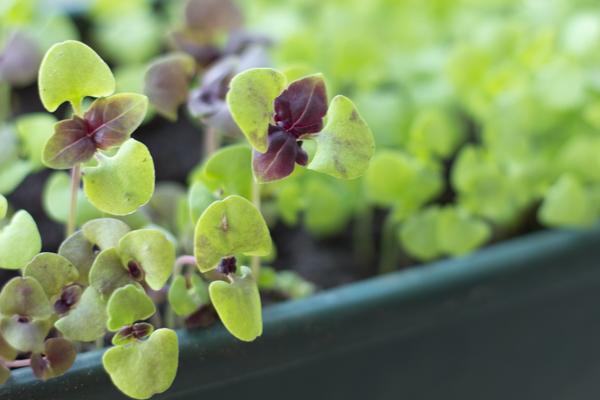
Low-growing varieties with small leaves are suitable for growing basil indoors: Basilisk, Gvozdichny, Yerevansky, Dwarf, Lemonny, Marquis, Troll, and Violet. All of these varieties are characterized by compact growth, take up little space, and do not develop extensive root growth.
To grow a good harvest of basil from seeds on a windowsill, prepare them in advance:
- It's essential to select only large, dense seeds. To do this, soak the planting material in a salt solution. Empty and poor-quality seeds will float to the surface of the water. These should be discarded, as they won't germinate.
- The seeds remaining at the bottom are soaked in warm water for 24 hours, changing the water every 8 hours. Soaking promotes rapid germination.
- To disinfect the seeds, soak them in a potassium permanganate solution for about two hours. Rinse the treated basil seeds under running water.
- At the final stage, the seeds are laid out on a fabric surface in a single layer and left until completely dry.
During further growth and development, basil is provided with all the necessary conditions and proper care.
Sowing basil seeds
To reap a bountiful harvest of fresh herbs, it's recommended to plant basil indoors in late February or early March. Since the plant requires plenty of light and warmth to thrive, these conditions are more difficult to achieve during the winter. Without sufficient warmth and light, the stems become thinner, few side shoots form, and the leaves will contain few essential oils and nutrients.
A bountiful harvest also depends on proper planting. Seeds are planted at a depth of 15 mm and spaced 21 mm apart. Cover the container with plastic wrap and store in a warm place, away from open windows. Remove the plastic wrap periodically for ventilation.
Once most of the seedlings have emerged, remove the film and move the container to the brightest windowsill. The first shoots should appear within 11 days. At this time, thin the plants, leaving a distance of 9 cm between each seedling.
When the seedling stems reach 7 cm, add a layer of new soil. This will strengthen the seedlings and replenish the mixture with nutrients.
Conditions for seed germination
When growing basil, certain conditions must be met:
- Maintain a room temperature of 24 degrees Celsius. If the thermometer reads below 21 degrees Celsius, seed germination slows and the amount of essential oils decreases. If the temperature is too hot (above 29 degrees Celsius), germination may not occur at all.
- The film that covers the container is periodically removed for ventilation.
- You can spray the soil with water using a spray bottle.
- There is no need to water the seedlings.
- The soil and planting material must be protected from drafts.
- When the seedlings grow up, a new layer of soil is added to the pot.
For healthy growth, herbs require adequate light: at least 7 hours of sunlight in summer and 14 hours in winter and fall. To ensure adequate lighting in winter, artificial lighting is provided. The lamps are installed 19 cm from the seedlings.
In summer, fluorescent lamps installed near the seedlings are turned on for 4-5 hours in the evening. If the weather is cloudy or rainy, the lamps should be on for at least 9-11 hours a day.
If all these conditions are met, young basil shoots will begin to appear 11 days after planting.
Rules for caring for basil at home
To ensure healthy basil growth, proper care is required:
- Be sure to establish a watering schedule. Advice: In summer, water the plant daily. In winter, reduce watering to twice a week. Mornings are best. Basil requires plenty of moisture, but avoid overwatering.
- In summer, additional daily spraying of greenery with settled water is organized.
- To ensure good growth, fertilize the plants every 30 days. Fertilize for the first time during the plant's active growth period.
- Loosen the soil periodically (every 3-4 days). This prevents crust formation and improves the flow of oxygen and nutrients to the roots. The first time, loosen the soil only when the plant has reached a large size. Loosening the soil before it's fully developed can damage the root system.
- To ensure that the top is fluffy and there are many side branches, regular pinching is carried out.
- Basil grown at home almost never gets sick, but for prevention it should be treated.
Advice: Don't allow the plant to flower. Pick the buds immediately after they appear, along with the surrounding leaves. Failure to do so will cause the leaves to develop a bitter taste and become inedible.
Basil is most often affected by diseases such as fusarium wilt, blackleg, and gray mold. The main preventative measure is establishing a watering schedule. Avoid overwatering.
If a problem is detected, the affected plant is removed along with its roots, and the entire soil is watered with a solution of potassium permanganate or onion infusion. In diseased plants, the stems become thinner, and the leaves dry out, turn yellow, and wilt. Yellow or black spots and stripes may be visible. If the disease spreads to other plants, use treatments such as Fitosporin or Topaz.
Aphids are a dangerous pest that can damage basil seedlings at home. These insects suck the plant's sap, causing the leaves and stems to dry out and growth to stop. Infusions of wormwood, mustard, tansy, and dandelion help combat these pests.
Harvesting
The first basil leaves are harvested after 35-40 days. By this time, each plant will have five leaves.
To keep basil growing on your windowsill at home, pinch it frequently. The first time, pinch off 2-3 leaves from the top after 30 days. Repeat the procedure again when three pairs of leaves appear on the stem. Subsequently, repeat pinching every two weeks.
The tops cut off by pinching can be added to dishes or dried for long-term storage. If you need a few leaves, select them from the bottom row.
Tip: Be sure to leave 3-4 leaves at the bottom of the stem. Without these, the plant will stretch upward, and the yield will decrease.
Advice: If you notice a bud with flowers, it should be immediately plucked along with the surrounding leaves.
Growing basil from cuttings
Another option is, How to grow basil on the balcony, is propagation by cuttings:
- From an adult plant, either the upper part or the lateral shoots are cut off.
- Place the cutting in a glass of water, changing the water daily. Roots should appear in about 14 days.
- The cutting with roots is planted in a container with prepared soil and watered.
- The pot with seedlings is placed on a windowsill with windows facing south.
The first harvest can be collected in just 2.5 weeks. The downside is that the plant will only last for 3.5 months.
Related posts:
 What is basil and what does it look like, description of varieties and where it grows
 The beneficial properties and contraindications of basil for men and women, and traditional medicine recipes
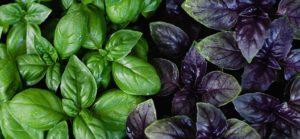
 Description of the 20 best basil varieties, what is the difference between green and purple
 How to prepare basil for the winter at home, storage methods and rules
 Growing from seeds and caring for basil in open ground, diseases and harvesting
 Description and use of purple basil varieties, what are the benefits
 How to dry basil at home: uses, benefits, and when to harvest
 TOP 10 tips on how to properly plant and grow basil from seeds at home for seedlings