- Detailed description and characteristics of the Shuttle tomato
- Appearance
- History of selection
- Suitable region and climate
- Fruit yield and ripening period
- Resistance to diseases and pests
- Advantages and disadvantages
- How to grow tomatoes correctly?
- Planting dates
- Where to plant Shuttle and what kind of soil is needed?
- The difference between growing in a greenhouse and in open ground
- Seedling
- Sowing Shuttle for seedlings
- How to prepare seed material
- Selecting a container for planting
- How to care for Shuttle seedlings
- Step-by-step transplanting of seedlings
- Planting seedlings in open ground
- Sowing scheme
- Rules for caring for the crop
- Watering
- Top dressing
- Soil care
- Protection from diseases and pests
- Harvesting and storage of crops
- The best reviews of the variety from our readers
The Shuttle tomato variety is easy to grow and resistant to major diseases, requiring minimal attention and care. Growing these tomatoes is convenient for gardeners who are constantly busy at work or simply lack the time to regularly tend to their plants. This variety demonstrates resilience to adverse weather conditions, delighting with consistent yields of delicious fruit with excellent marketability.
Detailed description and characteristics of the Shuttle tomato
The Shuttle tomato can be recognized among its competitors by its description and characteristic features.
Appearance
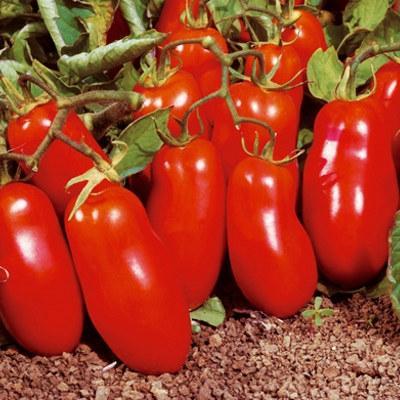
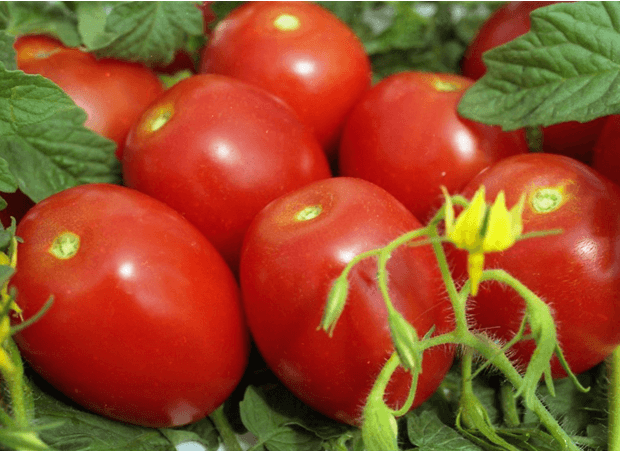
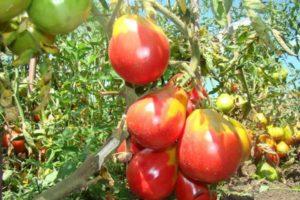
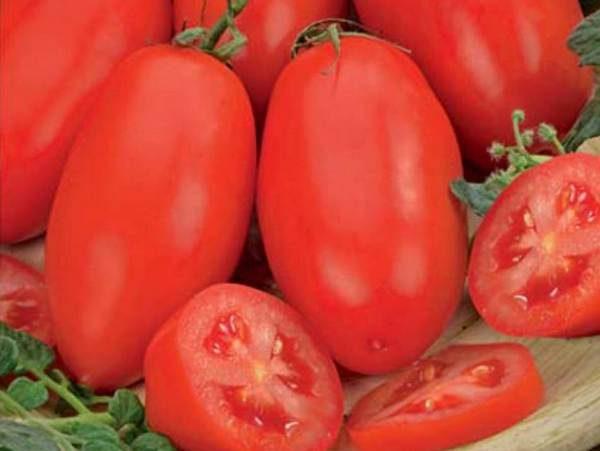
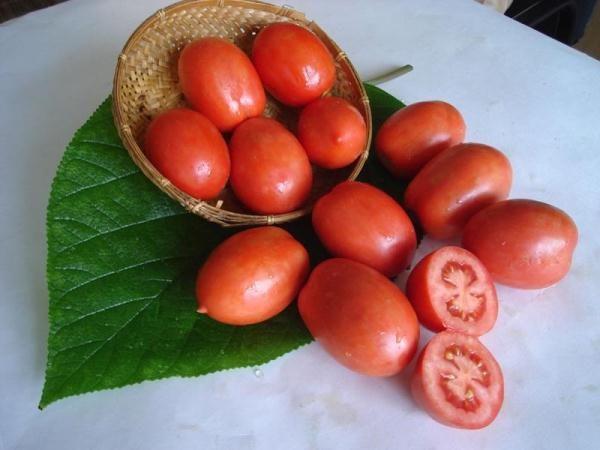
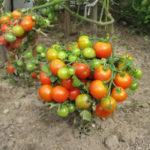
Shuttle is an early cluster tomato variety. The plant is determinate and standard. The tomato bush grows up to 0.6 m tall, with little foliage or branching. The first inflorescences form above the sixth or seventh leaf. The leaves are a rich green color and oblong in shape.
Shuttle tomatoes are cylindrical in shape, often developing a pointed tip. At technical maturity, the tomatoes turn a deep red color. The skin of the fruit is dense, which means they are not prone to cracking even with excessive moisture and during transportation. In the taste characteristics, tasters noted a slight roughness.
The Shuttle tomato variety grows to a weight of up to 80 grams. If you remove some of the ovaries, you can grow tomatoes weighing around 150 grams. This is considered a record for ultra-early ripening varieties. The fruit has firm flesh and 2-3 seed chambers. The flavor is a harmonious balance of mild acidity and high sugar content. The aroma is subtle and classic. The fruits are versatile.
History of selection
Staff at the Federal Scientific Center for Vegetable Growing spent several years developing a tomato variety that would meet all modern gardening requirements.
In 1997, the result of their labor, the Shuttle tomato, was entered into the State Register and began to win the extraordinary love of gardeners.
Suitable region and climate
The creators of the Shuttle tomato recommended it for cultivation in the Central, Volga-Vyatka, and West Siberian regions, but it is successfully grown everywhere except Siberia. This tomato is suitable for both greenhouse and open-field cultivation. Some experimenters have even obtained a harvest from this variety in apartments.
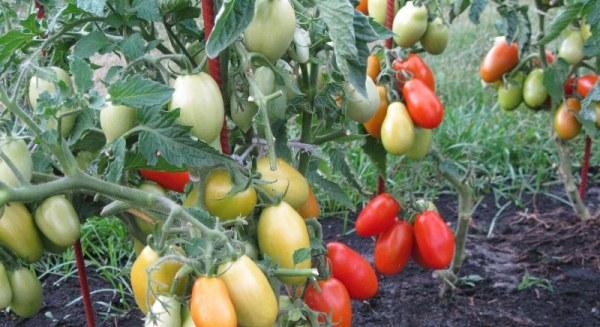
Fruit yield and ripening period
With proper agricultural practices, up to 8 kg of high-quality tomatoes can be harvested per square meter if grown outdoors, and up to 10 kg in greenhouses. The first fruits ripen within 90-110 days from germination. Fruiting is long-lasting and continues until the autumn frosts.
Resistance to diseases and pests
The Shuttle tomato has average disease and pest resistance. Particular attention should be paid to preventative measures and their timely implementation. In cold and rainy summers, fungicide treatment against late blight is required.
Advantages and disadvantages
The shuttle has a number of advantages, which is why gardeners prefer it:
- good yield performance;
- excellent taste characteristics;
- early harvest;
- compact bush size;
- undemanding in care;
- resistance to adverse climatic conditions;
- possibility of cultivation in open ground and in greenhouses;
- universal purpose of the harvested crop.
The variety is not without certain disadvantages:
- low resistance to viral diseases and pests;
- At low air temperatures during tomato flowering, yields decrease.
How to grow tomatoes correctly?
Compliance with agricultural practices helps increase yields and improve the taste and commercial characteristics of fruits.
Planting dates
Planting of ready-to-plant Shuttle tomato seedlings in an unheated greenhouse begins in early May. The plants are moved to the open garden beds later, once the threat of frost has passed.
Where to plant Shuttle and what kind of soil is needed?
To plant the Shuttle tomato variety, choose a location with adequate light and nutritious, loose soil. Four to five plants can be planted per square meter. If necessary, apply fertilizer (organic matter, ash, boric acid, or yeast) before planting.

The difference between growing in a greenhouse and in open ground
When growing this tomato variety in a greenhouse, a 50 x 40 cm planting pattern is used. In this case, seedlings are planted as early as early May, allowing for a harvest several weeks earlier.
Fruit can be harvested in an unheated greenhouse until the onset of persistent cold weather, and in heated buildings all year round.
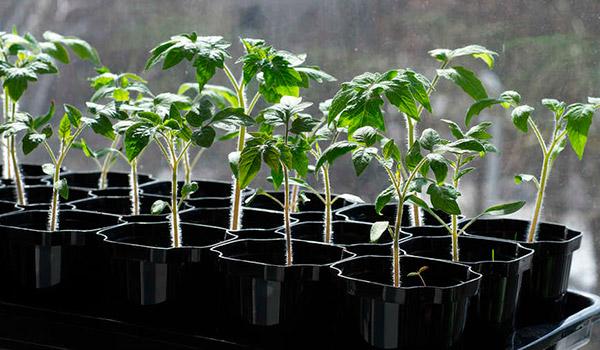
Seedling
The Shuttle tomato is grown exclusively from seedlings. This method has its own peculiarities.
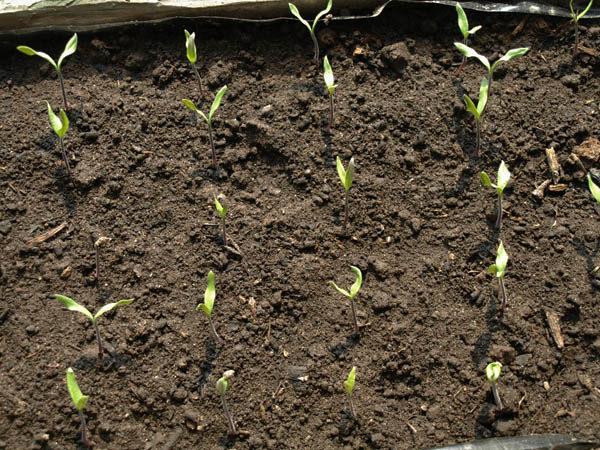
Sowing Shuttle for seedlings
The timing of sowing Shuttle tomato seeds for seedling production may vary depending on the region and its climate. Typically, this time is late February or early March.
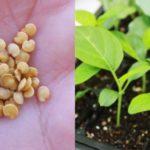
How to prepare seed material
Before sowing, it's recommended to treat Shuttle seeds with a solution of potassium permanganate or copper sulfate. Some gardeners soak them in a growth stimulant to improve germination.
Selecting a container for planting
If you plan to grow Shuttle tomatoes without further picking, then the seeds are sown directly into containers with a diameter of 6-8 cm. In other cases, sowing is done in regular seedling containers, peat cups, or other containers intended for this purpose.
How to care for Shuttle seedlings
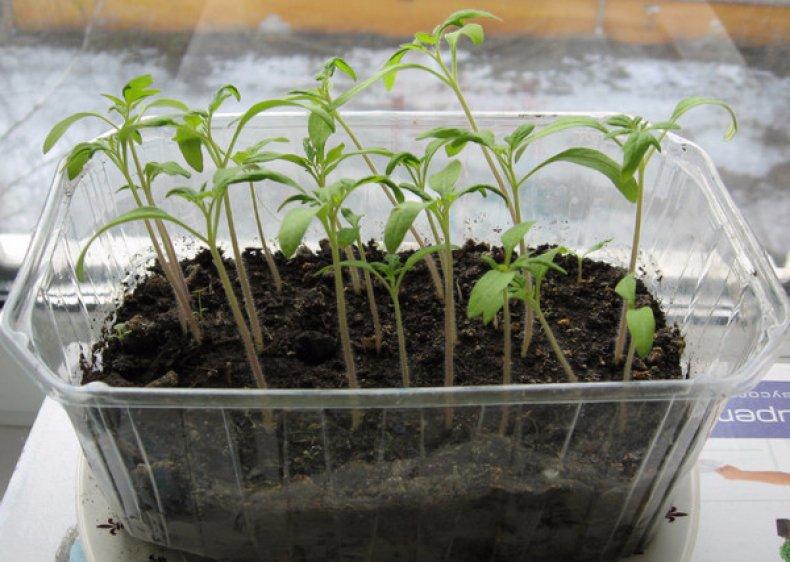
After the first signs become noticeable tomato seedlings The shuttle plants and their containers are moved to a south-facing windowsill or daylight is extended using special lamps. As the top layer of soil dries, water the seedlings. If the plants are growing slowly and the leaves are turning yellow, fertilize with nitrogen fertilizer.
As soon as 3 true leaves appear on the tomatoes, they are transplanted into separate containers.
Step-by-step transplanting of seedlings
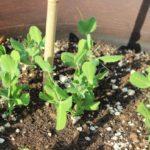
Pricking out Shuttle tomatoes is only necessary if they were planted in a common container. At the same time, remove weak and immature seedlings. This process begins when the plants have four true leaves. Carefully separate them, being careful not to damage the root system, and transplant them into cups filled with prepared soil mixture. Water them and leave them to root in a well-lit, warm location.
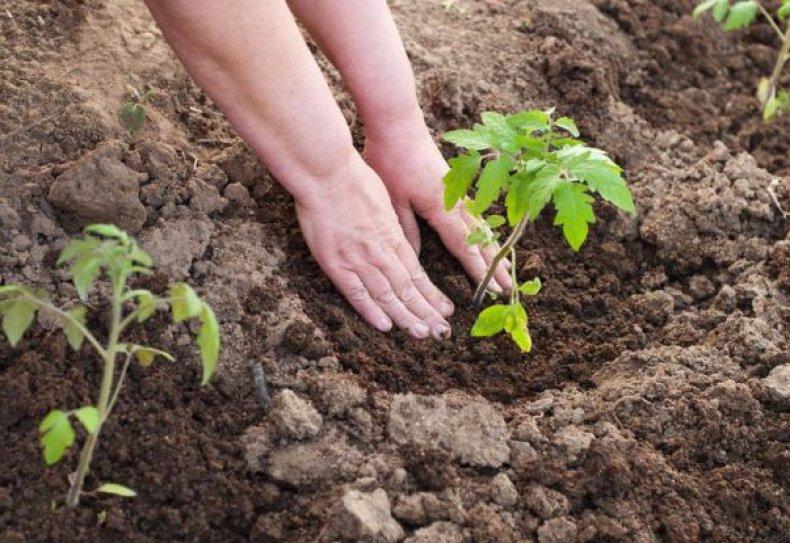
Planting seedlings in open ground
Before planting, Shuttle tomato seedlings are hardened off to an outdoor temperature of approximately +10°C (50°F). Initially, the plants are brought outside for a couple of hours, then gradually increase their exposure time over the course of a week. By the time the plants are planted, the threat of frost should have completely passed.
Sowing scheme
No more than four Shuttle tomato plants are planted per square meter. The distance between them is approximately 0.4 m. A two-row ribbon planting pattern is most commonly used.
Rules for caring for the crop
Basic plant care involves timely loosening of the soil around the bush, weeding, irrigation, and fertilizing.
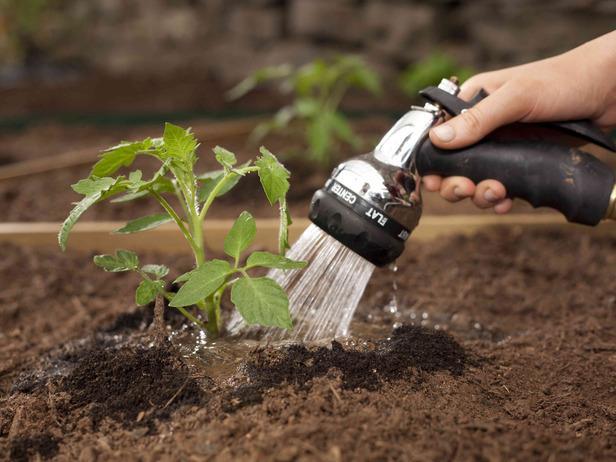
Watering
After Shuttle tomatoes have been planted in open ground, they are watered once a week. The soil is soaked to a depth of 25 cm. During the formation and ripening of tomato ovaries, watering is increased to 30 liters of water per square meter.
Top dressing
When transplanting seedlings, apply a complex mineral fertilizer to the beds. After that, apply fertilizer once a week. Both organic and mineral fertilizers are used. Each tomato plant requires up to 1 liter of nutrients.
Soil care
The soil around the Shuttle tomato plants should be loosened after each watering or heavy rainfall. To prevent weeds and excess moisture evaporation, mulching is recommended.

Protection from diseases and pests
Many Shuttle tomato diseases can be prevented by promptly removing weeds and raking fallen leaves. Plants are also treated with a soap solution, and in severe cases, insecticides and chemical fungicides are used.
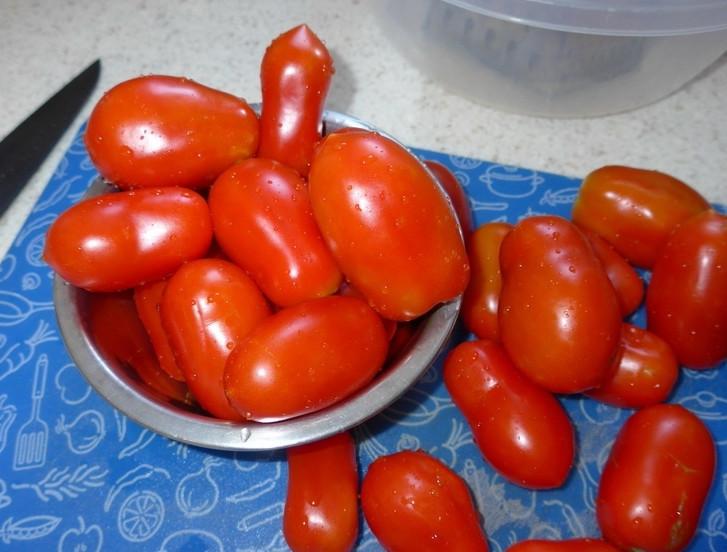
Harvesting and storage of crops
With proper agricultural practices, you can enjoy your first harvest of Shuttle tomatoes as early as 3.5 months after germination. The fruits ripen unevenly, so harvesting continues until the onset of cold weather. These tomatoes are suitable for long-distance transportation and retain their flavor and marketability for a long time.
The best reviews of the variety from our readers
Those who have planted the Shuttle tomato in their gardens are happy to share their reviews about it.
Anna Sergeevna, a novice gardener: "When we first bought our plot, a neighbor shared her surplus Chelnok tomato seedlings with us. She recommended it as an easy-to-grow and hardy variety for beginners. I was pleased with the results. Even with some mistakes in our gardening techniques, we managed to get a good harvest."
Mikhail Semenovich, worker: "Because I'm so busy at work, I can't devote much time to my garden, but I want to enjoy my own vegetables. On the advice of a salesperson, I tried growing Shuttle tomatoes from seeds. We've been eating fresh fruit all summer and even managed to make preserves."
Timofey Viktorovich, retiree: "I gave in to my neighbors' urging and tried growing the ultra-early tomato variety, Chelnok. I can't say it's perfect. We harvested the fruits before the frost, but they were small and the skin was tough. Furthermore, we had to regularly protect the plants from fungal diseases due to the damp weather. I don't know if I'll grow this variety again."
Marina Vladimirovna: "My godmother and I bought the Shuttle tomato seeds together. We must admit, we're quite happy with the variety. We weren't always able to pay the proper attention to caring for the plants, but the whole family still enjoyed fresh fruit right up until the frost. We even managed to make some preserves for the winter. The harvest ripened early, though we did have to work a bit with the seedlings."
Related posts:
 The best eggplant varieties for growing in a polycarbonate greenhouse: planting and care
 What is the best way to feed tomato seedlings to make them plump?
 Rules for growing tomatoes in open ground, choosing a variety, planting and care
 How to prepare soil for tomato seedlings yourself
 What are standard tomatoes, description of varieties and cultivation
 Planting, growing, and caring for eggplant seedlings at home
 Description of varieties of sowing peas and cultivation, to which family they belong
 How to properly plant peas in a greenhouse and open ground