- The essence of the method
- Advantages and disadvantages of growing potatoes in bags
- Features of cultivation
- Selection and preparation of containers
- Preparing tubers for planting
- Potato planting times
- Step-by-step planting instructions
- Caring for potatoes in bags
- Top dressing
- Protection from diseases and pests
- Potential difficulties
- Harvesting
- Are all varieties suitable for growing in bags?
Many gardeners, especially older ones, avoid planting potatoes due to the labor-intensive process or lack of space in their plots. However, recently, gardeners have increasingly turned to an unconventional method of growing potatoes – in ordinary bags. This planting and care method is much simpler than the traditional one, although it is not without its own challenges, and failure to follow the procedure will result in a poor harvest.
The essence of the method
This method of growing potatoes involves planting the vegetable in bags where the seedlings will grow and mature. This method is usually chosen by those who don't have a garden or whose garden soil isn't suitable for planting. It's crucial to follow the proper planting technique to ensure the best results. To achieve this, potatoes need sufficient moisture, sunlight, and nutrients.
Therefore, it is best to choose a place:
- well lit;
- closed from waste water;
- where there will be support for seedlings or the ability to sprinkle the bags with soil for greater stability;
- If the vegetable is to be grown on a balcony, it is important to remember that when harvesting the fruit, the soil will spill out onto the floor.
Advantages and disadvantages of growing potatoes in bags
Like any method, growing root vegetables in bags has its pros and cons. Here are the positives:
- space saving;
- no weeding or hilling required;
- protection from pests and diseases;
- the soil warms up better and is saturated with oxygen;
- no stagnation of water;
- seedlings grow faster;
- requires less time for care;
- a simplified method of harvesting.
Disadvantages of the method:
- the need to buy bags and soil;
- preliminary treatment and disinfection of soil;
- the number of fertilizing and waterings increases;
- the soil often dries out;
- the method is more expensive;
- There are frequent cases of ants settling inside the bag.
Features of cultivation
To grow potatoes in bags, you must follow certain rules to ensure a good harvest.
Selection and preparation of containers
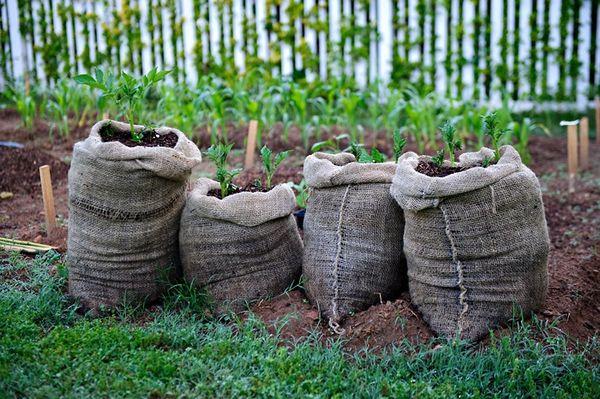
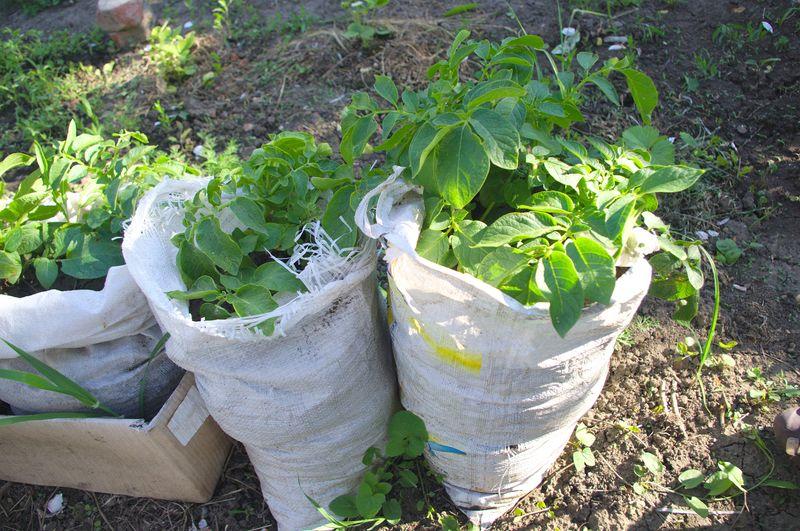
A suitable bag is essential for successful seedling growth, so choose it carefully. Avoid fabric or paper containers immediately—these materials are not durable and will quickly rot. Choose sturdy, roomy, and breathable containers that can last for four months.

Woven polypropylene bags are an excellent option. Polyethylene bags are also suitable, but be sure to punch holes in them to allow moisture drainage and airflow. Some gardeners sew their own bags, adding a valve at the bottom for harvesting. These containers are available at gardening stores.
Placing bags too close together, so that the material touches, is not recommended. While this will retain moisture, it will accelerate the container's decay. Space between plants should be appropriate, but not too large, to increase air flow.
Preparing tubers for planting
For planting, select strong, healthy, and large potatoes free of external damage. The selected tubers should be disinfected and allowed to germinate. The entire process will take 10 to 20 days. There are several methods for disinfecting seedlings, but the simplest is to treat them with garlic, which will not only protect against diseases but also accelerate growth.
- Pass the garlic through a press and pour cold water over the pulp in proportions of 10 liters per kilogram;
- mix thoroughly and let it sit for 2 hours;
- soak the potatoes for 5 hours, making sure the infusion completely covers the tubers;
- place the soaked material in a warm place (14-18 °C) and leave to germinate;
- When the sprouts reach 3-5 centimeters, you can start planting.
Important! Tubers that fail to sprout should be discarded, as they will yield a poor harvest.
Potato planting times
The time for planting in bags is no different from the usual method. As soon as the warmth becomes stable (in the central zone, this is in late April or early May), you can begin planting.
Step-by-step planting instructions
To plant potatoes in containers, you should follow clear instructions:
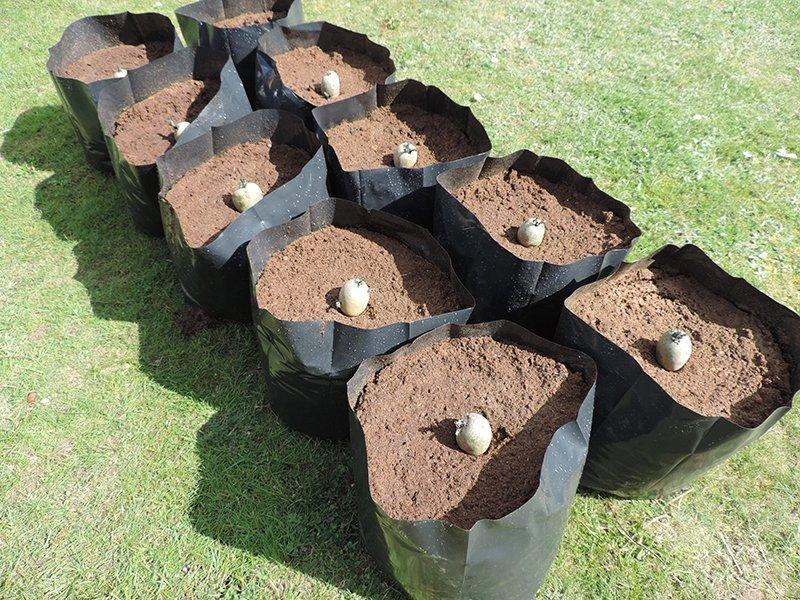
- fill the bag 15-30 centimeters deep with loose soil fertilized with nutrients;
- place 1-4 tubers or a slice with a sprouted eye on top;
- cover with a 15-centimeter layer of soil;
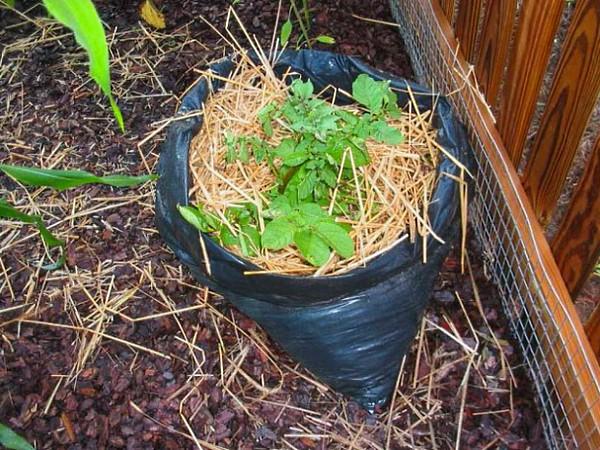
- add a little water and, if desired, mulch with straw;
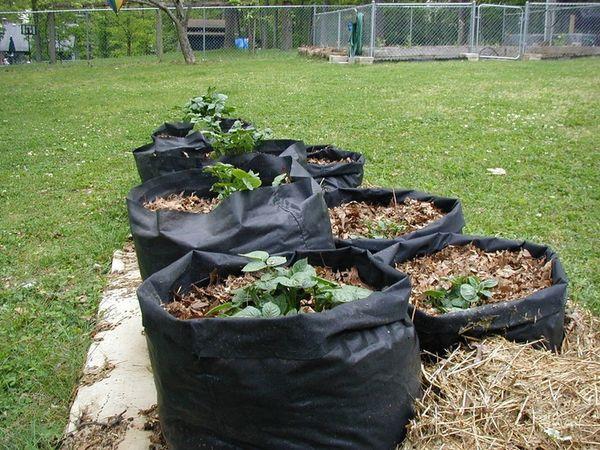
- in a week or two the first shoots will appear, and when they rise 15 centimeters above the “bed”, you should add more soil up to the leaves, which will help the formation of new roots;
- repeat the procedure until 1/3 of the bag remains free.

The total depth of the “beds” should not be more than a meter, so that the plant can easily feed all the fruits.
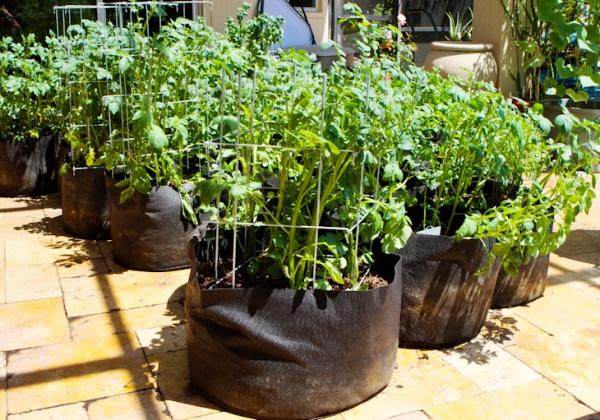
Caring for potatoes in bags
Sowing technology isn't the only thing to follow. Proper cultivation and care of seedlings is crucial, and watering is paramount. Because bagged soil doesn't retain moisture, the frequency and volume of watering should be increased, ensuring the soil remains moist, but not soggy, from top to bottom.
- first watering – when planting;
- After the first sprouts appear, you should wait 3 days and begin regular watering, remembering to increase the amount during drought.

Important! Water with settled, sun-warmed water.
Top dressing
Potatoes should be fed three times:
- when the first shoots have reached 15 centimeters, before adding a layer of soil;
- when buds appear, before adding more soil;
- during flowering.
For fertilizers, it is worth choosing ready-made preparations containing potassium and phosphorus.
Important! Fertilizers containing nitrogen and nitrate inhibit vegetable growth and reduce fruit quality.
Natural ones that are suitable are:
- Herbal infusion: soak freshly cut grass or last year's hay in water and let it steep for 2 weeks, stirring occasionally. When the infusion begins to smell foul, dilute it with water (8 liters of liquid per 2 liters of fertilizer) and water the seedlings;
- Manure: Fill ¼ of a bucket of manure with water to the brim and let it sit for a week. Dilute the prepared fertilizer with water (1 liter of manure per 10 liters of water) and water;
- droppings: proportions and preparation are the same as for manure, but the finished fertilizer is mixed in proportions of 0.5 liters of droppings per 10 liters of water;
- Ash: Apply ash fertilizer a week after the main fertilizer to prevent the chemical reaction from evaporating the fertilizer. Ash can be applied either directly, scattered over the soil, or mixed with water during watering.
Protection from diseases and pests
If the tubers have been treated, the soil disinfected, and the container has holes for ventilation and drainage of excess moisture, the vegetables will be immune to disease. However, such a cozy "bed" will certainly attract heat-loving ants, which are quite difficult to get rid of. Therefore, it's necessary to provide protection:
- sprinkle ant poison around the bags;
- sprinkle the ground with mustard powder or ash;
- Loosen and move the bag so that the ants feel uncomfortable in the revived house.

Potential difficulties
It is important to remember some nuances that may arise during planting:
- To grow potatoes in a vertical "bed" you need a large amount of nutritious soil;
- the place where the bags are placed must ensure the stability of the seedlings, because if they fall, the “bed” will collapse;
- the bag should not be placed under a roof where rainwater will fall, otherwise the plant will begin to rot from excess moisture;
- You should regularly check the soil moisture level and do not allow it to dry out;
- After harvesting, the soil cannot be reused, but can be spread over the beds as mulch.
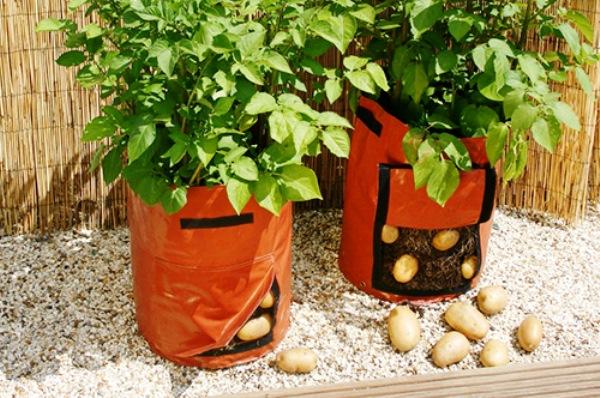
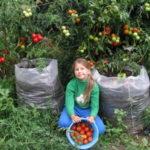
Harvesting
The top tubers are always younger than the bottom ones. The grown potatoes should be harvested in August using the following methods:
- turn the bag over, pouring out the soil and crops;
- If the bag is no longer suitable for planting, it is enough to cut it;
- If the bag has valves, then it is enough to open them and take out the fruits.
After harvesting, suitable and intact bags should be carefully folded and stored until next year.
Are all varieties suitable for growing in bags?
When growing vegetables in bags, it's important to choose more low-maintenance varieties. Experienced gardeners recommend:
- Bellarosa (Germany);
- Sante (Netherlands);
- Svitanok Kyiv and Slavyanka (Russia).
Related posts:
 Growing tomatoes in bags in open ground and a greenhouse step by step
 The best eggplant varieties for growing in a polycarbonate greenhouse: planting and care
 Methods for planting and propagating cherries at home
 Step-by-step technology for growing strawberries in bags in open ground and a greenhouse
 Description of the Bryanochka cherry variety, planting and care instructions
 Description of the Red Early apple tree variety, agricultural technology and specific care
 The best grape varieties for growing in the Urals, planting and care rules in summer
 The health benefits and contraindications of black currants