- Advantages and disadvantages of the system
- Types of automatic irrigation
- Drip irrigation
- Sprinkling
- Subsurface irrigation
- Automatic watering in a greenhouse using bottles
- Automatic air irrigation of a greenhouse
- With water supply through a pipeline
- The best irrigation systems for greenhouses
- System "AquaDusya"
- Beetle system
- Automatic system CLIP-36
- DIY drip irrigation in a greenhouse
- Calculation of water volume and irrigation duration
- Automatic watering system design for a greenhouse
- Materials needed: water tank, pumps and filters for automatic irrigation
- Timers and controllers for automatic watering
- We organize automatic ventilation
- Distance between drip nozzles
- The process of assembling and installing an automatic irrigation system
- Launching and testing the installation
Installing an automatic irrigation system in your greenhouse will significantly reduce the time spent caring for your crops. An automatic irrigation system offers numerous advantages over manual watering. There are several different ways to moisten beds in a greenhouse; the main thing is to choose the most suitable one.
Advantages and disadvantages of the system
Advantages of installing automatic irrigation in a polycarbonate greenhouse:
- Saving time and water costs.
- Increased yield due to optimized irrigation.
- Moisture evaporates from the soil more slowly.
- Even when installing complex irrigation systems, careful planning of garden bed irrigation is not required.
- No waterlogged areas appear.
- Water is distributed evenly across the area.
Disadvantages of automatic garden bed irrigation:
- Watering is not suitable for trees and shrubs.
- High cost of irrigation systems.
In addition, the question arises as to how much the savings on water and time for independent watering pays off, given the cost of the irrigation system.
Types of automatic irrigation
There are several types of automatic irrigation systems. The main difference between each is the type of water supply and spray pattern. Before settling on one, it's worth exploring all the different types.

Drip irrigation
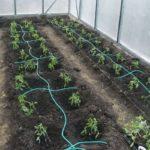
From the water source, liquid is delivered through pipes to special tapes. Tapes and drippers deliver the water to the soil and each plant in the area. The drops in this type are very small.
Among the advantages of drip irrigation is the saving of liquid.
It also prevents weeds from developing, and the soil is evenly moistened. Disadvantages include the complexity of installation and the cost of the system. Furthermore, constant monitoring is required to keep the tapes clean.
Sprinkling
An automated sprinkler irrigation system uses water from a source to spray sprinklers that simulate raindrops. These sprinklers are installed either at ground level or under the greenhouse roof.

The advantages of sprinkler irrigation include the ability to irrigate large areas of soil at once. Disadvantages include the risk of overwatering the soil. Water also splashes onto plant leaves, which can cause sunburn and crop death in sunny weather.
Take a look Also
Subsurface irrigation
Subsurface irrigation is considered one of the most complex systems to install. Subsurface irrigation is similar to drip irrigation in its design, but the water pipes are installed underground.
This type of soil irrigation is considered the most effective. Furthermore, during irrigation, the soil is saturated with oxygen. Disadvantages include the labor-intensive nature of the system's installation and the need to dig a trench between the beds.

Automatic watering in a greenhouse using bottles
To water your greenhouse, you can create your own automatic irrigation system using recycled plastic bottles. This type of irrigation is similar to the previous one, but simplified. Water flows to the plant roots through holes in the bottles. The bottles are buried in the soil.
Automatic watering with bottles is the most affordable option. It's also easy to install. The only drawback is that this system isn't fully automatic. The bottles will need to be refilled regularly.

Automatic air irrigation of a greenhouse
In this case, the automatic irrigation system is located not on the soil surface or beneath it, but at the top of the greenhouse. This method of watering the beds can be drip or rain. The pipes that supply water to the sprinklers are installed above, under the roof of the greenhouse. The advantage of this method is that it simulates raindrops. This type of irrigation prevents the soil from becoming over-watered.
Among the disadvantages noted is the difficulty of installing pipes under the roof of the greenhouse.
With water supply through a pipeline
This method is suitable for large areas. Piped irrigation is used in areas with shrubs and trees, where redirecting the water flow is not required. These automatic irrigation systems are installed for the long term.

The best irrigation systems for greenhouses
Automatic irrigation is quite expensive. The cost depends on the complexity. There are several types of irrigation systems for greenhouses.
System "AquaDusya"
The AquaDusya irrigation system is a drip system. It's suitable for small greenhouses. Water is pumped using a pump that can be installed directly into a watering barrel placed inside the greenhouse. AquaDusya runs on AA batteries. The irrigation cycle lasts for one hour. Assembling the system yourself is easy. That's precisely what it's designed for.

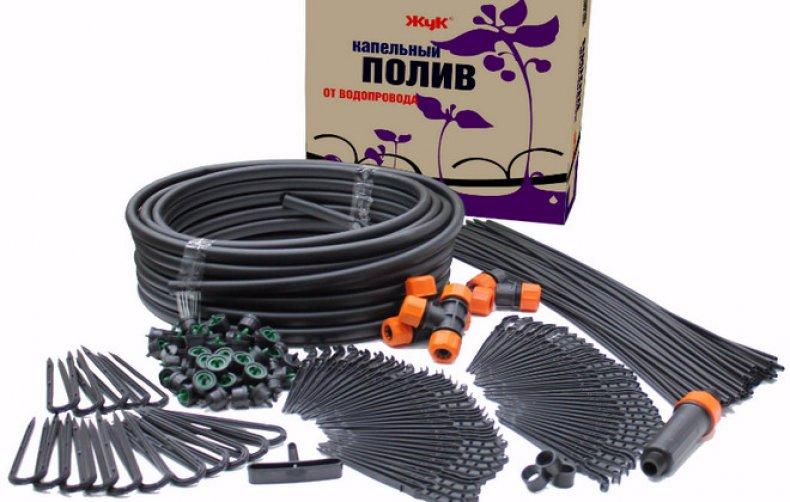
Beetle system
The "Zhuk" system is very simple in design and is also designed for self-assembly and installation. The hose has several branches for drippers, allowing for quick and effective irrigation of garden beds. The only drawback is that the system does not have a timer. One must be purchased separately. The system is connected to a water supply or installed in a barrel. The advantage of the "Zhuk" system is its relative affordability and ease of installation.

Automatic system CLIP-36
The KLIP-36 system delivers water intermittently throughout the day. The system irrigates the soil for 1-2 minutes, followed by a longer break. The KLIP-36 is connected to a pipeline or water tank.
This system requires no batteries, and can be used to irrigate garden beds with fertilizer along with the liquid. The pipes that carry the liquid do not clog during operation. Furthermore, it is possible to use from one to four pipes.
DIY drip irrigation in a greenhouse
If you don't want to spend a fortune but still need to install an automatic irrigation system in your greenhouse, you can build one yourself. This doesn't require any special equipment. Automatic irrigation materials are easy to find.
Calculation of water volume and irrigation duration
First, you'll need to calculate the volume of water and the irrigation duration for the beds in the greenhouse. Measure the length of the beds and record the resulting figure. This will be used to calculate the water volume. Next, draw the locations of each pipeline, as well as the water containers. The volume of water depends on the length of the system. If it's too long, it's advisable to split the drip system into several barrels or connect it to a permanent water source.

Automatic watering system design for a greenhouse
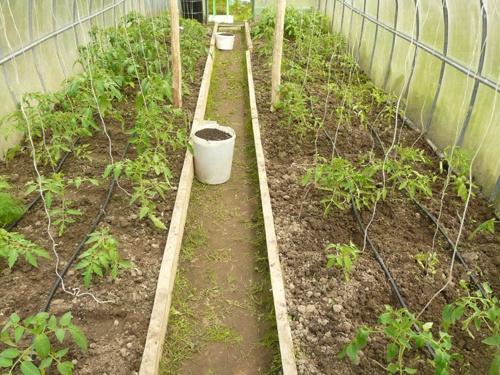
When making your own watering system, water is supplied through nozzles. The simplest way to set up automatic watering in a greenhouse is to run a hose from a barrel with holes punched in it. Drip irrigation is applied at the roots.
Materials needed: water tank, pumps and filters for automatic irrigation
To install automatic irrigation in a greenhouse you will need:
- barrels of water;
- PVC pipes;
- pump (comes complete with filters);
- droppers;
- switches (they will be used to regulate the water pressure);
- tow (used for sealing);
- plastic couplings;
- adapters;
- plugs will be required at the end of the water pipe;
- tees.

You will also need a timer and a battery.
Timers and controllers for automatic watering
Automatic watering timers are required to set irrigation times. They allow you to specify the start and end times for irrigation.
We organize automatic ventilation
It is advisable to install automatic ventilation in the greenhouse:
- Pour water into a glass jar and seal it.
- Then drill a hole in the lid and insert a brass tube.
- There should be 2-4 mm left to the bottom, then the hole is sealed.
- Drill a hole in the polyethylene lid and insert a flexible tube into it.
- Seal and close the jar with a lid.
Take a look Also

Now you can place the structure in the greenhouse. When the temperature rises, this structure opens the greenhouse window. When it drops, it closes.
Distance between drip nozzles
When installing an automatic irrigation system, the water flow should be adjusted. Weak water pressure will not provide sufficient moisture to all the beds, while strong pressure will lead to overwatering. The spacing between drippers depends on the crop variety.
Spider-type drippers are used for perennials. They are characterized by a large distance between them. This type is used only for greenhouses. For crops with underground roots, drippers spaced 20 cm apart are used. Melons require drippers spaced 1 m apart.

The process of assembling and installing an automatic irrigation system
Assembly process:
- The barrel is placed at a distance of 1-1.5 m from the ground and covered with a lid.
- A hole is made near the bottom and a hose is inserted into it.
- To obtain complete joints, pipes are cut at an angle of 90 degrees.
- Small holes are drilled in plastic pipes.
- The main hose is installed using a clamp. A plug is installed in the drain hole.
- Sprinklers are installed on the lines marked on the pipe.
- When connecting taps, plugs, and dispensers, you will need tow to ensure the structure is airtight.
Before installing the last plug, it is recommended to flush the entire system to remove any plastic shavings that remain inside after drilling the holes.
Launching and testing the installation
Before starting the automatic watering system, ensure that water is reaching each dispenser. Pay particular attention to the last dispenser. Once installed, set the start and end times on the timer. Once the set times are reached, the automatic watering system will turn on.
Related posts:
 The best eggplant varieties for growing in a polycarbonate greenhouse: planting and care
 How to make a drip irrigation system for tomatoes in a greenhouse yourself
 What fertilizers and when to use for feeding tomatoes in a greenhouse
 How to make a drip irrigation system for tomatoes from plastic bottles
 How to grow cucumbers in a polycarbonate greenhouse: planting and care guidelines
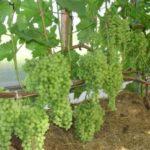 Rules for growing grapes in a greenhouse at your dacha, planting and care
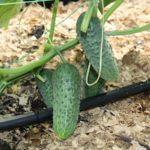 How to set up drip irrigation for cucumbers in a greenhouse and open ground
 How to make a drip irrigation system for cucumbers using plastic bottles