- When does spring garlic ripen?
- Depending on the growing region
- Depending on the variety
- Lunar harvest calendar for 2025
- Auspicious dates
- Unwanted dates
- Why is late or early harvesting undesirable?
- The main signs of ripening garlic heads
- Collection rules
- How to quickly dry and prepare crops for storage
- Methods for storing summer garlic
- Traditional methods
- In a glass jar
- In flour
- In paraffin
- In salt
- In the grid
- In a cloth bag
- In the ground
- Modern methods
- In fabric and polyethylene
- In cling film and sawdust
- Freezing
Garlic is a vegetable crop that's hard to imagine without in any garden or allotment. Growing garlic has several distinctive features. There are two types: winter and spring garlic. When growing spring garlic, the question often arises of when to store it. Following proper care ensures the safety of the harvested crop.
When does spring garlic ripen?
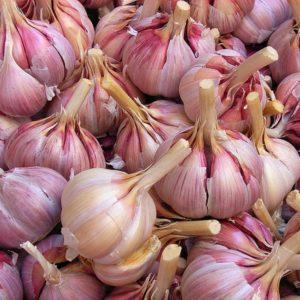
Spring garlic doesn't produce the same scapes as winter garlic, and its cloves are larger and have a richer flavor. Spring garlic ripens later than winter garlic. The exact ripening time depends on planting time and the characteristics of the chosen variety.
Spring-planted garlic is harvested during the last weeks of August. In addition to timing, gardeners rely on external characteristics and take into account the climate.
Depending on the growing region
Each region's climate has its own unique characteristics: in the south, spring garlic is harvested from mid-August until the end of the month. This period marks the onset of technical maturity. From planting to maturity, the crop requires approximately 100 days.
In northern regions, harvesting shifts to September. It's important to harvest spring-planted garlic before frost sets in. If the soil freezes, the garlic cloves will become wilted and inedible.

Depending on the variety
Harvest times may vary for winter and fall varieties. Winter varieties are planted in the fall and harvested in the spring, while spring varieties are planted in the spring and harvested in the summer for storage throughout the winter.
Lunar harvest calendar for 2025
Many gardeners rely on the dates indicated in the lunar calendar. Using the calendar is quite simple: choose the most convenient dates from a list of suitable dates, then harvest within that day.

Auspicious dates
The numbers suitable for collection are selected from a list created for July-August.
| July | 5, 6, 7, 15, 16, 19, 20, 23, 24, 25, 26, 27 |
| August | 1, 2, 3, 11, 12, 15, 16, 29, 30 |
Unwanted dates
It is not recommended to dig up garlic during inappropriate periods:
- July 1-4, 8-14;
- August 4-10, 13, 14, 17-28.
Tip! In addition to focusing on suitable or unsuitable dates, consider the appearance of the plants and climate conditions.
Why is late or early harvesting undesirable?
Harvesting spring garlic too early risks making it unsuitable for storage. Unripe cloves lack a distinct flavor, fail to grow into full-sized cloves, and do not retain their nutritional properties. Unripe garlic typically begins to rot in mid-winter.
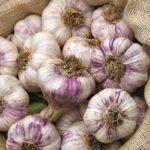
![When can you harvest garlic in [year] according to the lunar calendar, timing and storage rules](https://harvesthub.decorexpro.com/wp-content/uploads/2019/04/chesnok-2-300x188.jpg)

Garlic that's been left in the garden for too long begins to crack and sprout prematurely. The uncracked, but swollen, cloves begin to develop black spots over the winter, which then dry out. The centers of these cloves rot by the last month of winter.
The main signs of ripening garlic heads
To preserve spring garlic, it's essential to harvest it properly and in a timely manner. You can tell when the crop is ready for harvest by its appearance. Aboveground part:
- the arrows do not curl or straighten, they fall to the ground;
- no new arrows are formed;
- the part of the stem at the base looks dry.
Underground part:
- the slices separate well from each other;
- the husk comes off easily and starts to rustle when peeled;
- The teeth are fully formed and approximately equal in shape and size.

Garlic ripens unevenly. Garden beds facing south are cleared first. Those facing north will ripen fully 1-2 weeks later.
Collection rules
When harvesting, certain rules are followed.
- Garlic should only be dug when the soil is dry. To ensure this, watering should be stopped a week before digging.
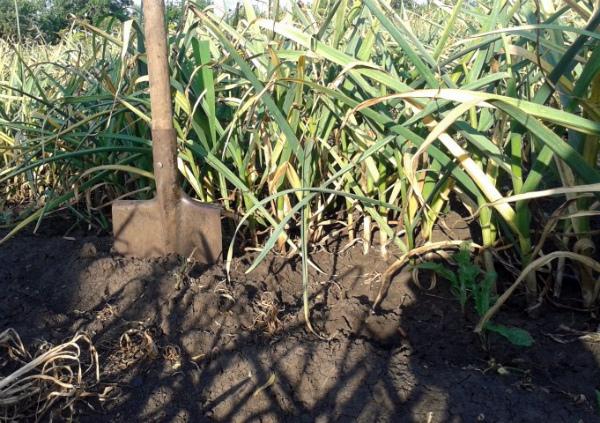
- To dig up garlic, use a pitchfork. It won't damage the berries and will help loosen the soil, making it easier to pull the bulbs out.
- When using a shovel, dig a hole and then pull out the head with your hands.
- The collected heads are placed on a dry surface, and the damaged garlic is set aside separately.
It's recommended to harvest in the morning so the crop can dry outdoors before dusk. In the evening, the harvest should be brought indoors, even if it hasn't been trimmed or cleared of soil. Nighttime humidity can ruin the harvest, leaving the cloves waterlogged.
How to quickly dry and prepare crops for storage
Garlic must be properly prepared for winter storage. After harvesting, it can be left to dry for a few days or quickly dried and stored.
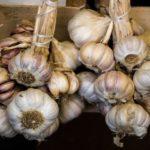
For home storage, the heads are not washed; they are dried naturally for 2-3 weeks or using additional methods that speed up the process. For natural drying, the garlic is braided into strands, tying nylon threads to the remaining stems. Some gardeners prefer to make bundles, hanging them individually by the stems.

After digging, primary processing is carried out: the heads are cleared of soil, the shoots and root hairs are cut off, leaving about 2-5 centimeters on each side.
- Outdoor drying. This involves hanging the plants outdoors in diffused sunlight. The plants are dried during the day and stored at night to prevent moisture accumulation.
- Home drying. This is done in a dark, ventilated area. Drying usually takes 2 to 3 weeks.
- Electric drying. This involves drying garlic cloves or slices in the oven or electric dehydrator. This method is suitable for those who store the cloves in a pre-dried form. The heads are completely peeled and cut into random pieces, ensuring the slices are of approximately equal thickness to ensure even cooking. The drying time depends on the power of the oven or dehydrator. It's best to dry the slices in 10-15 minute intervals to ensure complete drying.
Take a look Also
Information! Dried garlic retains its composition and beneficial properties.

Methods for storing summer garlic
When planning crop storage, it is important to keep in mind the basic requirements.
- Temperature. Spring garlic should be stored at temperatures between 16 and 20 degrees Celsius, but no higher. High temperatures will cause the stalks to sprout. Temperature fluctuations are considered dangerous, as they can lead to rotting.
- Air humidity should not exceed 80 percent. Excessive humidity will cause the cloves to rot.
- Light. Exposure to sunlight can cause disease to develop on the heads, so the heads are stored in partial shade.
The location is selected according to these requirements. Additionally, there are several additional techniques for preserving garlic bulbs.

Traditional methods
Garlic is traditionally stored throughout the winter in a way that allows for quick and easy access to several heads for cooking. Furthermore, the location and method must meet basic requirements to prevent the heads from rotting or becoming too wilted.
Important information! Garlic should not be stored with other vegetables.
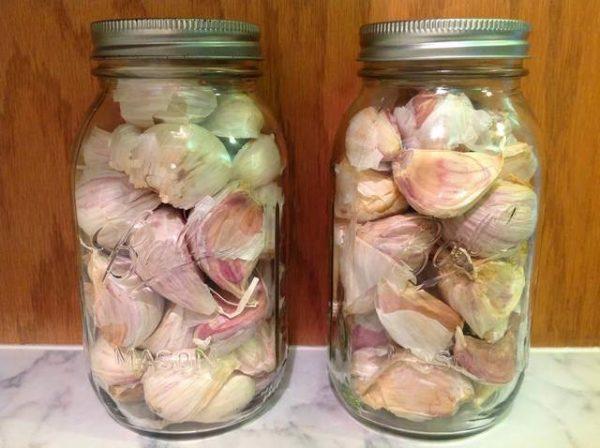
In a glass jar
One traditional method for preserving garlic is to separate it into cloves. To do this, peel the heads, cut them into several pieces, or sort them into individual cloves. The cloves are stored in 2- or 3-liter glass jars with tightly sealed lids.
In flour
Glass jars, half-filled with wedges or heads, are filled with flour. In this storage method, flour acts as a moisture-absorbing material. This method helps prevent gnats from gathering around the crop and also prevents the development of fungal diseases.
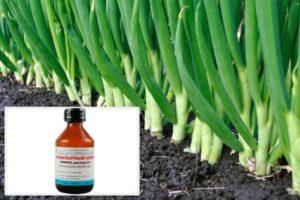
In paraffin
The paraffin method requires some skill. It requires preparing several thick paraffin candles. Melt them in a double boiler (a wide basin is best for this). Grasp the garlic by the stem and dip it into the paraffin, right down to the base. Then lift it above the surface of the paraffin to allow the excess to drip off, then place it on parchment paper until it hardens completely.

After treatment, the heads are placed in the bottom of prepared boxes or baskets and then stored. Paraffin-treated garlic will be well protected from rotting and the penetration of harmful microorganisms.
Note! The paraffin method allows for storage in rows. To prevent paraffin shedding, the rows are separated by parchment paper.
In salt
Salt is used as a moisture absorber. Moisture is the main enemy of garlic storage. When it comes into contact with the bulb, water is absorbed and causes fungal diseases. Jars of garlic are sprinkled with salt, then tightly sealed with lids.

In the grid
This method is used to store whole, unhusked mushroom heads. This method is suitable for utility rooms. Nylon mesh with a fine weave is filled with the mushrooms and hung at mid-height or from the ceiling. With proper ventilation and temperature control, the mushroom heads can be stored until spring.
Tip! Thick nylon stockings are sometimes used for storage: they allow air to pass through and protect the heads from midges or flies.
In a cloth bag
Bags made of natural materials, free of synthetic fibers, are suitable. Before storage, the bags are specially treated. They are placed in a strong saline solution, then dried and used for storage. This treatment prevents mold growth and infection.

In the ground
This option is suitable for preserving a large harvest. Gardeners dig a medium-sized hole, line it with several layers of newspaper, place the dried tomato bulbs in it, cover with newspaper, then cover with mown grass and tomato tops, and bury them.
This method eliminates the need to harvest garlic in winter and is suitable for storage until spring, when the entire stored crop can be dug up.
Modern methods
With the advent of modern auxiliary materials, new storage methods have become popular. They help extend storage periods and prevent crop spoilage.
In fabric and polyethylene
This storage method helps reduce the risk of fungal diseases due to excess moisture or bacterial contamination. Garlic is prepared and placed in the bottom of a cloth bag. The top of the bag is tied in a knot. The bag that holds the tied bag should be one size larger. The bag is left untied and unsealed. The garlic is aired weekly.

In cling film and sawdust
Cling film serves as a protective barrier against bacteria and infection. Each head is tightly wrapped in cling film, twisting the material tightly at the base. The heads are then dipped into sawdust, pressing down. The tail should be visible through the sawdust. The sawdust removes excess moisture, even if condensation forms on the plastic wrap due to a loose seal.
Freezing
Freezing garlic has several benefits:
- preservation of beneficial properties;
- long shelf life;
- convenience of placement.
This option allows you to store both peeled and unpeeled cloves. Peeled cloves will preserve better and be ready to eat after defrosting, while unpeeled cloves will be difficult to peel.
For freezing, use plastic bags with zip-lock closures or ice cube trays. Garlic can be stored in the freezer for up to 8 months.
Related posts:
 Description of the best cabbage varieties for 2025 for different regions
 How to properly dry winter garlic after digging and where to store it at home
 The best varieties and types of early and winter garlic with descriptions and names
 When can you harvest garlic in 2025 according to the lunar calendar, timing and storage rules
 Garlic harvesting dates in the Urals in 2025, cultivation and care
 The best recipes for pickled garlic heads at home for the winter, like those found at the market, and the shelf life
 When to harvest winter garlic in Siberia, planting and storage times, varieties
 Description and characteristics of the best varieties of late cabbage, planting and care technology