- Characteristics of the variety
- History of appearance
- General description
- Taste qualities
- Beneficial properties
- Advantages and disadvantages
- Growing methods
- Seminal
- Step-by-step instructions
- Soil preparation
- How to plant seeds in spring
- Winter sowing
- Seedling method in open ground
- Preparation of seed material
- Planting container
- Soil for onion crops
- Covering with soil and watering
- Greenhouse conditions
- We put it in the shade
- We remove the film
- Hardening
- Planting in a garden bed
- Planting diagram
- Correct planting of seedlings
- Seed preparation
- Soil for planting
- Care
- Watering and lighting
- Weeding and loosening
- Top dressing
- Mulching
- Picking
- Harvesting and storage
- Diseases and pests
- Rot
- Onion smut
- Stem nematode
- Onion fly
- Reproduction
- How to get nigella
- Reviews
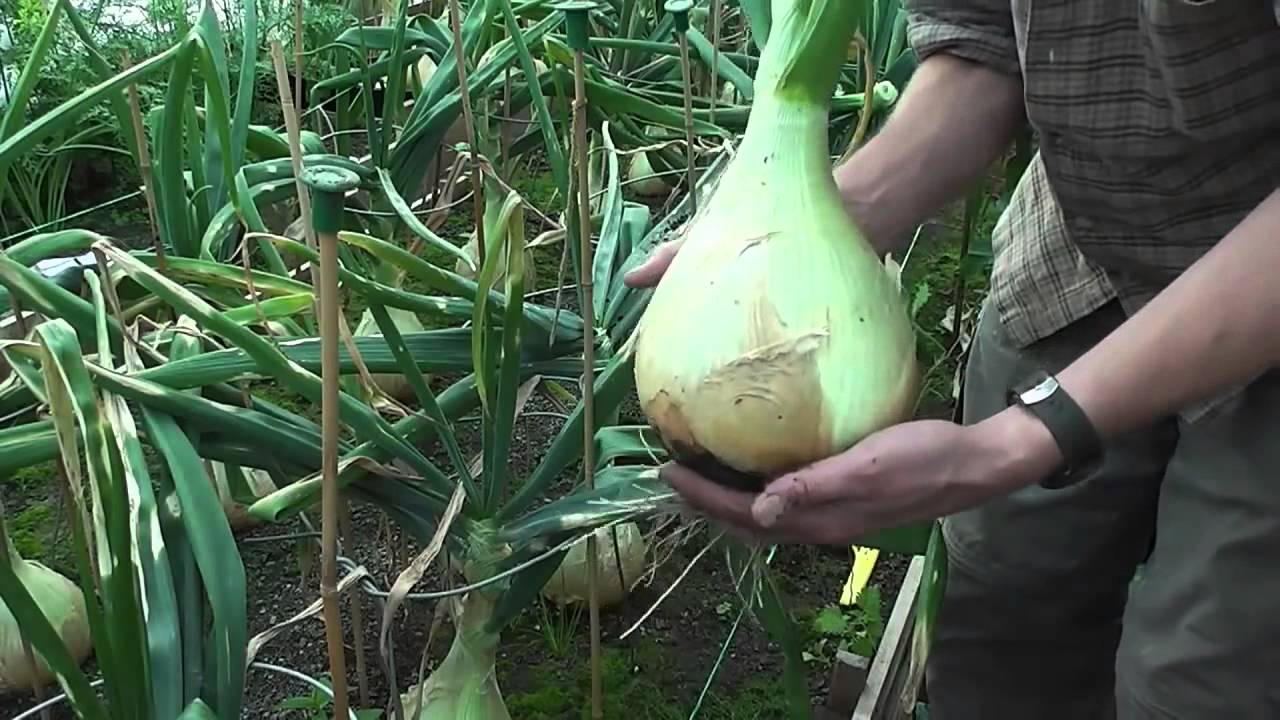
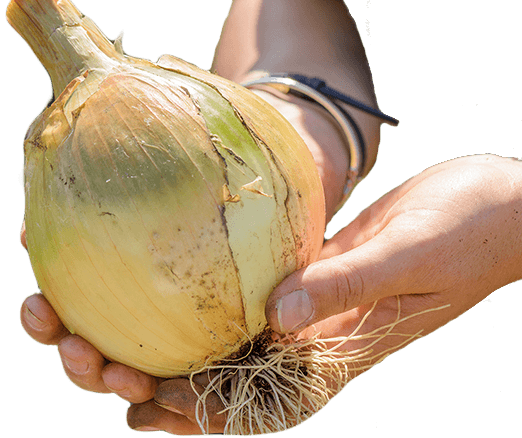
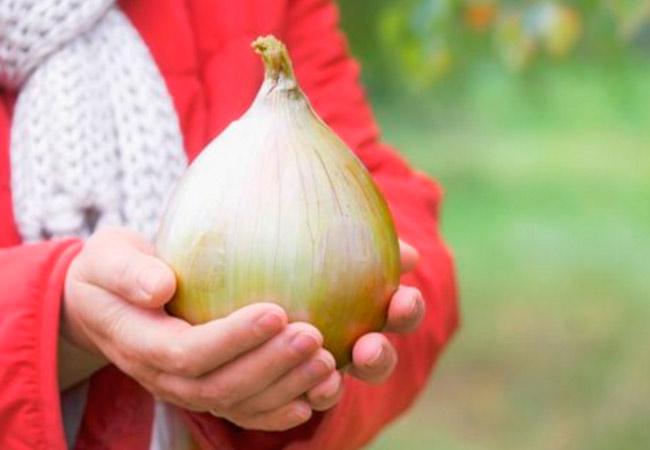
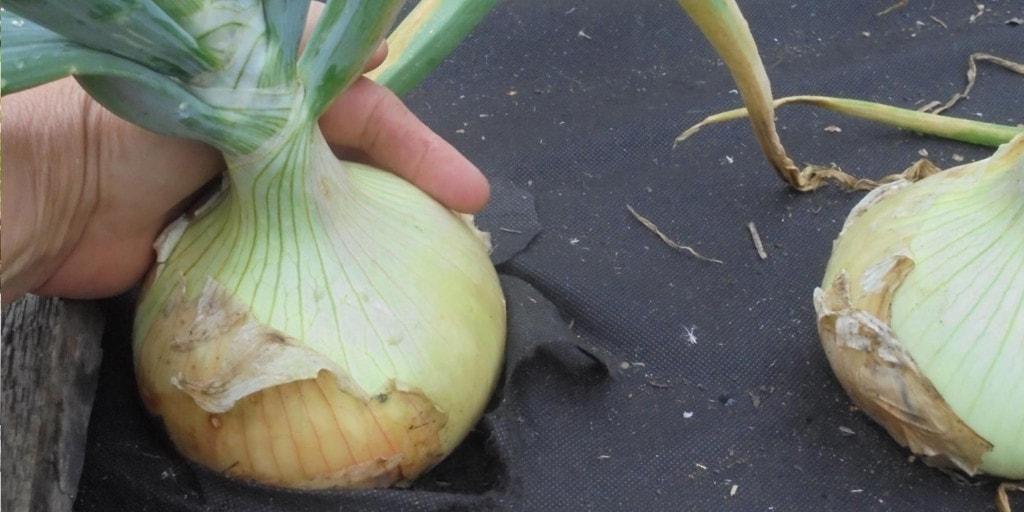
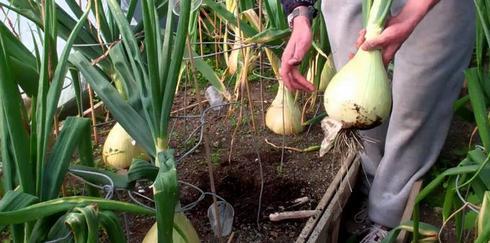
The large-fruited, aromatic Exhibition onion variety is a treasure for both professional and novice gardeners. Developed by Dutch breeders, it boasts a piquant, delicate flavor and a pleasant aroma. When peeling and cutting the ripe onions, the juices and aroma are non-irritating to the eyes. This variety is considered easy to grow and thrives in a variety of soil types. Each onion can weigh up to 1 kilogram.
Characteristics of the variety
This Dutch-bred onion was recently developed. Russian gardeners love Exhibition for its large fruits and lack of bitterness. This giant onion is easy to grow, and the harvest can be completed in late August, which is important for gardeners in regions with short summers.
History of appearance
Speaking of the Exhibition variety, Dutch breeders believe they have developed the ideal onion, capable of growing in a variety of climates and delighting gardeners with a harvest of large, beautiful bulbs. It lacks bitterness, produces abundant harvests, and is easy to care for—these are the key characteristics the Dutch breeders strived for.
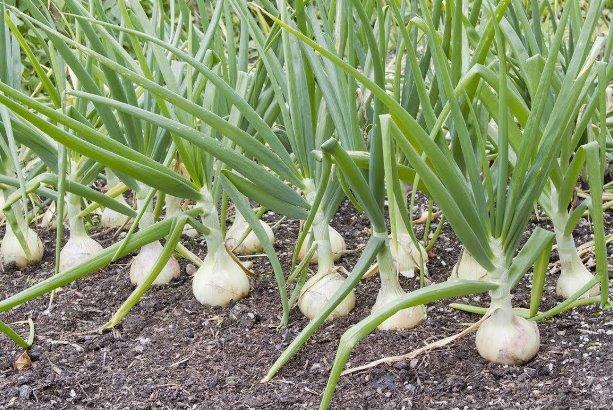
General description
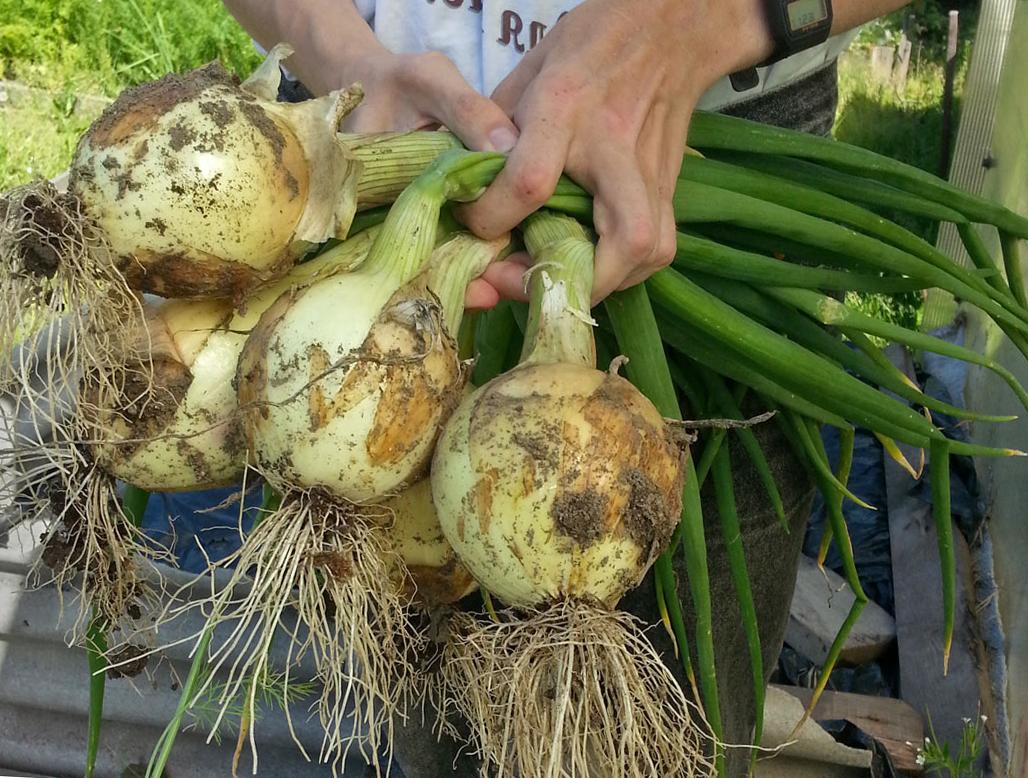
Exhibition is a mid-late onion, suitable for Siberia. Key characteristics:
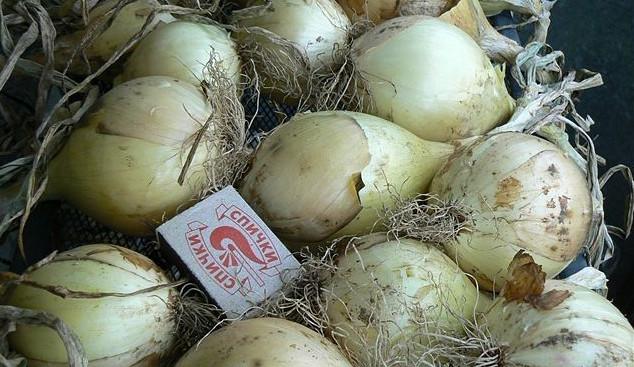
- The average weight of a ripe onion is 500 grams, the maximum weight is 1 kilogram.
- Does not emit eye-irritating fumes when cutting.
- Salad purpose.
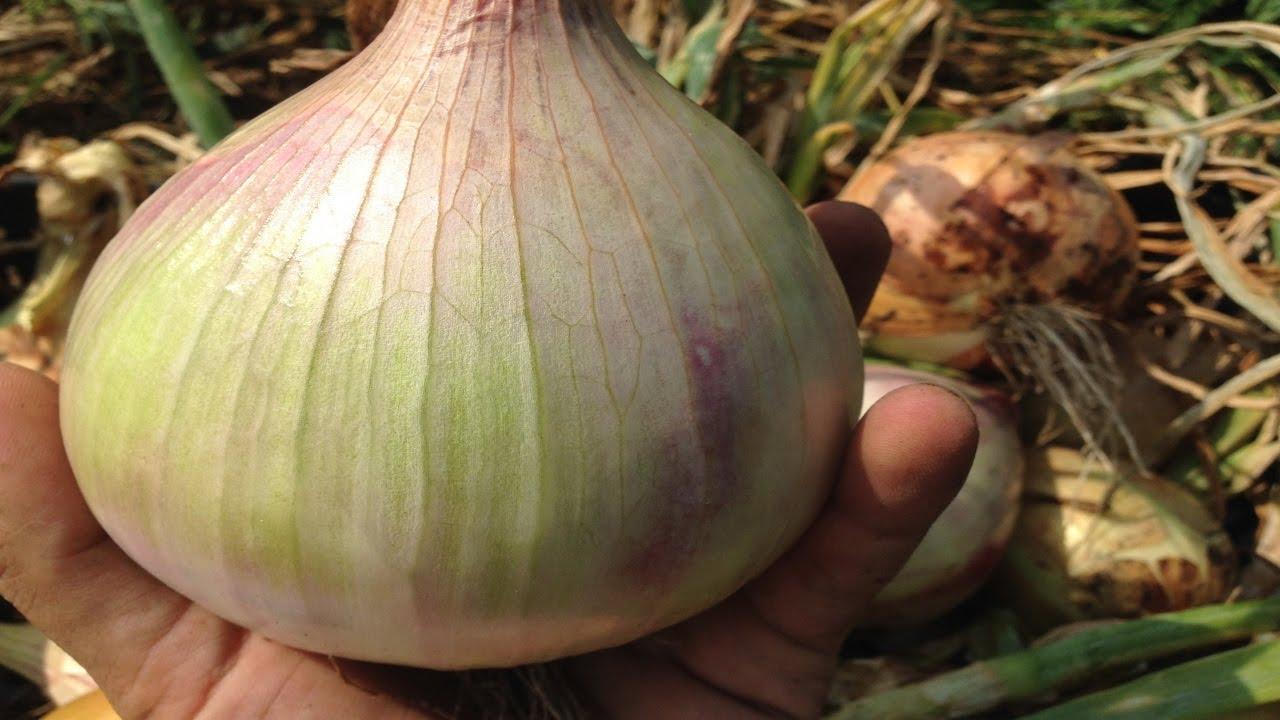
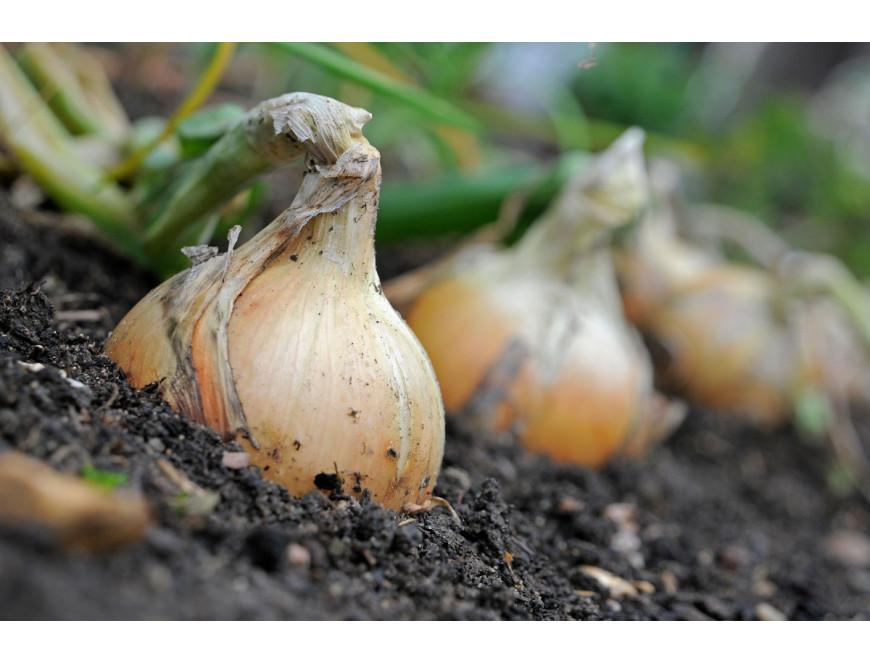
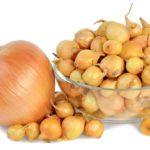
- The color of the bulb is golden brown.
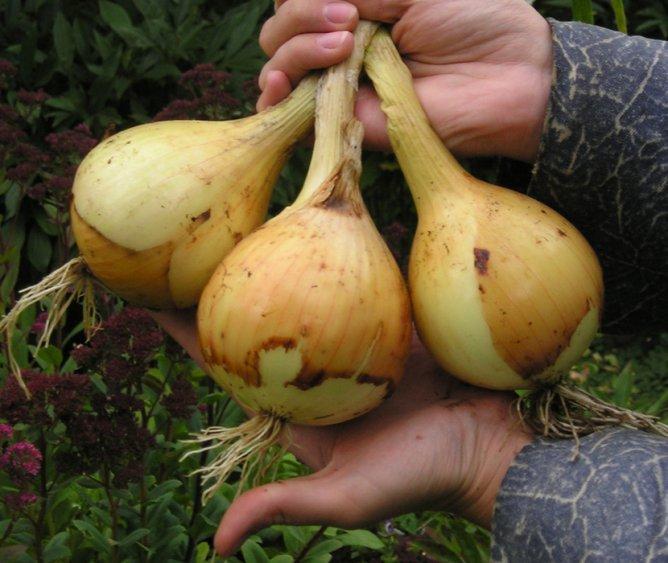
- The shape of the fruit is oval.
- Thin husk, easily peeled from the head.
 Important! Onions are consumed fresh; this variety is not suitable for long-term storage; it should be stored for no more than 4 months.
Taste qualities
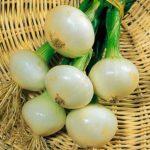
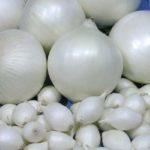
A distinctive flavor characteristic is the absence of bitterness. This onion doesn't sting the eyes and has a pleasant, delicate flavor. The white flesh is very juicy. Exhibition onions are ideal for salads. The combination of juiciness in the sliced rings and the pleasant color gives the finished product excellent decorative qualities and is suitable for garnishing dishes.
Beneficial properties
Like any onion, Exhibition has antibacterial and antiviral properties. The pulp is a storehouse of vitamins A, B, C, and E, an indispensable remedy for vitamin deficiency. It contains flavonoids, substances that can counteract the formation of cancer cells. It strengthens the immune system and improves mood.
Advantages and disadvantages
This Dutch-bred onion has a number of advantages over other varieties:
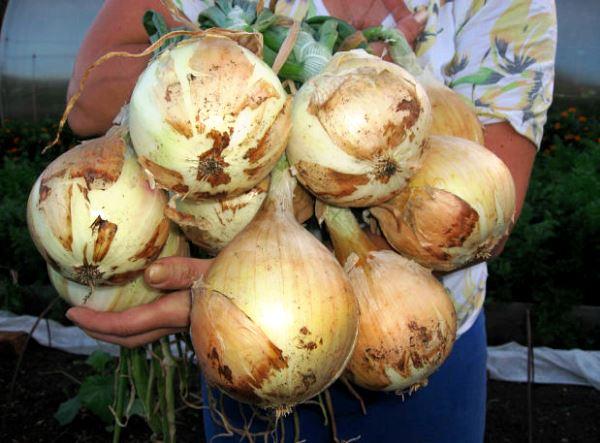
- High yield per season, large fruits.
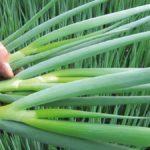
- The bulb and green feathers are used as food.
- The taste is free from bitterness and eye-irritating elements.
- Ripens in August, suitable for regions with short summers.
- Undemanding to soil and additional fertilizers.
With proper and sustainable care, onion plants produce a uniform and abundant harvest. They are disease-free and have a strong immune system.
The disadvantages of the Exhibition bow include:
- Short shelf life.
- Requires disease prevention.
- Early germination is possible.
- It is important to follow agricultural practices and maintain the correct planting pattern.
Dutch onions are grown for fresh consumption, and the fruits are stored only until December.
Growing methods
The primary method of growing onions from seeds is direct sowing into the ground or seedlings. It's important to purchase seed material responsibly. Purchase onion seeds only from trusted producers with a guarantee of quality and germination.
Note: Nigella seeds do not store for long; the collection period should not exceed one year.
Seminal
Pre-sowing seed preparation is essential. The seed is sorted, calibrated, and any nigella seeds are discarded. The seeds are soaked in warm water for one hour. A solution of potassium permanganate or brilliant green can be used. Empty, non-viable seeds are light and float on the surface of the glass. These must be discarded and removed. Seeds that are too small also have a low germination rate and are excluded from the seed.
Hardening is done using dry heat. Selected onion seeds are placed in a cloth bag and placed on a radiator for 6 hours. An ultraviolet lamp can also be used.

Step-by-step instructions
Onion seeds are very small, so to prevent the seedlings from becoming crowded, they must be planted carefully, maintaining proper spacing. To prevent the seeds from becoming dislodged after watering, a small trick is used: they are secured with tape.
Toilet paper tape
The material used must be biodegradable. Otherwise, future seedlings and seeds will have an additional obstacle to root growth.
Applying paste
A special adhesive is applied to the rolled-out strips of toilet paper. This adhesive can be homemade or purchased at a specialty store. The adhesive is distributed in strips to represent the rows of seeds that will grow in the onion plant.
Seed application
Onion seeds are laid out at regular intervals between rows and distances from each other. The distance between rows is 2 centimeters, and between seeds, 1 centimeter. This is a painstaking process, requiring precision, as the seeds are small.
Rolling up the roll
Once the glue has dried, the roll can be rolled up and stored until next year or used during the current planting season.
Storage
Seed material applied to tapes or in bulk has a short shelf life; the germination rate of onion seeds drops by 50% every year.
Recipe for paste
Homemade glue can be made from flour. Ingredients:
- 1 liter of water;
- 10 tablespoons of flour.
Bring the water in the pan to a boil. Using a spoon, carefully pour in the flour, stirring constantly. The mixture will gradually begin to thicken; once the paste becomes viscous, remove the pan from the heat. The flour glue for onion seeds is ready.
Soil preparation
Soil preparation for onion beds begins in the fall. Deep plowing is performed, weeds are removed, the soil is loosened, and fertilizers are applied, both mineral and organic. An excellent organic fertilizer is humus or compost mixed with wood ash. Superphosphate is a mineral fertilizer.
Important! Fresh manure is not suitable for onion beds, as it can burn the plants.
Autumn soil preparation makes spring work faster and more productive. After the snow melts, the soil is dug again, loosened, and disinfected with boiling water or a potassium permanganate solution. Re-fertilization is not necessary. If the soil is acidic, liming is necessary.
How to plant seeds in spring
Spring onion sowing begins in mid-April. The planting time depends on the growing region and the natural and climatic conditions. Soil temperature should reach +10°C. WITH.
Onion seeds are sown earlier for seedlings, starting in mid-February. Young seedlings are transplanted to their permanent location in early to mid-May, into prepared beds.
Winter sowing
The timing of sowing seeds may also vary depending on the region and climate conditions. The general rule: when sowing nigella seeds in the winter, the soil should be partially frozen; planting is possible after snow has fallen. The average planting time is late October and November.
Seedling method in open ground
This method saves fertilizer, improves onion growth, and reduces disease risk. Nigella seeds are sown in seedling trays 60 days before the expected planting in open ground. The planting pattern is the same as for onion sets. The row spacing and distance between plants are maintained.
Preparation of seed material
Exhibition onion seeds are very small and take a long time to germinate. The seeds must be prepared: soak the onions in water, disinfect them with potassium permanganate, harden, and dry.
Soak
The rejected and calibrated seeds are placed in a container of warm water. If any seeds remain on the surface after an hour, they are removed and the water is drained. As an additional disinfectant, potassium permanganate or a few drops of brilliant green are added to the water.
Drying
The seeds are dried using an ultraviolet lamp. The procedure takes no more than an hour. The dried material is ready for hardening.
Disinfection
Antiseptic treatment can be carried out in various ways:
- The dried seeds are rolled in a mixture of wood ash and sand.
- Keep the seeds under the ultraviolet lamp a little longer.
- When soaking seeds, add brilliant green or potassium permanganate to the water.
The combination of these measures is a high-quality prevention of fungal diseases.
Planting container
Seedling boxes are used as planting containers. Specialty stores offer options suitable for onion crops. The container should be at least 15 centimeters deep.
Soil for onion crops
The key soil parameter is maintaining acidity. Onions do not grow well in acidic soil. The soil should be loose and well-drained. A crust should not form on the surface. Regular loosening, liming (in cases of high acidity), and adding sand will solve these problems.
Take a look Also
Covering with soil and watering
Overwatering is harmful to onions. Stagnant moisture at the roots is unacceptable. Sprinkle the spaces between the rows with a nutritious mixture of humus, wood ash, and sand. This maintains optimal soil moisture levels and creates an additional nutrient cushion for the seedlings.
When sowing seeds, do not cover them too much with soil; a 0.5 cm layer is enough.
Greenhouse conditions
To ensure rapid germination, seedling trays are covered with plastic film with small holes and placed in a warm, well-lit room. Under these greenhouse conditions, seedlings emerge no later than 10 days after sowing.
We put it in the shade
Once the seedlings have emerged, the seedling trays are placed in the shade or partially shaded with newspaper. The young shoots learn to thrive in these conditions. This step is necessary if the seedlings have outgrown their growth and cannot be transplanted to a permanent location.
We remove the film
The film is removed when the germination rate reaches 80%. Young seedlings are very delicate and require care. Sunlight should be reduced for several days after removing the film. Once the plants have adapted, they are returned to their original location.
Hardening
To ensure that seedlings are healthy and have strong immunity, hardening procedures are carried out:
- Periodic change of temperature regime.
- Changing the illumination level.
From late April, the seedling trays can be placed outdoors on a terrace or balcony. The seedlings will become familiar with the outside world and tolerate gentle fluctuations in temperature, humidity, and light.
Planting in a garden bed
Furrows are drawn in the prepared beds and holes are made 8 centimeters apart. The seedlings are removed from the boxes with a lump of soil, and the tangled seedlings are separated. Before planting, each hole should be moistened, after which the plants are planted. The seedlings are covered with soil and pressed down by hand. After transplanting, the plants are watered generously.
Planting diagram
The distance between rows is 10 centimeters. Keep in mind that the Exhibition onion is a large-fruited variety, so the distance between the holes is larger than standard and should be at least 8 centimeters between plants.
Correct planting of seedlings
Planting onion sets from seed is common and considered less labor-intensive. The sowing principle and planting pattern are similar to those for seedlings: space rows 10 centimeters apart, and space bulbs 8 centimeters apart. Don't completely cover the sets with soil; a "cap" of the plant remains on the surface. The soil can be mulched with a mixture of humus, ash, and sand.
Seed preparation
The onions are calibrated and culled before planting. Oversized bulbs are removed; they are best used for greens. Tubers showing signs of disease are discarded. The onions are soaked in a bucket of warm water or a potassium permanganate solution for 3-4 hours. The solution is then strained, the bulbs are rinsed, and placed in sunlight for one hour. The seeds are further disinfected and dried.
Soil for planting
The soil temperature on the day of planting the sets should not be below +10 C. The soil should be loose and prepared. The pH level should be neutral. Adding manure is not recommended.
Care
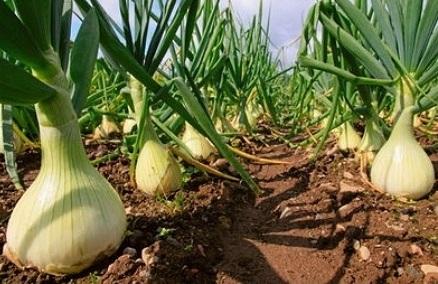
The Exhibition onion is easy to grow and requires little care. With proper planting and selection of a growing site, a harvest of large bulbs will ripen by the end of August.
Watering and lighting
The onion bed should be well-lit. Onions are a heat-loving crop that produces a good harvest when provided with sufficient sunlight.
The more sun hits the beds, the more saturated the color of the greenery will be and the larger the bulbs will be.
Watering should not be excessive. Avoid waterlogging at the onion roots. Onion plants do not require artificial irrigation during cloudy weather or rainy summers.

Weeding and loosening
Weeding and loosening the soil around onions is essential. When a soil crust forms, the bulbs are deprived of oxygen, and plant growth slows. Loosen the space between the rows with a hoe. Weeds can cause diseases in cultivated plants and must be removed from onion beds promptly.
Top dressing
Additional fertilizers are not necessary during the growing season. Most fertilizers are applied during the preparation of the beds for onion planting: in the fall or spring. If onions are grown for greens, urea can be added. Fresh manure should not be used.
Mulching
Mulch between rows with a mixture of humus and sand after loosening the soil—no more than twice per season. If the soil is slightly acidic, mulch with a mixture of eggshells mixed with sand.

When planting onions in winter, the beds are sprinkled with dry leaves, which are removed after the first snow melts.
Picking
The Exhibition onion is a large-fruited variety. When seedlings and sets reach 100% germination, the plantings may become too dense. In this case, the plants are pruned, removing weaker bulbs to prevent them from slowing down the development of the others. Pruning is combined with loosening and mulching the spaces between the rows.
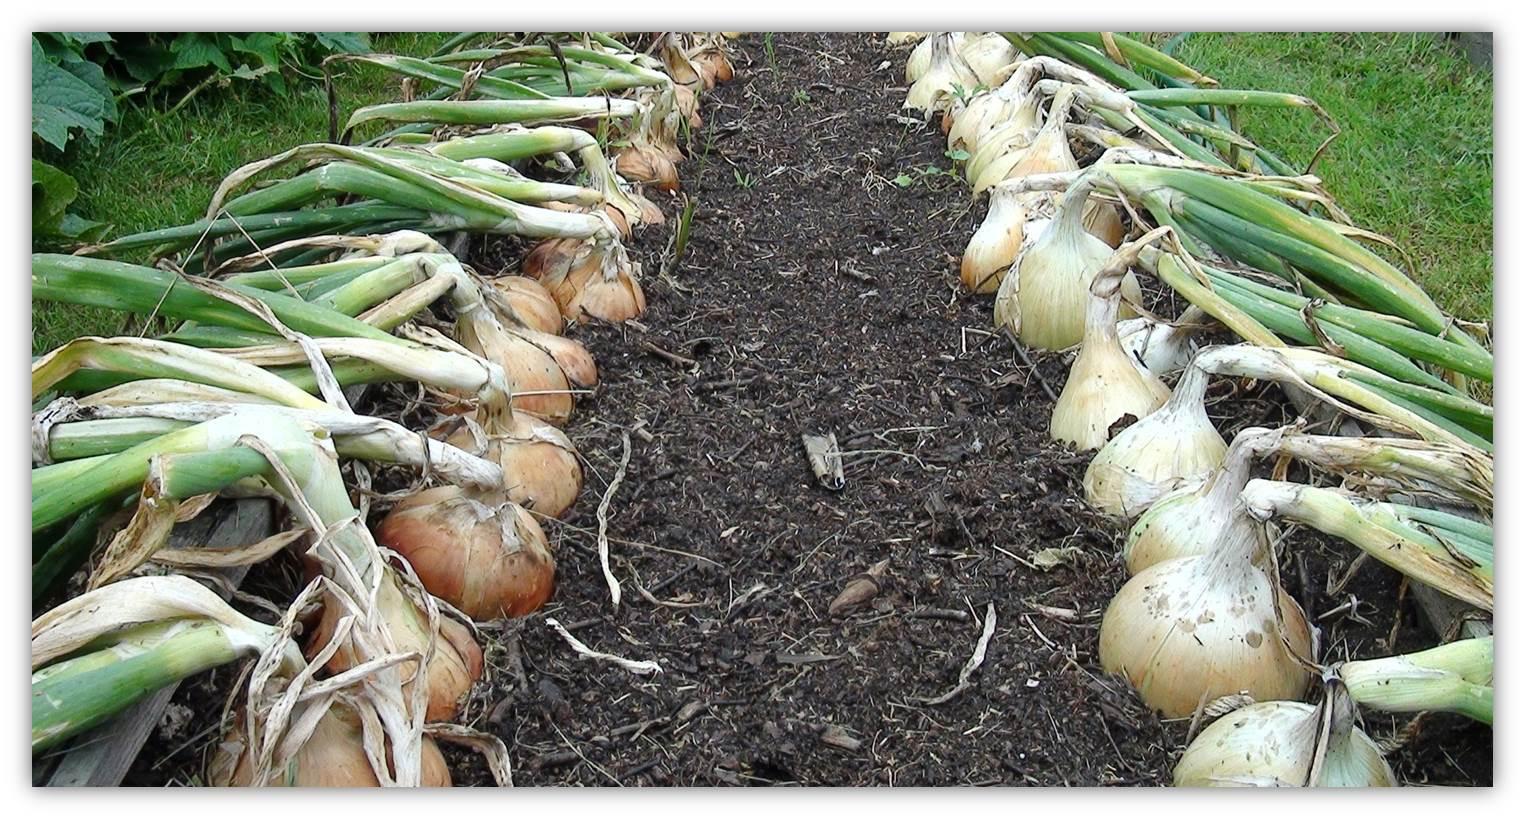
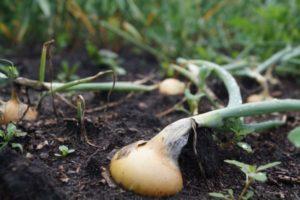
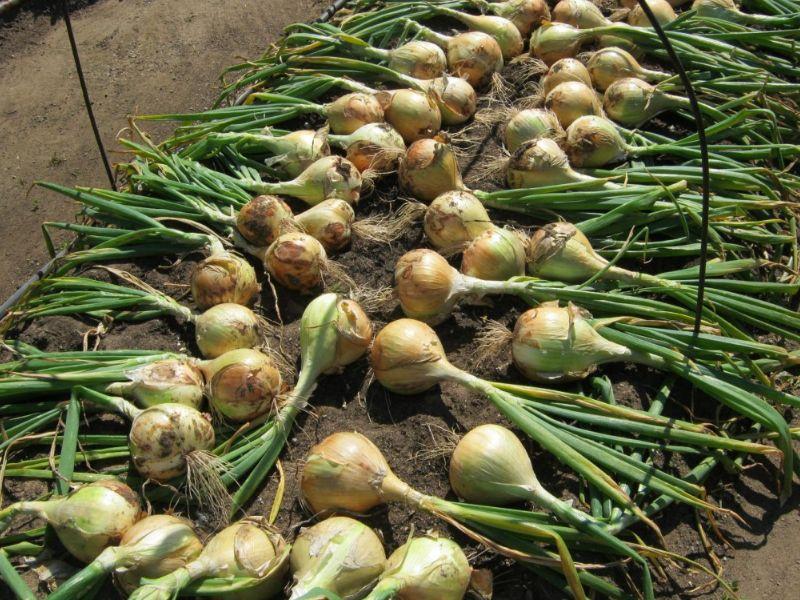
Harvesting and storage
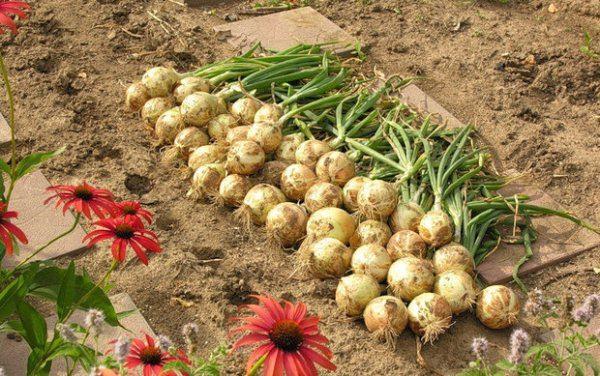
At the end of August, the Exhibition onion is already delighting gardeners with its harvest. The onions are harvested from the beds, along with their tops, and dried on wooden racks in the sun in a warm place.
Once the bulbs have dried, the tops are cut off. It's not advisable to make wicker fences from this variety of bulbs, as they won't store for long. The harvested crop is stored in well-ventilated wooden boxes. The onions should be consumed by December.
Diseases and pests
When growing Exhibition onions, preventative measures against diseases are essential. This Dutch variety is susceptible to rot and insect attacks. The plant has average immunity.
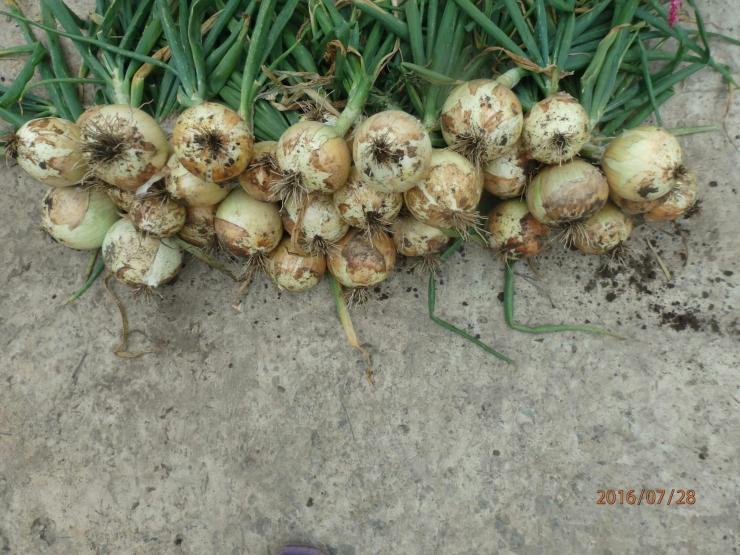
Rot
During prolonged rainy seasons, infrequent tillage, and an abundance of weeds in onion beds, fungal diseases can develop. Neck rot can develop during storage. All types of rot spread quickly and infect other bulbs. To prevent this, you must:
- Remove all infected plants.
- Stop feeding the onions.
- Spray the beds with potassium permanganate or copper sulfate solution.
- Adjust the care system.
Processing seed material and disinfecting the soil before planting onion sets or nigella is a mandatory preventative measure against fungal diseases.
Onion smut
Young onions are most often attacked in the first weeks after planting. The causative agent is a fungus that penetrates healthy bulbs and forms black veins. This disease is controlled with antifungal agents, and diseased plants should be removed.
Stem nematode
A dangerous onion disease that can destroy an entire crop. Nematodes are parasitic stem worms that suck all the nutrients out of onion crops. These small, thread-like white worms burrow into the bulb and multiply rapidly.
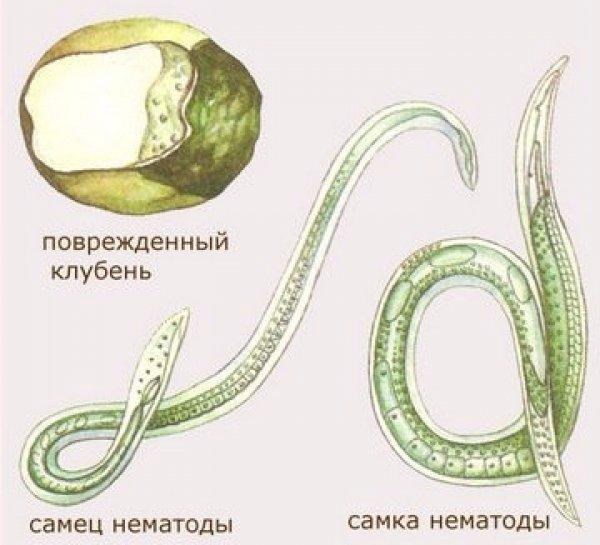
A folk remedy for prevention is planting repellent plants, such as marigolds, near onion beds. A chemical treatment that works well is Lindane.
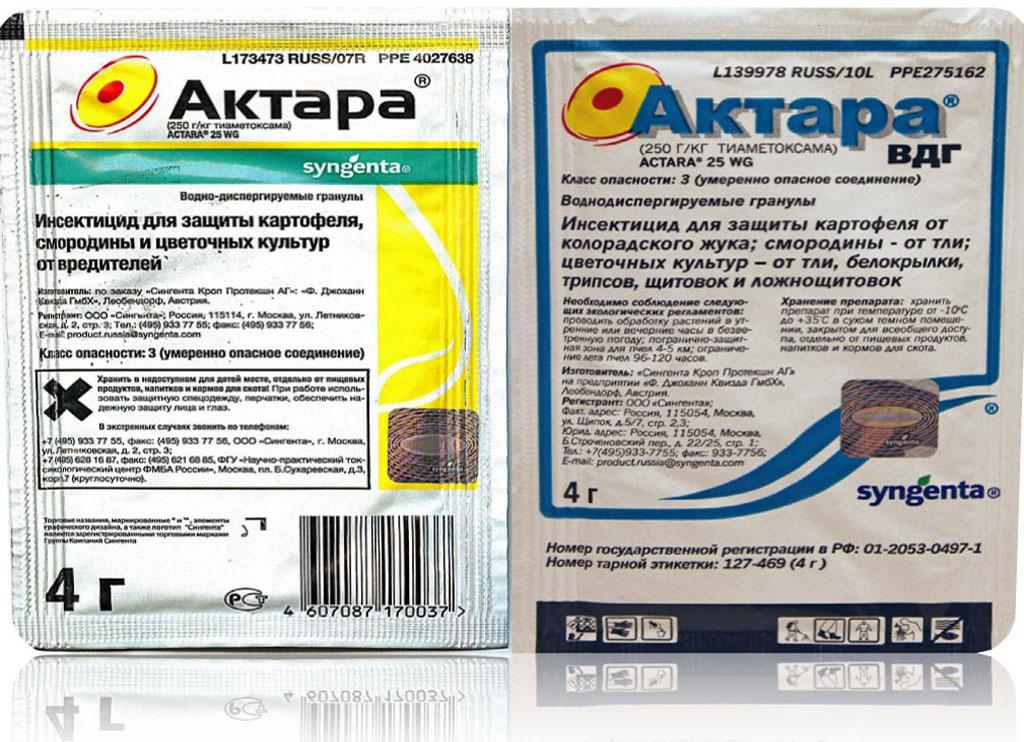
Onion fly
A small winged insect that lays eggs on the stems of onion crops, which subsequently hatch into voracious larvae. The disease has been known for a long time, and there are many chemical and folk remedies for controlling the onion fly:
- Watering and spraying the beds with a saline solution.
- Sprinkling onions with wood ash.
- Tobacco dust.
- Vinegar solution.
- Chemicals: "Aktara", "Extraflor" and other preparations.
Reproduction
Exhibition onions are primarily propagated by seedlings using nigella seeds. You can purchase these onion sets, but it's important to choose the right source. There are many counterfeit and low-quality planting material available. Plants grown from seed are more disease-resistant and less susceptible to illness.
How to get nigella
Nigella is harvested from the seeds that form in the onion stalk after flowering. Exhibition onions form beautiful, spherical, white inflorescences. After pollination, black seeds develop within them. The inflorescence is cut off, the seeds are shaken off, and dried. Since onion seeds ripen unevenly, gardeners resort to a little trick: they cover the ripened inflorescences with gauze or cloth and wait for them to ripen evenly.
Reviews
Olga Aleksandrovna Ryabchikova, Magnitogorsk, 56: "I've been growing Exhibition onions for several years; they're an excellent salad variety, perfect for Greek salads. I mix the juicy white rings with purple ones. It creates a unique color combination. The flavor is amazing, very delicate. A good harvest can be obtained from a single small bed. They're easy to peel, and in the summer we use the fresh greens, which, by the way, are also very tasty."
Related posts:
 50 types and varieties of perennial onions with descriptions, cultivation, and care
 Description of the best varieties of onions, planting and care in open ground
 How and when to plant onions to get large bulbs
 When to harvest leeks from the garden for storage, ripening times
 The beneficial properties of white onions, description of varieties, cultivation and care
 Description of varieties and cultivars of wild onions, the subtleties of cultivation
 Description of Welsh onion varieties, planting, growing, and care in open ground
 Types of onion varieties with names and descriptions, their differences and cultivation