- Features of the reticulated iris
- Optimal conditions
- Use for flowerbed decoration
- Popular varieties
- Hybrid Catarina Hodgkin
- Mrs Dunford's Iris
- Natasha
- Joyce
- Jenin
- Pauline
- Harmony
- Planting and care in open ground
- Site selection and soil preparation
- Schemes and timing of planting bulbs
- Watering and fertilizing
- Preventive treatments
- Trimming
- Preparing for the cold season
- Methods of reproduction
- Problems and solutions
Iris reticulata are a favorite among gardeners who grow bulbous perennials. This aesthetically pleasing, attractive plant looks beautiful in flowerbeds and delights the eye throughout its long blooming period. Before planting and caring for Iris reticulata, it's important for every gardener to familiarize themselves with the plant's characteristics and requirements.
Features of the reticulated iris
Reticulated irises are also known as "iridodictyum" or "reticulate." You can also find "union" and "xiphium" in the catalogs of well-known ornamental plant companies. This plant is commonly called a snowdrop iris due to its early flowering. Its exoticism is so pronounced that some experts confuse reticulated irises with orchids.
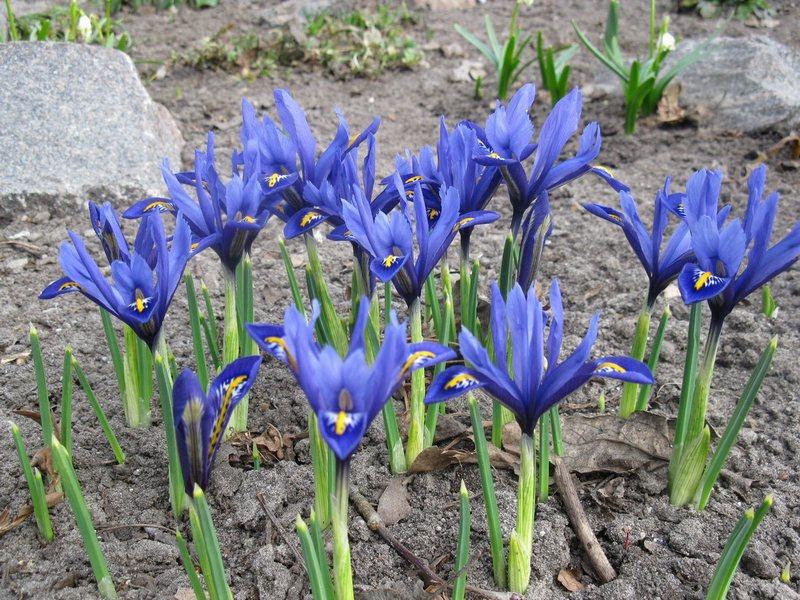
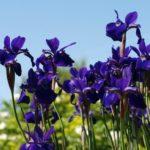
This plant is characterized as a small bulbous plant, no more than 17 cm tall. Its leaves have an unusual awl-shaped form, which distinguishes it from other varieties. It is prized by gardeners for its early blooming of neat, multicolored buds about 6-8 cm in diameter. No more than two flowers appear on a single stem. The petal color varies depending on the cultivar; some varieties feature unique patterns and splashes of various shades.
Common varieties include irises with white, red, pink, blue and purple colors.
After flowering, small seed pods form on the Iris reticulata bushes. These are harvested in the summer and immediately planted. When the weather heats up, the bud stops blooming, dries up, and the entire above-ground portion withers. In the second half of summer, the plant becomes dormant. Iris reticulata form an average of four new bulbs per year. The planting material is a small bulb, 3 cm long and 1.5 cm in diameter. The surface covering is a reticulated fibrous sheath, which gives the species its name.
Optimal conditions
When planting, it is necessary to take into account the optimal conditions for the germination of reticulated irises in order to correctly comply with all agricultural standards:
- sunny location;
- loose, fertile, sandy soil;
- neutral, alkaline soil;
- lack of groundwater;
- wintering with shelter or placing the bulbs in a dry place.
Even though the plant may be found in the wild, it is important to follow all requirements when cultivating it.
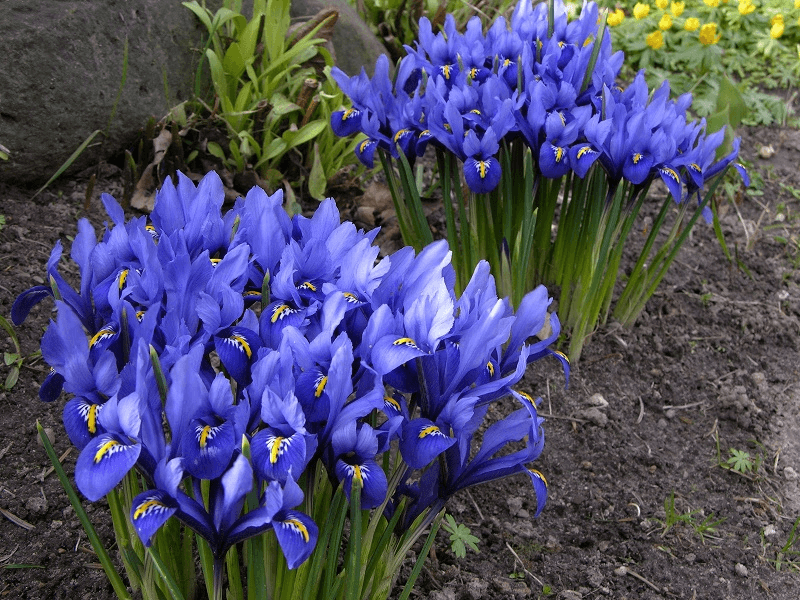
Use for flowerbed decoration
Reticulate irises don't require large plots due to their early blooming. Landscape designers use these plants to decorate various garden compositions, as well as alpine gardens and flower beds. When creating a landscape, specialists are usually guided not only by their own aesthetic preferences but also by the characteristics and needs of the plant. For example, if irises prefer a neutral soil environment, their neighbors should also thrive in similar conditions. Potential neighbors for reticulate irises include crocuses and perennials with small root systems that won't spread widely and damage the bulb.
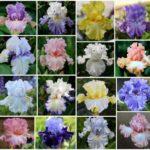
Popular varieties
There are several varieties of reticulated irises that are particularly popular among gardeners due to their individual characteristics and unusual features.
Hybrid Catarina Hodgkin
This hybrid was developed back in the 1960s and is still considered the finest among reticulate irises. Its main characteristic is its large flowers, reaching 10 cm in diameter. The petals are tinged with blue and have a fresh fragrance.
The variety is resistant to sudden temperature fluctuations and can grow in moist soils. It can survive in one location for up to five years, after which it requires immediate replanting.
Mrs Dunford's Iris
This early-blooming plant blooms as early as mid-April. The bush grows to just 10 cm in length. Due to its small size, it can be planted in small pots. Just 1.5 months after planting, yellow petals appear on the seedlings. This variety has many advantages and distinctive features:
- miniature size;
- sterility of buds;
- absence of petals in the top row;
- resistance to frost and high humidity.

The variety is suitable for growing in pots at home and in open ground.
Natasha
The most frost-resistant variety of all iris types. The height of the bush ranges from 15 to 25 cm. This figure depends on growing conditions, as it is larger in a greenhouse than in the open ground. This type of iris blooms late, beginning in the third ten days of May and lasting up to 30 days, until a severe drought sets in. During the summer, the plant's shoots die back completely, and re-sprouting is only possible the following spring.
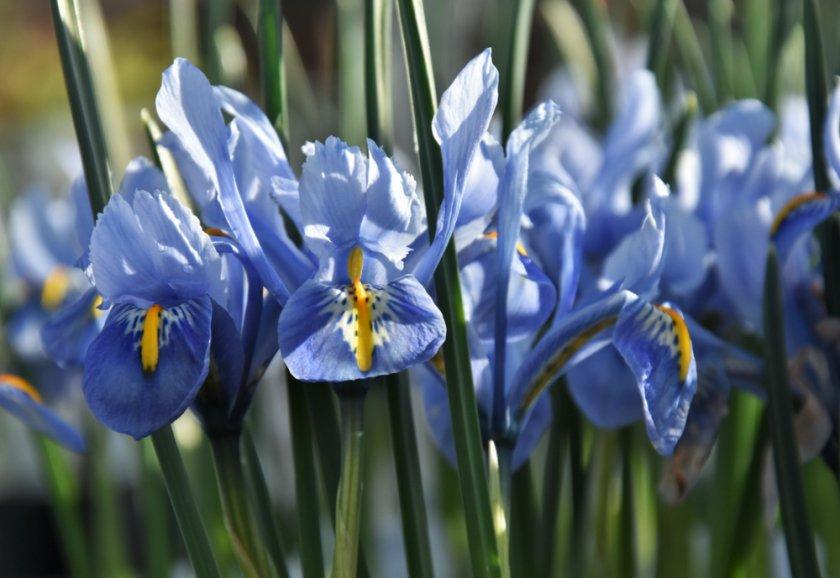
Joyce
A unique variety that amazes gardeners and enthusiasts with its appearance and early flowering. The first shoots of Joyce irises can be seen emerging as early as 5-6 degrees Celsius, after the snow melts. This usually occurs in March, but in harsh winters, this process can last until April. Among the variety's most notable features are the beautiful blue color of the corolla, up to 8 cm tall, and its vigorous growth, reaching 10 cm in a short period. It grows in one place for no more than 4 years.

Jenin
Flowering begins as early as April and lasts for over a month. The plant is a miniature bush up to 15 cm tall. The inflorescence diameter is 6-8 cm. The plant tolerates night frosts well and grows well in an open garden bed and indoors in a pot.
Pauline
The Pauline variety surpasses other varieties in its attractiveness. Its flowering begins to delight the eye as early as the first ten days of March. The bulb is ovoid, slightly elongated, with a fleshy surface covered in dense scales. The elongated, bright green leaves harmonize beautifully with the sturdy and elegant stem, up to 25 cm tall. The flower is purple, approximately 9 cm in diameter.
Take a look Also

Important! Do not plant before mid-September, as this variety does not cope well with temperature fluctuations and requires time to establish.
Harmony
The early appearance of buds attracts the attention of many gardeners. Flowering begins in mid-spring, as soon as night frosts subside slightly. Miniature buds, 1.5 cm across, cover the entire miniature bush. The bulb tolerates winter well, as it is covered with durable scales, which protect the planting material from freezing. Their colors are captivating, ranging from red, orange, purple, yellow, snow-white, and blue. Less commonly, petals with two-sided coloring appear.
Planting and care in open ground
Before cultivating reticulated irises, it's important to familiarize yourself with the rules for planting and caring for them in an open garden bed to achieve the desired results and enjoy their enchanting blooms in the spring.
Site selection and soil preparation
Before planting, choose the right site and prepare the soil. Reticulated irises thrive in soil with a pH no higher than 6.8. If the bulb is placed in overly acidic soil, the plant will not bloom, and the shrub will grow to its maximum size. In this case, it is recommended to add ash, chalk, and lime to the soil. Dry, sandy soil is best for planting.
Advice! It's not recommended to plant in heavy soil rich in minerals, as the plant will grow slowly in such conditions. For better growth, you can enrich the area with organic matter.
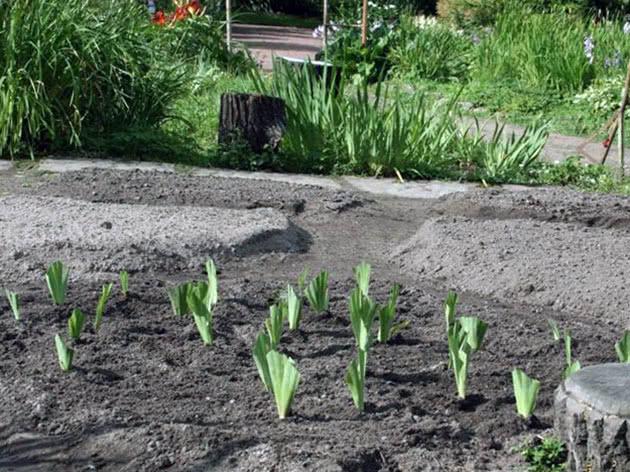
Schemes and timing of planting bulbs
Planting reticulated iris bulbs is usually done in the last ten days of summer and continues until mid-autumn. Don't delay this process, as the plant may not establish properly and may not survive. To do this, dig the required number of holes, each 10 cm deep, but for larger bulbs, increase the holes by 3-5 cm.
The distance between plantings should be an average of 20 cm, although less is possible. However, planting them too close together will slow growth and flowering.
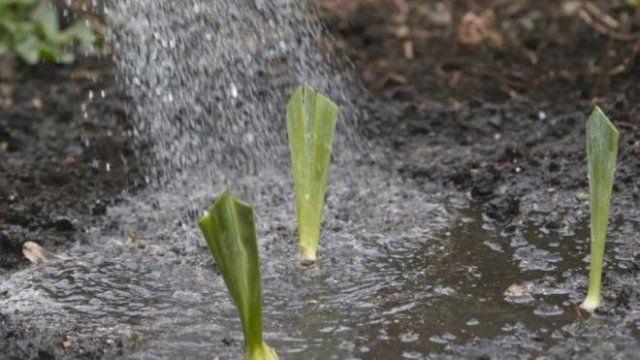
Watering and fertilizing
Iris reticulata requires timely watering and proper nutrition to ensure vigorous growth and development. When watering, remember not to keep the soil constantly wet, as this will cause the root system to rot and the plant to die. Watering the plant 2-3 times a week with warm water is sufficient.
Reticulated irises are sensitive to chemicals, so natural fertilizers are recommended. For this, you can use organic matter, and if necessary, combine compost, humus, and ash.
Fertilizing should begin in the second year. It is also recommended to apply fertilizer after flowering, towards the end of summer, as this is the period when the plant replenishes nutrients and prepares for winter.
Preventive treatments
Gardeners who have been enjoying the early bloom of reticulated irises for years often encounter common diseases. To eliminate pathogens and pests as quickly as possible, it's important to follow preventative measures regularly.

Preventive measures against diseases and pests:
- water the plant correctly to protect the crop from bacteriosis;
- treat with various insecticidal preparations to repel insects that carry diseases;
- Dig up and loosen the soil, combining it with ammonia to neutralize the mole crickets.
To avoid bacterial and fungal infections, it is important to adhere to all agricultural practices and promptly carry out additional preventative measures using natural or synthetic substances.
Trimming
When the above-ground portion of the plant dries out, it needs to be cut off. To do this, use pruning shears or regular scissors.

Preparing for the cold season
Before the onset of cold weather, it's recommended to prepare the plant. To do this, trim the bushes and cover them with a special covering material. Straw, dry leaves, or tree branches can be used as covering material, spreading them over the flowerbed in a 2-5 cm layer. This will help absorb excess moisture during thaws and protect the bulbs from severe frosts.
Tip! Many gardeners recommend digging up and drying reticulated iris bulbs to prevent ink spot. It's important to store dug-up specimens in a cool, dry place.
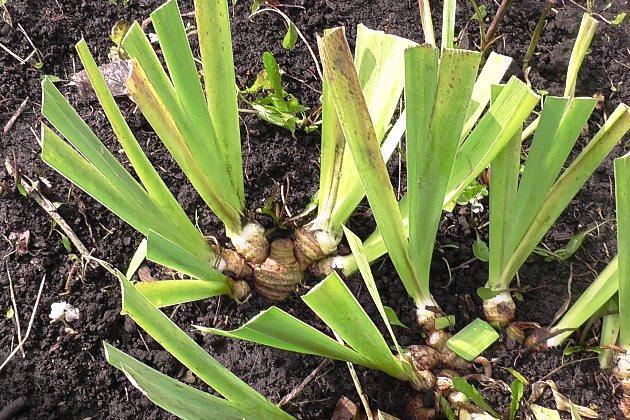
Methods of reproduction
There are several methods for propagating reticulated irises, but many gardeners prefer the seed method. To do this, you need:
- Collect ripe irises and extract the ripe seeds.
- Place them in a small flower pot and fill with water.
- Soak for 3 days, wait until they sprout.
- Plant the seed in the soil in autumn or spring, when the soil is well warmed up.
- The seedlings will grow and begin to bloom only after 2-3 years.
Sometimes specimens grown from seeds lose their varietal characteristics, against which new distinctive features appear.
Problems and solutions
The main problem with growing reticulated irises is their lack of flowering. This anomaly occurs with deep planting, bulb freezing during winter, insufficient light, and excessive root growth. Gardeners also frequently encounter bacterial and soft rot and wonder how to protect their flowers from these diseases. This requires timely application of phosphorus- and potassium-based mineral fertilizers and regular loosening of the soil.
To avoid problems when growing reticulated irises, choose a planting site with nutrient-rich soil; this will ensure the plant thrives. Also, provide the plant with care and attention, and it will reward you with luxurious blooms.
Related posts:
 Description and characteristics of the best varieties and types of irises
 Planting and caring for irises in open ground, propagation and variety selection
 Description of Japanese iris varieties, planting and care in open ground
 Why do irises have only leaves and don't bloom? What to do and how to eliminate the causes
 Description of Siberian iris varieties, planting and care in open ground
 When is the best time to transplant irises and how to do it correctly, care after the procedure
 What flowers go well with irises in a flowerbed? What flowers are best to plant them with?
 What to fertilize irises with before and after flowering, timing and rules for applying fertilizers