Dill is an annual plant belonging to the celery family. It is grown for its aromatic leaves and seeds, and is eaten fresh, dried, and pickled. The plant is very beneficial and contains a wealth of nutrients. Growing dill is not difficult, but it does require certain conditions.
Types and varieties
Varieties of dill They differ in the structure of their stems and leaves, but their flavor remains virtually unchanged. The most common distinguishing criterion is the speed of ripening.

Depending on this, varieties are divided into several groups:
- Early varieties. These include the Umbrella, Gribovsky, and other varieties. It takes approximately 35-40 days from germination to the formation of stems. Flowering begins a few days later. On average, one plant produces 4-6 leaves.
- Mid-season varieties. These include Richelieu, Kibray, and others. Stem formation begins 45-55 days after germination. During this time, up to 10 leaves grow on a single bush. Therefore, varieties in this group produce large yields.
- Late-ripening varieties include Alligator, Amazon, Salute, and others. The period from germination to stem formation is quite long—up to 70 days. This allows the bushes to produce more than 10 leaves.
Early-ripening varieties are unprofitable for commercial cultivation, but they're an excellent option for home gardening. The seeds ripen quickly and fall off. They'll grow into more dill the following year. Mid-season and late-ripening varieties, however, are suitable for mass cultivation for fresh herbs.
Seed preparation
A good way to prepare dill seeds before planting is by soaking them. First, rinse them in warm water. Then, place them in the bottom of any container and pour the prepared solution over them (use 1 tablespoon of wood ash per 1 liter of water). Use 300 ml of liquid per 100 g of seeds. Pour the solution in two portions to ensure better absorption. Another method for soaking them is to place the seeds in a cheesecloth bag and then place it in the container with the prepared solution.
Take a look Also


Stop the procedure when some of the seeds begin to sprout. Pre-soaking the seeds will speed up germination by several days. The germination rate is 25% higher than when planting dry seeds.
Planting dates
Dill seeds tolerate winter frosts well and do not rot in the soil. Therefore, they can be planted in October-November, at least 10 days before the first frost. Mulching can be applied, but this is not necessary. Planting in the fall will ensure the seeds germinate at the optimal time, typically mid- to late April.
You can also plant seeds in the ground in early spring, as soon as the soil temperature warms to 7°C (45°F). However, in this case, the first shoots may appear a little later, in May. Avoid planting seeds in the summer heat, as they are unlikely to produce a good dill harvest. However, they will germinate the following year.
Soil preparation
To ensure a good dill harvest outdoors, it's recommended to thoroughly fertilize the soil. Organic fertilizer is best. Avoid adding ash or lime, as this will cause the dill to turn reddish.
Immediately before planting, add compost to the soil. If you don't have compost, you can use mullein diluted with 10 parts water. The first shoots will appear in 21-30 days from spring planting.
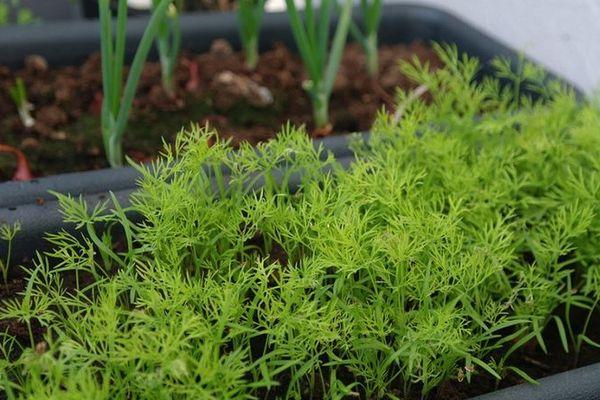
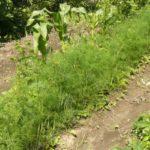
Sowing dill seeds at the dacha
Planting dill It should be done in a well-lit area. The plant loves moisture and sunlight, so it will suffer greatly in the shade.

To have fresh dill all summer long, it's recommended to sow the seeds in stages. Start in early April, then every three weeks. However, the last time you plant dill should not be later than August 20th.
It is better to plant seeds not in a row, but in a furrow at least 5 cm wide. The distance between furrows should be at least 12 cm.
Features of dill care
Growing dill is not much different from caring for other crops. The plant requires the right temperature, adequate moisture, and regular fertilization.
Lighting and temperature conditions
Dill is temperature-tolerant. It thrives in any above-zero temperature. Therefore, it can be planted almost immediately after the snow melts.
However, the plant requires sufficient sunlight. Therefore, avoid shaded areas for planting. Dill requires regular weeding, as weeds create shade and disrupt the growth of young plants.

Watering the plant
Dill doesn't need to be watered immediately after planting. Its seeds are very small, so they can be washed away into a single pile or buried in deeper soil layers. This will result in uneven germination. Once the first sprouts appear, the soil can be regularly moistened, but not too much.
Loosening the soil
Once dense shoots emerge, the sprouts will need to be thinned out. Otherwise, the dill stems will become very thin. Thinning loosens the soil, ensuring good aeration.

In the future, loosening the soil will be necessary every time after watering to prevent a dry crust from forming on the soil, which can slow down dill growth.
Top dressing
Dill's growing season is short, so in most cases there's no need to fertilize it. However, if the seeds aren't germinating well, the sprouts are growing slowly, or their leaves are turning yellow, fertilizing may be necessary to speed up their growth.
Dill most often lacks nitrogen. To supply it, you can use mullein or a weed infusion. To prepare it, soak 5 kg of weeds in 10 liters of water and let it steep for three days. Then strain the water, add 200 g of complex fertilizer, and water the plants.
You can also feed dill with ready-made nitrogen fertilizers. Saltpeter, ammonia water, and other substances are suitable for this purpose. However, when applying them, it's important to take into account the required dosage; otherwise, an excess of fertilizer can lead to high nitrate levels.

Pests and their control
Dill is often affected by the following pests:
- Dill moth. Caterpillars infest the plant, devouring the umbels and unripe seeds. Rarely is the entire dill crop affected at once, so insecticides are only used in extreme cases.
- The line shield bug is a small, orange insect that emits a very unpleasant odor when threatened. It sucks the juice from seeds, causing them to become of poor quality. These pests can be easily shaken off, preferably into a bucket of water.
- Aphids. These are small green bugs that attack the entire plant at once. They are very sensitive, so they can be controlled without chemicals. Soak tomato or potato tops in water, then spray the plants with the resulting solution.
Take a look Also
Thus, pest control is possible without the use of chemicals. However, their use is not recommended, as dill is eaten fresh.
Harvesting and storage
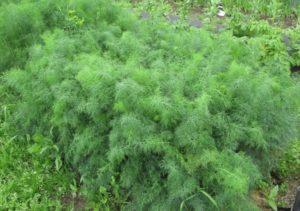
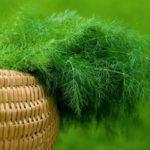
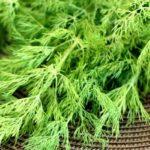
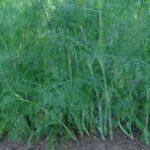
To ensure good-quality young dill, don't harvest it too late. It's ready 30-40 days after planting. These dill leaves have the most distinct flavor and aroma. They are light green. Older leaves, however, are darker, almost black. They can be eaten or used for preserves, but their flavor is slightly inferior.
Young leaves can be pinched or cut off with scissors. Young stems are also suitable—they're soft. Older plants, however, tend to have stiff stems. It's best to harvest greens in the morning, when the leaves' cellular turgor is highest, making them easier to remove.

To increase dill yield, you can pluck the flowers. This will help the plant produce fresh greens for longer.
The seeds can be harvested after 90-120 days. They should turn dark brown, with the stems and umbels drying out. Alternatively, the seeds can be left behind—they will self-sow throughout the garden, resulting in a high germination rate.
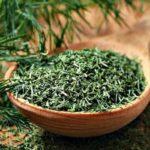
Dill is best eaten fresh. However, it can also be dried, pickled, or frozen. Dried dill leaves can be young or mature. For pickling, dill harvested 55-60 days after the first shoots emerge is best. This dill releases juice better and has a longer shelf life. Pickled dill can be stored for 2-3 years, provided its aroma or flavor has not changed.
Related posts:
 Description of the best dill varieties for open ground and for greens, what the plant looks like
 How to choose the best dill varieties for growing greens without umbrellas in open ground and greenhouses
 Growing bush dill for greens, describing its varieties, and harvesting
 Recipes for pickling fresh dill for the winter at home in jars, proportions, and storage
 Characteristics and description of the Alligator dill variety
 How to properly plant dill in open ground and a greenhouse: secrets of agricultural technology
 Medicinal properties and contraindications of dried and fresh dill, its use in folk medicine
 What are the diseases and pests of dill and how to deal with them, simple methods