Knowing the secrets of how to properly trim garlic for storage will preserve its juiciness and flavor for a long time. After digging, thoroughly dry the garlic along with its tops before removing them.
Experienced gardeners cite many positive reasons for storing vegetables in trimmed form. It's essential to select the appropriate container and location.
When to harvest garlic from the garden
There are two main subspecies of this spicy vegetable.
- Winter garlic varieties are planted in October. All varieties are prone to bolting. The head forms with large cloves arranged around a central stem. Winter garlic is harvested approximately 85-98 days after the first shoots emerge. This time coincides with the end of July and the beginning of August.
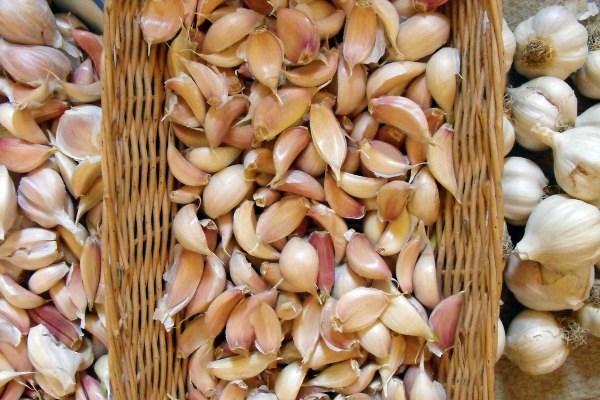
- Spring varieties are planted in late March or early April; they do not bolt. A head produces up to 10-12 small cloves arranged in several rows. There is no central stem. Harvesting begins in late August or early September.
Harvest times are determined primarily by weather conditions. Ripening can be calculated mathematically or based on the lunar calendar. Garlic ripeness can be determined by its external characteristics. In most cases, regardless of the weather in spring and summer, harvesting begins after three months.
How to determine when garlic is ready to harvest
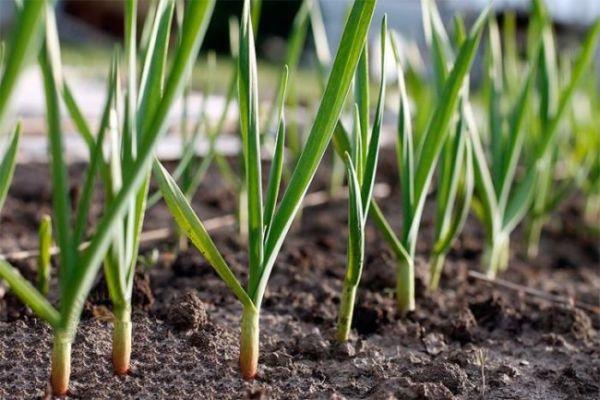
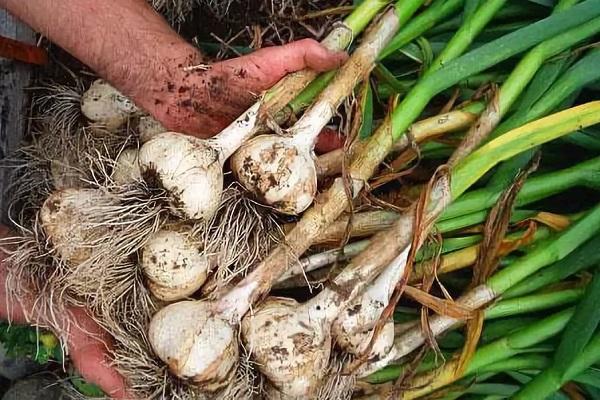
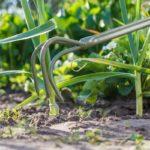
To accurately determine the garlic's readiness for harvesting during its growth and development, test specimens are planted in the garden bed. The stalks are left on them, and when the time comes, the bulbs are gradually dug up and checked for ripeness.
Signs of ripening of a vegetable crop are:
- yellowing and drying of the lower feathers, the upper leaves may remain green;
- cracking of the seed box on the arrows;
- the neck of the bulb becomes thinner and dries out;
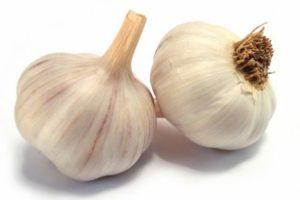
- the underground head is hard and covered with dry scales that rustle and come off easily;
- The cloves are of regular shape and separate well from each other.
Yellowing leaves don't always indicate the head is ripe. Changes in the appearance of the above-ground portion of the plant can be caused by adverse weather conditions, infection, or improper care.
The most reliable way to determine ripeness is by the condition of the stalks. Therefore, gardeners don't cut off all the stalks at once, but leave a few. By the time the seedlings stop growing and the vegetable ripens, the stalk straightens, the capsule splits, and the seeds can be seen.
Don't leave a mature bulb in the ground for too long. The scales will begin to crack, exposing the cloves. Such a harvest doesn't store well and spoils quickly.
How to properly harvest from a garden bed
Preparations for harvesting begin in advance, creating favorable conditions for full ripening.
- A month before the expected harvest, stop watering and applying fertilizers.
- It's recommended to rake the soil away from the bulbs 10-14 days before planting. This will allow light and air to penetrate the soil unimpeded and promote rapid ripening.
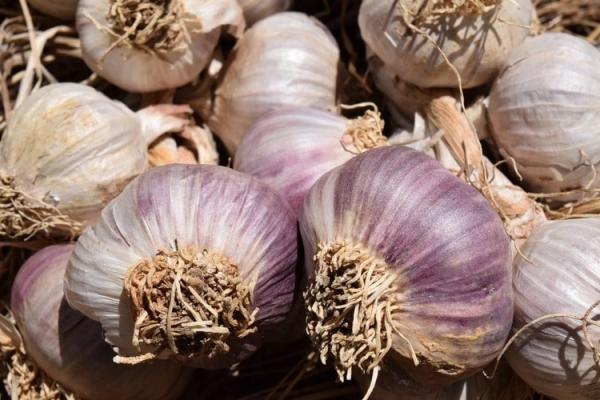
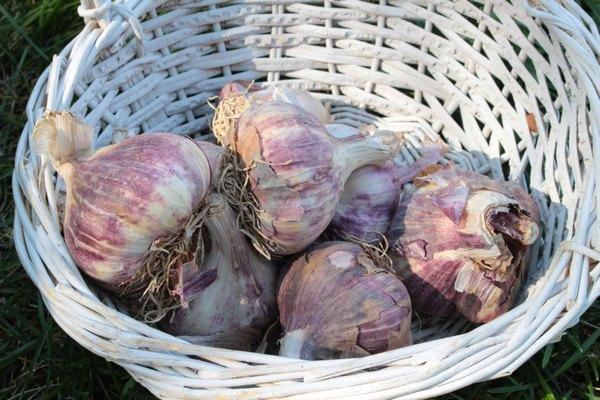
- To harvest vegetables intended for long-term storage, choose a dry, windy day. Gently shake the soil from each dug head.
Freshly dug onions are left to dry directly in the beds. The sun's rays will dry and disinfect the bulbs. At night, it's best to bring the spicy vegetable indoors or cover it with plastic wrap. You can tie the tops of several onions together and hang them in a well-ventilated area or spread them out in a single layer on a flat surface.
The drying process takes 7-10 days. It's recommended to dry the greens with the tops, as they contain many nutrients. This ensures the heads are juicy, flavorful, and nutritious.
Many gardeners wonder whether it's necessary or possible to wash garlic immediately after harvesting. Excessive moisture in the harvested crop, especially in rainy weather, increases the risk of rot and the spread of various infections. Such a harvest doesn't store well and loses its flavor.
How to dry garlic after digging
Proper drying of vegetables after harvesting ensures that the harvest will be stored for a long time without losing its beneficial properties.
- In sunny, dry weather, the harvest is left for 2-3 days directly on the beds, laid out in one row.
- If the air humidity is high, bring the garlic indoors. Lay it out in a single row on a surface or hang it by tying the tops of several heads together.

After two weeks, the harvest should be completely dry. The tops will acquire a uniform color, dry completely, and become brittle. The top layer of scales on the heads will rustle and peel off easily.
Recommendations to help preserve the taste and quality of your harvest.
- Don't trim garlic immediately after harvesting. It's best to dry it with the tops on, as they impart nutrients to the cloves.
- For drying, choose the vertical method, when the tops are positioned upwards.
- Gently shake the soil off each bulb. Avoid banging the bulbs together. Even minor damage can affect the shelf life of the harvest.
When peeling garlic heads, you can remove the top, driest part of the husk.
Storage at home
It's best to hang the harvest with the tops down for drying. Nutrients from the leaves and tops will reach the cloves, improving the flavor. Drying time is at least 5 days.
Should I trim the roots and tops of the vegetable, and how should I do this? It's best to trim the roots before they dry, leaving 5 millimeters. After drying, the remaining roots are scorched with a candle.
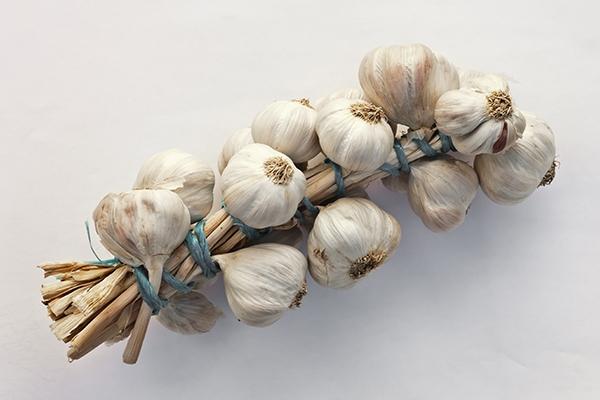
- If you plan to store the vegetable crop in braids, then the tops are cut off, leaving a length of 30 centimeters.
- To store vegetables in bunches, leave tops no longer than 20 centimeters.
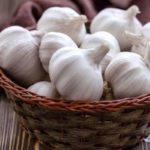
- If the harvest is to be stored in bags, boxes, nets, or crates, then after pruning, a stump no more than 3 centimeters is left.
There are many ways to store the vegetable indoors, ensuring the cloves retain their firmness and juiciness.
- Long-term storage is possible in a sterilized glass jar. The vegetables are placed in layers, each layer sprinkled with salt or wheat flour.
- A complex but effective method for storing this spicy vegetable is to wrap it in a paraffin wax. This prevents moisture from evaporating, so the cloves remain firm for a long time. Each clove should be dipped in liquid paraffin.
- Treating garlic with vegetable oil with a few drops of iodine helps. After treatment with the oil solution, the vegetable is dried and stored in boxes.
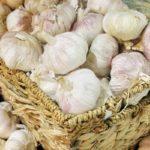
- The harvest also stores well in cloth bags. If the humidity is high, the bag is filled with salt, and if it's low, with onion skins.
![When can you harvest garlic in [year] according to the lunar calendar, timing and storage rules](https://harvesthub.decorexpro.com/wp-content/uploads/2019/04/chesnok-2-300x188.jpg)
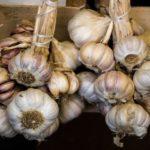
A common method is storing the harvest in braids. The tops are braided and hung. This is inconvenient for apartment living, as it requires a lot of space.
The harvested crop is best stored in a cool, dark place with humidity levels around 80%. The optimal temperature for winter garlic is considered to be 2 degrees Celsius. Spring varieties can be stored at higher temperatures, but not above 20 degrees Celsius.
If these requirements are not met, the bulbs may quickly become soft and spoil.
There are many ways to store vegetables. In an apartment, the storage space should be located away from heating appliances, such as in a pantry. A shoe rack in the hallway can also be a suitable location.
Garlic harvesting and storage video
Summer varieties of this spicy vegetable store better because the bulbs have many scales inside. This garlic loses moisture and dries more slowly, reducing the risk of rot and mold.
The shelf life of garlic is largely influenced by growing conditions and care, as well as proper harvesting and drying procedures. Properly processed, harvested garlic can be stored until the following season.
Related posts:
 The best varieties and types of early and winter garlic with descriptions and names
 When to dig up garlic in the Moscow region in 2025
 How to properly grow and care for spring garlic in open ground and when to tie it into knots
 When can spring garlic be harvested in 2025? Harvesting from the garden and storage
 Description and cultivation of single-clove garlic, planting and care rules
 How to properly dry winter garlic after digging and where to store it at home
 Features of planting and caring for family garlic, description of varieties, pest control
 Why does garlic turn blue and green when pickled, how to avoid this, and is it safe to eat?