- Should garlic be tied up?
- Principle of the method
- When to perform the procedure
- For spring garlic
- For winter crops
- Is it necessary to tie the leaves after breaking off the shoots?
- Step-by-step instructions for tying
- Post-procedure care
- Harvesting Rules
- When should you trim after removing from the ground?
- Tops
- Roots
- Pruning tools
- Mistakes, consequences, and how to avoid them
Many gardeners wonder when and how to tie garlic leaves, and whether it's necessary. Opinions differ on this matter. None of them have been scientifically tested or proven, so the decision to perform this procedure rests with the grower. Leaf tying is performed at the end of the growing season, seven days before harvest. This procedure is believed to improve bulb quality and increase yield.
Should garlic be tied up?
Garlic leaves are tied before harvesting. There are several opinions on this matter. Many are interested in why and whether it's necessary. Some gardeners believe it helps strengthen the garlic heads and increases the yield, while others believe this procedure is harmful to the plant, and still others believe it has no effect on yield and is harmful to the garlic.
Principle of the method
Leaf formation in garlic stimulates root formation. All the energy the plant expended on shoot formation is now devoted to fruit formation. This procedure is performed 5 to 7 days before harvesting. During this time, the cloves increase in size and number, absorbing more nutrients.
When to perform the procedure
The procedure is performed at different times for each garlic variety. There are spring and winter varieties. Spring varieties are planted in the spring and ripen by the end of August. Winter varieties are planted in the fall, and the bulbs are dug up by mid-summer. This procedure is more difficult to perform on an industrial scale, but in private gardens it doesn't take much time.
For spring garlic
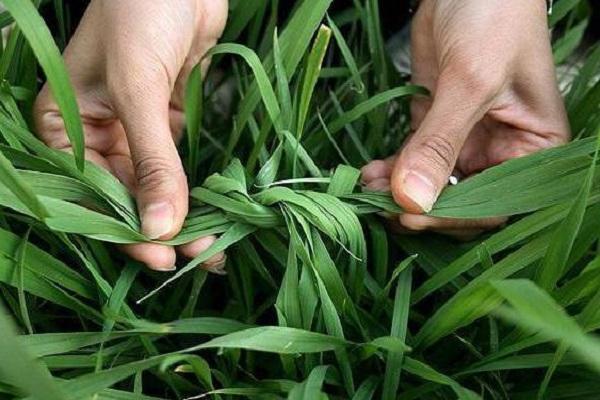
Spring garlic ripens by the end of August. Therefore, the leaves are picked around the tenth of the last month of summer. If the leaves reach 35 cm in height, make one knot; if they are taller, make two knots. Wear gloves during this process, as the plant's shoots are thick and can cut your hands. The leaves are gathered into a bunch and tied in a knot. They are also braided into a pigtail, similar to how you would braid hair, and tied at the end.

Important! The knots are made tight so that they cannot come undone.
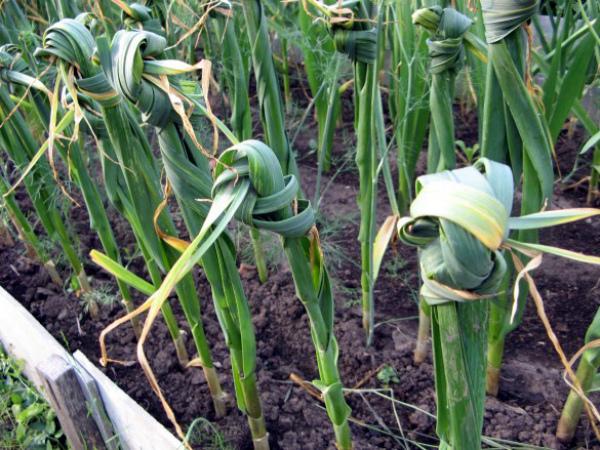
For winter crops
Winter garlic is prone to bolting. Therefore, the leaves are set based on the growth of the shoots. The leaves are set when they are fully erect. Wear a pair of thick gloves to avoid injuring your hands when handling the shoots. Trim the shoots at an angle with scissors. Form a bunch of leaves and tie a tight knot. You can also braid the bunch with a knot at the end. The shoots are trimmed with a tool, not torn off by hand, to avoid disrupting the plant's development.
Is it necessary to tie the leaves after breaking off the shoots?
Pruning stems improves crop yield. This procedure is mandatory. Opinions differ regarding leaf set. Some gardeners say it strengthens the roots and stimulates root formation.
Other gardeners believe that the plant is already experiencing stress after removing the stems, and that the tying of leaves worsens its condition.
Important! The garlic leaf-binding process has not been studied by scientists and has no proven benefits.
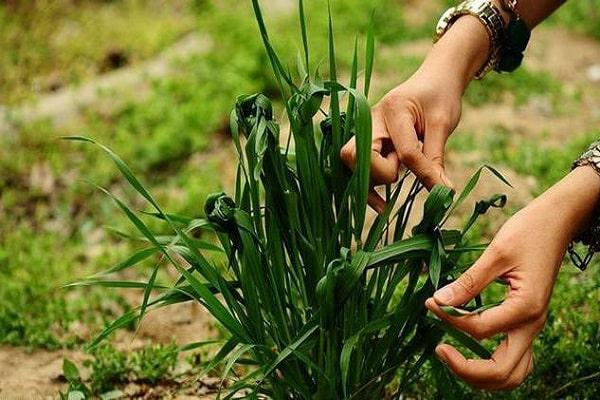
Step-by-step instructions for tying
Garlic shoots are tied according to a specific algorithm, which must be followed in order not to disrupt the vegetative development of the plants:
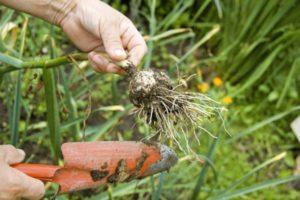
- Three weeks before harvesting, one bush is dug up to determine the ripeness of the fruit.
- The husks on the cloves should fit tightly, and the cloves themselves should remain dense.
- Wear thick gloves on your hands, as the leaves are thick and sharp and can cause cuts on your hands.
- Use scissors to cut the arrows at an angle.
- The leaves are gathered into a bunch.
- Make 1-2 knots or braid a braid with a knot at the end.
- The knot should be tied tightly so that it cannot come undone under the influence of wind and other factors.
Post-procedure care
After this procedure, the soil between the rows and around the roots of the plant is loosened with a hoe. The hoe is inserted into the soil a few centimeters and gently lifted. The area around the stem is slightly exposed to make it easier to monitor the bulbs' maturity. By the time they are dug up, the fruit should be easily removed from the soil, and the skins on the cloves should separate easily.
Harvesting Rules
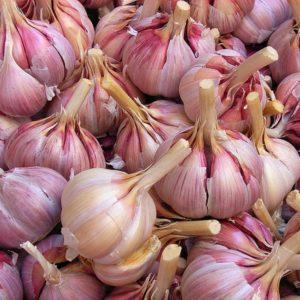
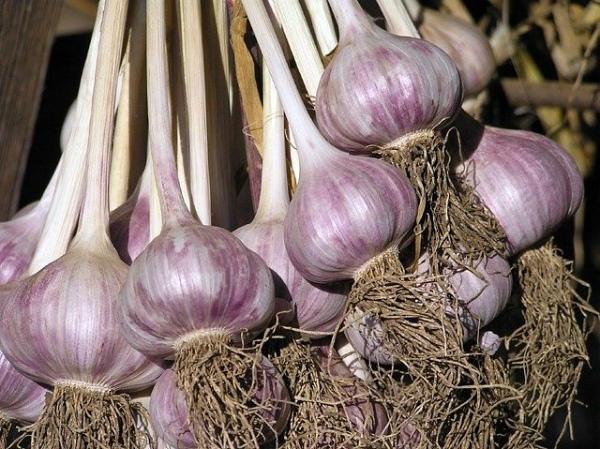
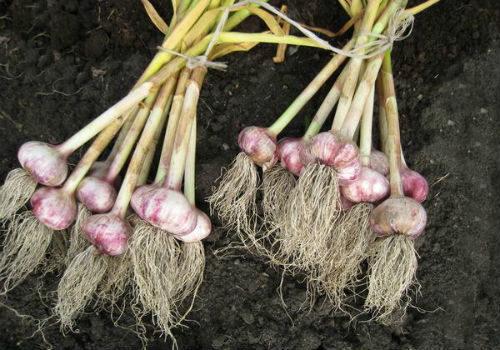
Garlic is dug up with a shovel. Pulling it out of the ground is not recommended, as this will damage the bulbs. The bulbs are cleaned of soil and moved to a shaded, well-ventilated area to allow the tops, roots, and bulbs to dry slightly. They are hung or laid out in small groups to speed up the process.
For further storage, the tops and roots of the bulbs are trimmed. This prolongs their shelf life. The bulbs are collected in cardboard boxes or cloth bags and stored in a dry, warm place. Part of the harvest is processed and consumed soon. The rest is saved for seed and winter use.
When should you trim after removing from the ground?
The timing for pruning tops and roots is the same. The procedures are carried out simultaneously, but each has its own specifics. The timing depends on the harvest time.
Tops
If you need to quickly tidy up your garlic crop, trim it 3-4 days after harvesting. The optimal time to remove the tops is 7-8 days after digging. Ideally, the tops should be completely dry. They will become light and can be removed without much effort.
Preserving the leaves does not affect the storage quality of the harvest. The pruning procedure saves space in the storage cabinet.
Roots
Root pruning is a mandatory procedure and has a time limit. They must be removed within a month of digging. If this is neglected, the garlic will begin to sprout during storage, the cloves will become small and dry out, as all the beneficial elements will be absorbed into the stem. The optimal time for this procedure is 7-8 days after harvesting. If desired, you can trim the roots 3-4 days after digging.
Pruning tools
When pruning, every gardener chooses the most suitable tool. The most commonly used are:
- Garden pruning shears. These are designed for cutting dense tree branches. They're not particularly easy to use, but experienced gardeners still use them.
- A knife. This tool makes pruning easier, but it increases the risk of injuring your hand. Work carefully, using a sharp knife. A dull object will only complicate and slow down the process.
- Stationery scissors. The most convenient option. They're suitable for trimming tops and roots. Use scissors for cardboard or heavy paper; they're the sturdiest and best for the job.
Mistakes, consequences, and how to avoid them
Setting leaves too early will weaken the plant. Some of the nutrients supplied to the bulb from the foliage will be cut off, leading to weakening and death of the plant.
Removing leaves at the time of leaf formation weakens crops and, in some cases, leads to infection. The disease quickly spreads to the plant stem and attacks the newly formed cloves. This can lead to partial crop loss. To avoid this, it is recommended to carefully monitor the crop's ripening time and perform the procedure with care.
Related posts:
 How to properly dry winter garlic after digging and where to store it at home
 How to properly grow and care for spring garlic in open ground and when to tie it into knots
 How to properly plant garlic outdoors and prepare the soil
 Garlic diseases and pests and their control, treatment methods and prevention
 Garlic harvesting dates in the Urals in 2025, cultivation and care
 Winter garlic cultivation technology, large varieties and cultivation rules
 11 Best Recipes for Pickled Garlic Sprouts for Winter
 When to dig up garlic in the Moscow region in 2025