- Preparing for growing
- Checking soil acidity
- Daylight hours
- Preparing the soil correctly
- Wood sawdust, humus, peat or sand
- Liming
- Green manure plants
- Predecessors
- Seeds
- Selection
- Soak
- Heat treatment
- Bubbling
- Burial
- Sowing dates
- Early spring
- Summer
- Subwinter
- Effective sowing methods
- Granulated planting material
- Planting with tape and paper
- Sowing using egg trays
- Planting with radishes
- Mixing seeds with river sand
- Sprouted seeds
- Use of a seeder
- Planting in paste
- Using polyethylene immediately after planting
- Features of watering
- Proper weeding
- After watering or rain
- Before watering
- Thinning
- Hilling carrots
- Mulching with sawdust
- Feeding scheme
- Harvesting and storage of crops
- Common mistakes gardeners make, secrets, and answers to questions
How do you properly care for carrots planted outdoors? It turns out it's very simple. This crop requires minimal attention. The main thing is to treat the seeds before sowing to improve germination, and thin the beds during growth. Carrots will grow large and juicy if the soil is fertilized with organic and mineral nutrients, and the roots are watered during dry periods.
Preparing for growing
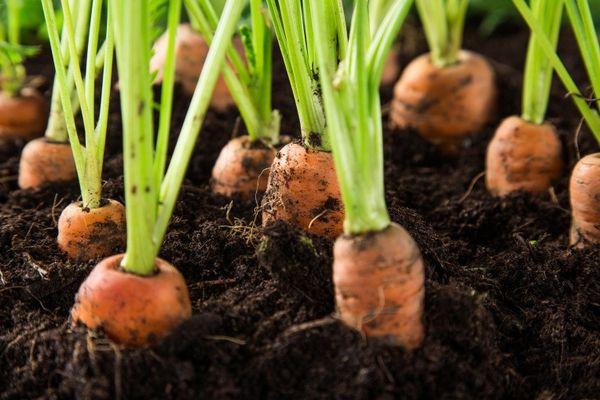
Carrots are a biennial crop from the Apiaceae family, typically grown for their orange (yellow, white, or purple) roots. In the second year, the plant flowers and produces seeds. Pollination is accomplished by insects.
This easy-to-grow crop thrives in neutral (slightly acidic) loamy or sandy loam soil. The root vegetable can weigh between 30 and 500 grams. A 1-meter row yields 1-5 kilograms of harvest. Carrots are very rich in beta-carotene, ascorbic acid, and potassium.
Checking soil acidity
Soil with a pH of 5.6 to 7.0 is suitable for growing carrots. The soil should be neutral. Any gardener can determine the soil condition themselves.
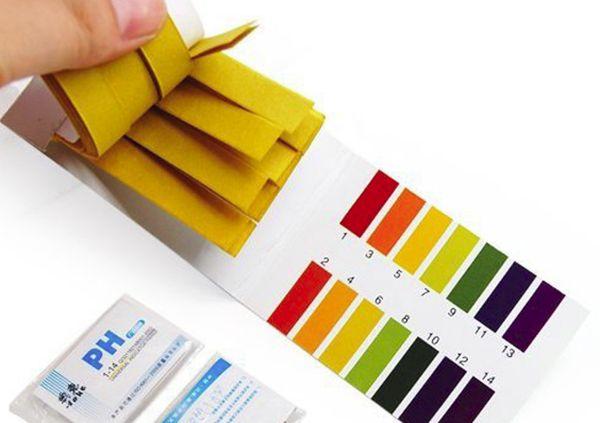
How to determine soil acidity:
- With litmus paper.
Buy a soil pH test strip (litmus paper). Take a sample of soil from a depth of 26 centimeters. Mix it with water. Wait 20 minutes. Dip the strip into the soaked soil for a few seconds. Green litmus paper indicates neutral pH.
- By inspection.
In acidic soil, water in puddles has a slightly rusty hue, and rainbow-colored streaks can be seen on the surface. When moisture percolates deeper, a brownish-yellow sediment remains. The surface of acidic soil is whitish.
- By vegetation.
Plants that grow in acidic soils include buttercup, plantain, cornflower, mint, and horsetail. Plants that grow in slightly acidic soils include clover, milkweed, chickweed, burdock, and couch grass. Plants that grow in neutral soils include clover, nettle, quinoa, and chicory. Plants that grow in alkaline soils include poppies, bindweed, elderberries, and elms.
- Using folk methods.
Take a couple of currant leaves, pour boiling water over them, and let steep for ten minutes. Add a handful of soil to the cooled water. If the liquid turns reddish, the soil is acidic; if it turns blue, it's neutral; and if it's green, it's slightly acidic.
Vinegar can be used to determine acidity. Alkaline soil will produce vigorous foaming, neutral soil will produce small bubbles, and acidic soil will show no reaction.

Daylight hours
Carrots require intense light, preferably 10-12 hours of clear weather. It's recommended to select open areas for sowing, with rows oriented south to north. It's important to maintain planting density, remove weeds, and avoid planting tall plants nearby. This sun-loving crop grows poorly in the shade and is prone to disease.
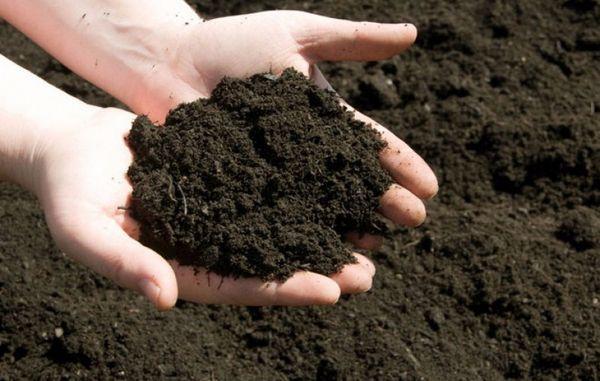
Preparing the soil correctly
Carrots won't grow in hard, clayey, or acidic soil. They require fertile soil; otherwise, the yield will be small and the flavor of the roots will suffer. Carrots require mechanical tillage. Digging the soil improves the quality of the harvest. It's best to plant carrots in raised, fertilized beds.
The application of organic and mineral additives, cultivation of green manure, and crop rotation improve soil fertility.
Wood sawdust, humus, peat or sand
The composition, density, and acidity of the soil can be changed using various additives. First, the soil is dug over and its condition is determined.
Ways to help improve soil quality:
- If the soil is clayey.
In the fall, dig up the soil and add sawdust (3 kilograms), peat, and sand (half a bucket each) per square meter. Fertilize with rotted manure (5 kilograms), superphosphate, and potassium sulfate (30 grams each).
- If the soil is acidic.
Dig and loosen the soil. Add 1 cup of lime or dolomite flour and wood ash per square meter of the plot.
- If the soil is peaty.
Add half a bucket of river sand and a bucket of turf soil per square meter of the plot. Fertilize with 5 kilograms of humus and 35 grams each of nitrogen, potassium, and phosphorus.
- If the soil is sandy.
The soil is dug up, 2 buckets of turf, a bucket of peat, and 5 kilograms of compost are added per 1 square meter of the plot.
To improve the black soil, it's advisable to add a small amount of potassium and phosphorus fertilizer (30 grams per square meter). Before planting carrots, the soil must be dug over, loosened, and any plant debris removed.
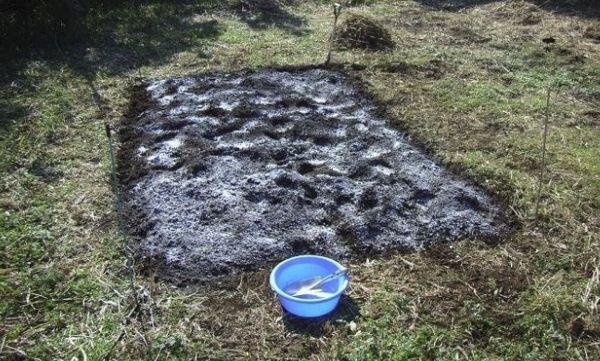
Liming
Adding slaked lime reduces soil acidity and disinfects it from fungi and bacteria. Conversely, to increase soil acidity, fertilize with humus and pine needles. Adding lime improves crop absorption of nutrients. If the soil isn't limed, plants won't receive enough beneficial minerals. However, too much lime will make the soil too alkaline, heavy, and infertile.
It's not advisable to use manure simultaneously with liming. Lime will react with nitrogen, neutralizing its beneficial properties. Slaked lime is applied in the fall, immediately after harvesting and tilling the soil. In large quantities, this substance can burn the roots.
Ground limestone is applied in the spring at planting. This additive does not burn plants. Lime is best used on loamy soils; on sandy soils, use regular limestone or dolomite flour. For acidic soil, 200-400 grams of lime or limestone are needed per square meter.
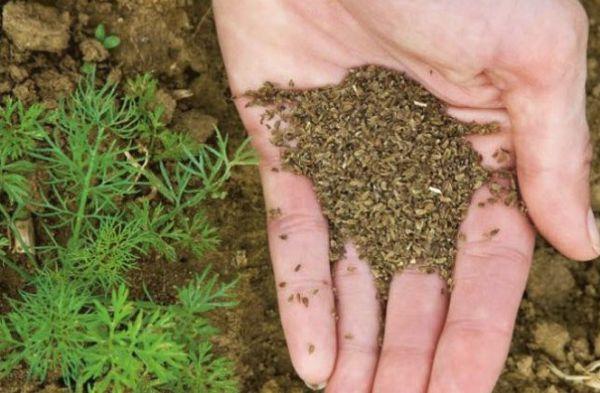
Green manure plants
Green manure crops are plants specifically grown to improve soil health. These include rye, peas, alfalfa, clover, sweet clover, buckwheat, and beans. Mown green manure crops are often left on the plot and incorporated into the soil. The roots are left in the ground to rot and enrich the soil with nutrients.
Green manure is sown before planting carrots or after harvesting themIn spring, you can plant mustard, phacelia, rapeseed, and rapeseed. Green manure is cut and dug into the soil two weeks before planting carrots.
Instead of burying the cut shoots, you can place them on the surface and mulch them. Over time, they will turn into nitrogen-rich compost. The remaining roots, thanks to earthworms and microorganisms, will decompose and turn into humus. In the fall, mustard, rye, and oats can be planted as green manure.

Predecessors
It's best to grow carrots in a plot previously occupied by tomatoes, potatoes, cucumbers, onions, and pumpkins. They can only be returned to their original location after four years. Avoid sowing carrots after beans, dill, or parsley. Garlic, onions, and marigolds can be planted nearby. The scent of these plants will repel insect pests.
Seeds
Cultivated carrots come in two varieties: fodder and table. Fodder carrots are grown for cattle and other livestock feed, while table carrots are suitable for human consumption. Depending on their ripening time, these crops are classified as early, mid-season, and late. Seeds are sown in the spring.
Before planting, the seeds are treated to improve germination, hardened, and disinfected to strengthen the plant's immune system. For fall planting, the seeds are not treated in any way. Sprouted or simply soaked seeds may freeze in winter. In the fall, only large seeds are sown for winter sowing.
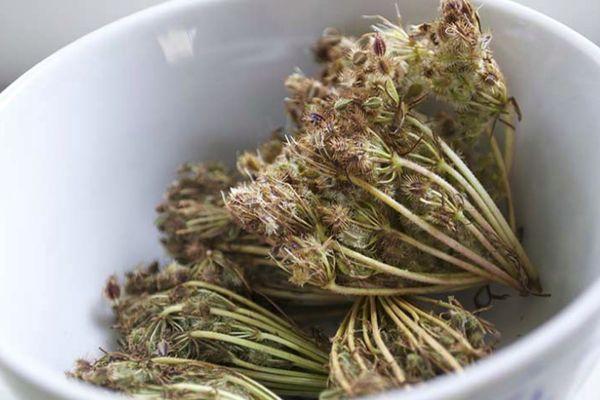
Selection
When purchasing seed packets, it's a good idea to check the date, intended use, and maturity date. Seeds lose their viability after four years. Immediately discard the seeds using salt water. Floating seeds are discarded, and those that settle are used for sowing. Some types of seeds require no treatment before sowing.
The seed is sold completely ready for planting. Hybrid seeds are untreated; they are granulated, dyed, and pre-coated with fertilizers, fungicides, and insecticides.
Soak
Soak carrot seeds in warm water for 24 hours. A little wood ash can be added to the solution. It's best to change the solution every 6 hours to prevent the seeds from fermenting. Sow the seeds immediately after soaking.
Before sowing, soaked seeds can be disinfected in a pink solution of potassium permanganate. The solution is soaked for 15 minutes. Do not place dry seeds in the potassium permanganate solution, as it can burn them. Seeds can be disinfected with a solution of boric acid or hydrogen peroxide.
The soaking process is combined with biostimulation. For this, a small amount of fertilizer, such as sodium humate or Epin, is added to the water. The seeds should be soaked in the warm nutrient solution for 10 hours.
Heat treatment
To increase seed resistance, heat-treat the seeds before sowing. After soaking, keep the seeds in a cold place for one week. Place the seeds in a plastic bag and store them on the vegetable shelf in the refrigerator. Hardening is only used for soaked and swollen seeds.
Sprouted seedlings are not subjected to heat treatment. Cold hardening can be combined with heat treatment. Refrigerated seeds can be removed daily and left in a warm room for 12 hours. Hardening can be accomplished by placing the seeds in hot water (at 50°C) for 20 minutes, then quickly removing them and rinsing with cold water.

Bubbling
With this method, the seeds are immersed in oxygenated water. This treatment promotes early germination. A jar is filled with warm water, and an aquarium air pump and the seeds are placed inside. The air flow will keep the seeds moving evenly. The bubbling process lasts 24 hours, and the water is changed every 12 hours. The treated seeds are dried and sown in soil. The carrots germinate in seven days.
Burial
You can germinate seeds in the spring by placing the seeds in a canvas bag and burying them in the ground for two weeks, burying them 20-25 centimeters deep. Sprouted seeds are immediately sown in moist soil.
Sowing dates
Seeds are sown in the spring or fall. Early varieties are planted in April, when the soil warms up to 5°C (41°F). Mid-season and late varieties are sown in May, when the air temperature reaches 15°C (59°F).
Early spring
Early varieties (Paris, Dragon, Zabava, Amsterdam) mature after 80 days. Seeds for these crops are sown in April. The garden for early carrots is prepared in the fall. The roots are eaten fresh and used in cooking. However, these vegetables are not suitable for long-term storage.
Mid-season varieties (Shantane, Vitaminnaya, Krasny Velikan) ripen in 80-120 days. Seeds are sown in the garden in May. The roots have a long shelf life and are also eaten fresh or added to various dishes.
The growing season of late varieties (Emperor, Flaccoro, Queen of Autumn) lasts 120-150 days. Seeds are sown in May. The roots can be stored until the next harvest.
Summer
Mid-season crop seeds can be sown in summer. Carrots planted in June will not emerge until October. To ensure a good harvest, seedlings should be watered regularly on hot, dry days. It is believed that carrots planted later are less susceptible to insect damage (carrot fly).
Subwinter
Before winter, seeds are sown in November, when the ground has frozen slightly and the first snow has fallen. The seeds must be dry. If sown on warm autumn days, they will germinate, but as winter approaches, the young seedlings will die from the cold. Before planting, the soil is prepared and fertilized. Do not water the sown seeds.
When planted before winter, the harvest is collected in June, and the vacated bed is used for planting radishes and lettuce. Varieties sown before winter include Vitaminnaya, Varvara Krasa, and Moskovskaya Zimnyaya.
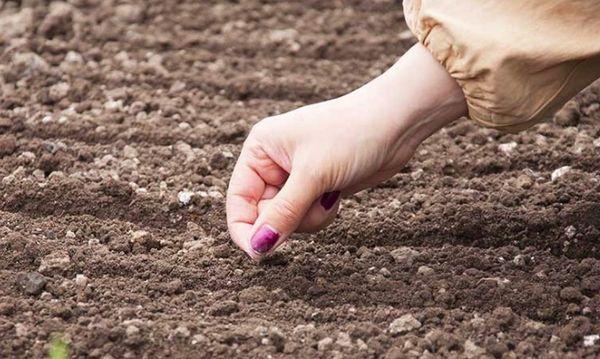
Effective sowing methods
Small carrot seeds germinate poorly if sown unprepared. Several sowing methods can increase seed germination and make caring for this crop easier.
In spring, seeds are planted in prepared, moistened furrows at a depth of 1.5-2 centimeters. In autumn, dry seeds are sown in dry soil at a depth of 3 centimeters. Leave 20 centimeters between adjacent rows, and 5 centimeters between seedlings within a row.
Granulated planting material
Ready-to-use granulated or pelleted seeds are available in stores. The seeds are larger and contained in a fertilizer capsule. The pellet contains the seed. You can also prepare this seed yourself. To do this, soak the seeds in a starch paste and sprinkle powdered peat or dry soil on top. To prepare the paste, take 3 tablespoons of potato starch, one liter of water, and one teaspoon of any complex fertilizer.

There's a simpler way to pellet seeds. First, soak them in water or a nutrient solution to swell. Then, while still slightly damp, remove them and sprinkle them with any flour. This method increases the size of the seeds and makes them easier to sow.
Planting with tape and paper
You can avoid thinning carrots in the future by gluing the seeds to paper tape or regular toilet paper at regular intervals (4-5 centimeters) using prepared paste. Dry the tapes and roll them into a roll. Then, place them seed-side down in well-moistened soil and cover with soil.
To make the paste, take 3 tablespoons of potato starch per liter of water and add one teaspoon of any complex fertilizer.
Sowing using egg trays
Egg cartons can be used for planting carrots. To do this, loosen and level the soil thoroughly. Then place an empty egg carton on the surface and press it lightly into the soil. Use it as a template. Make small holes in the soil at regular intervals. Place a single seed (preferably granulated) in each hole, cover with soil, and water.
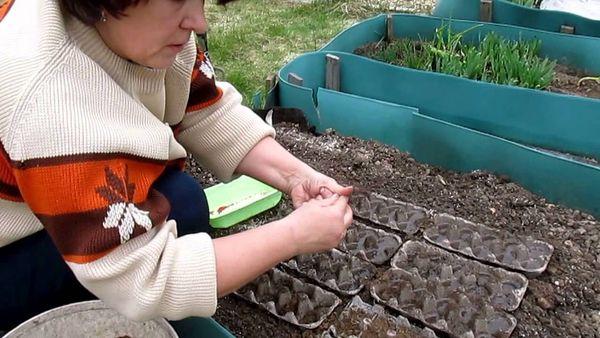
Egg trays can be left in the garden bed. First, cut out the bottom of each tray. Fill the trays with soil, place a seed in each hole, and cover with soil. After sowing, water the trays generously to soften them. This planting method will prevent weeds from growing and moisture from evaporating.
Planting with radishes
You can sow carrots and radishes in the same bed at the same time. First, mix the seeds of these crops in a 2:1 ratio, adding a little dry sand. Radishes grow before carrots, so they can be removed from the bed. The carrots are left alone and don't require additional thinning.
Mixing seeds with river sand
Before planting, carrot seeds can be mixed with dry river sand. Take 2 tablespoons of seeds and half a bucket of sand. Then, sow the mixture in a thin stream into the furrows. You can also moisten the sand and seeds and sow the slightly damp ingredients into the garden bed. This method will reduce the need for thinning the carrots.
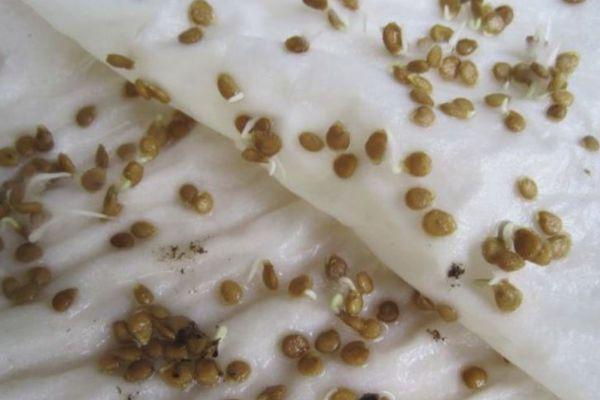
Sprouted seeds
Dry seeds are sown only before winter. In the spring, it's advisable to soak the seedlings or let them germinate briefly. Spread the seeds on a damp cloth and cover with plastic wrap. Germination can also be done on a damp bandage. The cloth should be moist, but not wet. The seeds will germinate if left in a warm place for a few days. To obtain larger roots, add a growth stimulant to the liquid.
Use of a seeder
Manual seeders, such as the Klen-1 and SMK-5, can be used for planting carrots. These machines simplify the sowing process. The seeds fall into the soil to the required depth, are evenly distributed, and are not damaged. The cost of one such seeder starts at 3,000 rubles.
Planting in paste
You can plant carrots in a garden bed using paste. To prepare it, take 1 liter of water, 2 tablespoons of potato starch or flour, and 1 teaspoon of fertilizer. Cool the paste, and stir in the seeds (2 packets). Pour the mixture into a plastic bottle and pour it in a thin stream into the furrows.
Using polyethylene immediately after planting
To speed up seed germination and ensure a guaranteed harvest, the beds are watered immediately after sowing and covered with plastic film. The covering material creates an optimal microclimate for seed germination. The plastic is removed from the garden after 2-3 weeks.
Dark-colored film can be used for weed control. The area is covered with a permeable material with holes for seedlings. Nothing grows under the dark film.
Features of watering
Carrots tolerate drought well, but to produce sweet, large roots, they require regular watering, especially during dry periods. Water generously during seed germination and root formation.
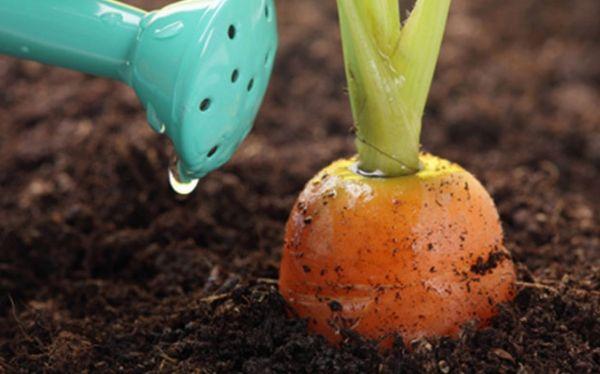
However, it's important to remember that carrots won't grow in waterlogged soil. Excess moisture will leach minerals, compact the soil, and reduce oxygen supply to the roots. Water carrots once a week, or three times every seven days during drought. Use a bucket of water per square meter of plot. Stop watering completely a week before harvest.
Proper weeding
Carrots grow very slowly—almost all summer long. During this period, many weeds have time to grow in the garden bed. The garden needs to be weeded regularly. During weeding, weeds are pulled out by hand and removed from the bed.
After watering or rain
Many gardeners prefer to weed after moistening the soil. Weeds are easier to remove from moist soil. Weeds are pulled by hand, and the soil is loosened with a hoe.
Before watering
The soil can be weeded before watering. Weeds removed from the soil will dry out between the rows in the scorching sun. Weeds near the carrots should be pulled out by hand.
Thinning
Carrots need to be thinned twice, as planting too densely will prevent large root vegetables from growing. The first thinning occurs after a few leaves appear. Water the soil before thinning. It's easier to pull the seedlings out of moist soil. When thinning, pull the seedlings straight up.
The second thinning is done when the tops reach 10 centimeters. To ensure long, narrow roots, leave 3 centimeters between adjacent plants. Carrots will grow larger if the distance between plants is 5-7 centimeters. Discard the seedlings that are pulled out of the ground.
Hilling carrots
Carrots are hilled three times per season. The first time is when the plant has five leaves, the second time is when it has seven leaves, and the third time is when the tops reach 10 centimeters. This agricultural practice prevents sunburn and greening of the root tips. Hilling protects the carrots from overheating. A 5-centimeter layer of soil is added to the top of the plant.
Mulching with sawdust
Mulching improves fruit quality and retains additional moisture in the beds. A thick layer of mulch also prevents weeds from growing through the beds. Mulched beds protect carrots from insect pests. Well-rotted sawdust is used as mulch.
Wood waste is spread on the beds immediately after the first shoots emerge and the first thinning. Subsequently, the carrots are only watered occasionally during dry summer days and fertilized.
Feeding scheme
Carrots thrive in fertile soil. Root crops will grow large and juicy if the soil is fertilized before planting. However, manure should be applied in the fall. Apply 3-4 kilograms of manure per square meter of soil. During spring planting, the soil can be fertilized only with a mullein-water solution (1 liter of compost per 10 liters of water). In the spring, potassium and phosphorus are added to the soil. Apply 50 grams of potassium sulfate and superphosphate per square meter of soil.

Carrot fertilization scheme:
- After the first thinning.
Prepare a solution: 1 teaspoon each of potassium magnesium sulfate, urea, and 1 tablespoon of superphosphate per 10 liters of water. Water the carrot bed with the mixture.
- 2 weeks after the first feeding.
Prepare a solution using any complex fertilizer (Kemira, Rastvorin, Nitrophoska). Use 2 tablespoons of the nutrient mixture per 10 liters of water.
- During root crop development.
The beds are sprinkled with dry wood ash or watered with an ash solution. This fertilizer will increase the sugar content of the carrots.
- One month before harvest.
Prepare a solution: add 2 tablespoons of potassium chloride or potassium sulfate to a bucket of water. This fertilizer helps remove nitrates from the roots. At the same time, irrigate the carrots with a boron solution (1 gram of boric acid per 5 liters of water).
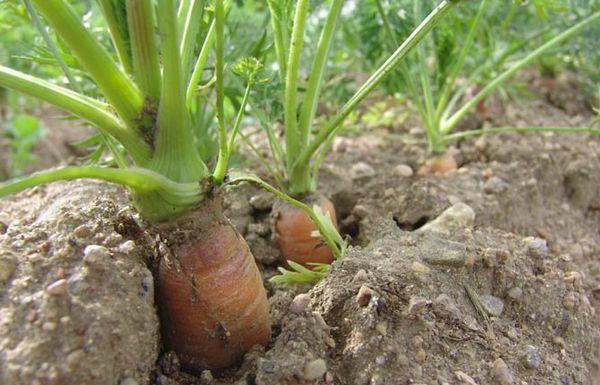
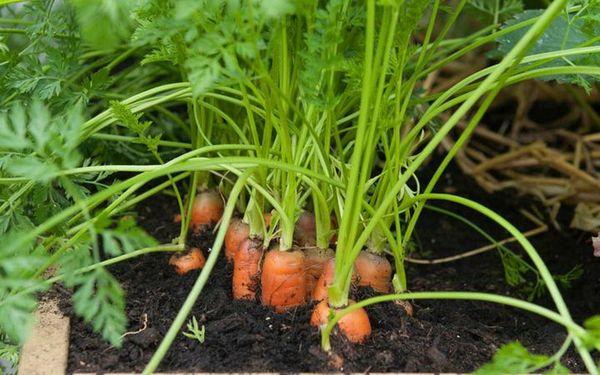
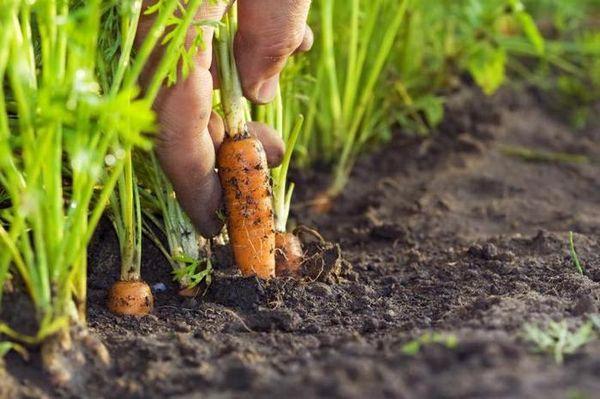
Harvesting and storage of crops
Carrots are harvested from the garden after ripening. Early varieties ripen in July and are used in salads and cooking. Mid-season varieties ripen in August. Late varieties are harvested in September. Late-ripening roots can be stored until spring. Carrots are harvested on a dry, warm day. From light, loose soil, the roots are pulled up by the tops. For dense soil, the cultivation technique is different: carrots are dug up with a shovel. The tops are trimmed off all the roots once they are removed from the ground.
Before storing, carrots are lightly cleaned of soil, sprayed with a weak solution of potassium permanganate, and left under a canopy for 10 days to dry. Root vegetables should be stored in a dark, dry, cool place, preferably a basement. The storage temperature is 0-4°C (32-4°F). Carrots are placed in wooden boxes and sprinkled with dry river sand. Pine sawdust can be used instead of sand. Carrots can be stored under a thick layer of sand or pine needles for up to 8 months. Refrigerated in a plastic bag, carrots will stay fresh for 2 months.
Common mistakes gardeners make, secrets, and answers to questions
Mistake #1: Soaking seeds before winter planting.
Before winter, carrot seeds are sown dry. They should not be soaked, otherwise they will germinate in November, begin to grow, and soon die from the cold. For the winter, it's better to sow pelleted dry seeds.
Mistake #2: After a long drought and a long period of lack of watering, gardeners begin to water the garden generously.
It's best to water carrots regularly, especially in hot and dry weather. During such periods, water every other day. If gardeners visit their gardens once a week and overwater, they risk cracked roots. After a prolonged drought, water carrots very carefully and sparingly.
Question #1: Do purchased pelleted seeds need to be soaked before sowing?
Answer: Industrially processed seeds do not require soaking. They are sown dry in prepared and fertilized soil.
Question #2: Is it possible to hill carrots?
Answer: Root vegetables must be hilled. This technique will protect the vegetables from overheating, increase their size, and improve the quality of the carrots.
 Question #3: Why do carrots take so long to sprout? and it grows poorly?
Answer: Carrots germinate poorly if dry, unsprouted seeds are planted. Swollen seeds planted in well-moistened soil germinate in two weeks. Poor seed quality affects the growth of the crop. The vegetable may not thrive in soil that is too heavy and nutrient-poor. It's advisable to fertilize the soil with organic matter before planting, add a little sand or peat, and reduce acidity with limestone.
Question #4: Why do the tops dry out and fall off?
Answer: Carrot tops can dry out for two reasons: disease or insect attacks. This disease most often occurs in overly dense plantings during rainy weather. In this case, plants are treated with Bordeaux mixture or Oxychom solution. Zemlin or Bazudin are effective against insects.
Question #5: Why are carrots crooked and ugly?
Answer: Carrots grow crooked if the soil is too nitrogen-poor. It's best to apply fresh manure several months before sowing.
Question #6: Why doesn’t a root crop form, but an arrow appears?
Answer: Winter-grown varieties sometimes develop bolting instead of root crops. The plant turns from a biennial into an annual. Bolting can be avoided by sowing the seeds in frozen ground.
Question #7: Why do young carrot shoots turn yellow??
Answer: Young plants can become infected with phoma and brown spot. The leaves turn yellow and wilt. It's best to remove the affected seedlings from the garden bed; they won't be able to recover.
Question #8: Why does the root vegetable turn pale?
Answer: Some varieties have white, not orange, roots. Manufacturers are required to indicate this on the packaging. Sometimes, roots turn pale due to excess nitrogen and a lack of potassium and phosphorus in the soil. Carrots in nitrogen-rich soil grow dry and bitter, but have very lush tops.
Related posts:
 Is it possible to plant carrots in July or at the end of June? What are the best days and care instructions?
 How to control carrot flies with medications and folk remedies
 Description of carrot pests and diseases and methods of control
 Timing and rules for planting carrots in winter, which variety is best to choose
 Why didn't the carrots sprout and what should I do? How to plant them so they sprout quickly?
 What is the best way to feed carrots? Fertilizers and preparations, using folk remedies.
 How and when to thin carrots in open ground
 Description of black carrot varieties and what kind of crop it is, cultivation features