- General information on cuttings
- How to choose the right cuttings
- Green
- Lignified
- Preparing planting material for summer rooting
- Harvesting and storing in winter
- Trimming
- Soaking
- Stratification
- Furrowing
- Paraffinization
- Updating cuts and undercuts
- Treatment with root growth stimulants
- How to root correctly
- Classic method of growing
- A mini-garden on a windowsill at home
- Germination in water
- Without roots
- In a jar of water with aeration
- Kilchevaniye
- In the ground
- In a peat tablet
- In potatoes
- Planting in open ground
- Recommended timeframes
- Preparing the planting hole
- Planting diagram
- Soil requirements
- Features of planting in a greenhouse
- How to put in school
- Post-landing care
- Mulching
- Weeding
- Top dressing
- Watering
- Protection from diseases and pests
- Regional features
- Kuban and Krasnodar Krai
- Belarus
- Central Russia and the Moscow region
- Urals and Siberia
It's possible to increase the number of grapevines by cuttings. When propagating grapes in the summer using green cuttings, it's important to follow the procedure's nuances to ensure proper rooting of the shoots.
General information on cuttings
Cuttings are a vegetative propagation method that involves forming a new plant from a portion of a shoot. The rooted cutting, also called a scion, can be herbaceous or woody. Rooting produces seedlings with their own roots. When planning to propagate grapes, you need to know the best time to perform the procedure, how to properly select and prepare the cuttings, and how to properly care for the shoots.
How to choose the right cuttings
The survival rate and future development of a seedling depend on the correct choice of cuttings. Different types of cuttings are harvested at different times and using specific techniques.
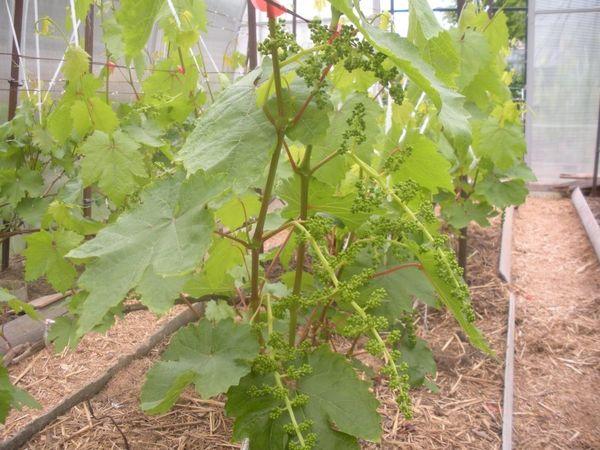
Green
Green cuttings are taken in the early spring, when shoots are actively growing. This typically occurs a couple of weeks before flowering. At this time, the bases of new shoots formed this year are semi-lignified. The shoot tissues are fully formed and saturated with sufficient growth hormones.
Lignified
Woody cuttings should be taken in the fall, after the leaves have fallen. It's important to take the cuttings before the first frost. In the fall, the buds and tissues of the cuttings are fully formed and contain a large supply of nutrients. This allows the cuttings to root better and begin to grow vigorously. Woody cuttings can be stored in the refrigerator for up to six months.
Preparing planting material for summer rooting
Preparing the selected cuttings for rooting in their permanent location is crucial. During this preparatory work, a number of essential steps must be completed.
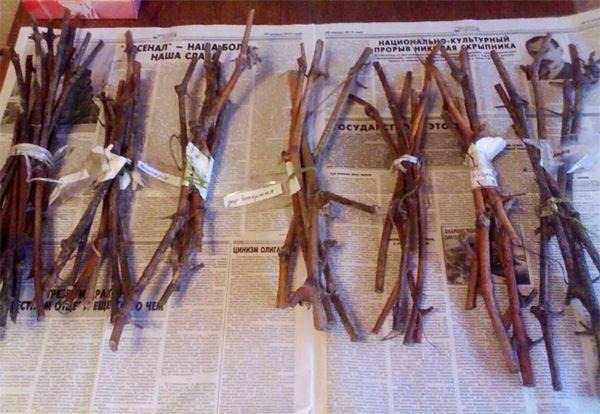
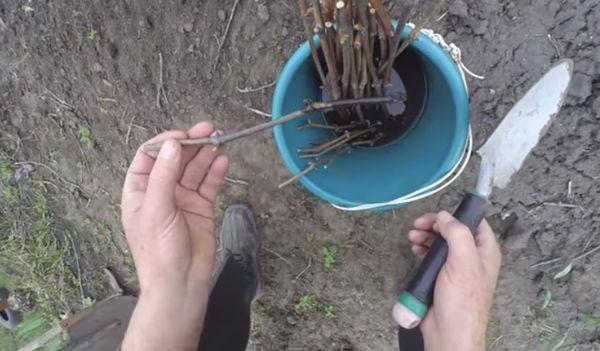
Harvesting and storing in winter
Depending on the variety of cuttings, they need to be harvested at different times. Green cuttings are prepared in the spring, while hardened grape cuttings are harvested in early fall or late August, if the region doesn't have a long summer.
Before storing cuttings, rinse them with cold water, wrap them in thick plastic wrap, and then refrigerate them. The ideal temperature for storing cuttings ranges from 0 to 5 degrees Celsius. To reduce the risk of mold, sprinkle the cuttings with damp sand. For long-term storage, it's important to choose the right cuttings, considering the following criteria:
- Absence of defects. Cuttings for sprouting should be green, without dark spots, signs of rot, or other damage.
- Presence of buds. It is recommended to take cuttings with 2-3 healthy buds.
Trimming
The cuttings are trimmed at an angle with a sharpened and disinfected knife to prevent infection. The optimal cutting width should not exceed 8 mm. The cutting length is 12-60 mm. A shoot that is too short will not have enough strength to germinate, and long cuttings do not store well.
Soaking
Even if cuttings are stored properly, they sometimes dry out partially. These cuttings adapt less well to new conditions, and the resulting plants develop slowly. Moisture can be restored by soaking the cuttings in water for several days at room temperature. The water should be changed daily. If possible, soak the cuttings in running water.
The exact duration of soaking the cuttings depends on the degree of drying. If the base of the grape cuttings is slightly dry, moisture can be restored within a couple of days. Soaking can be completed when droplets of water form on the top of the cutting. Freshly prepared cuttings for fall planting can be planted without pre-soaking.
If the grape cuttings haven't regained their moisture within 5 days, stop soaking. Otherwise, the cuttings will lose their nutrients. This loss is indicated by the appearance of a slimy mass on the cut surface and a darkening of the soaking water.
Stratification
Stratification accelerates cutting development and improves rooting. Storing cuttings in favorable conditions is already a partial stratification, which involves pre-growing the roots. Soaking also promotes stratification.
Another method involves cultivating the roots and grafting site at a temperature of approximately 25 degrees Celsius, and the upper part of the cutting with the buds at a temperature of 10 degrees Celsius. The grafted grape cuttings are treated with a weak solution of potassium permanganate, placed in a box, sprinkled with sawdust, and covered with a wet cloth and plastic wrap. The container with the cuttings is left in a cool place, and a heater is placed near the root side.
Furrowing
The agricultural technique of grooving cuttings is used to stimulate root formation. Grooving involves making small longitudinal cuts in the bark at the lower nodes before planting the cuttings.
Tissue appears at the incision sites, accelerating the formation of adventitious roots. Grooving also reduces the time lag between shoot growth and root development. Grooving is most often used when growing own-rooted seedlings of difficult-to-root grape varieties.
Paraffinization
Paraffinizing grape cuttings can help increase the seedling yield. This technique involves coating the top of the vine with a thin layer of paraffin to prevent drying and promote timely bud opening. The paraffin is melted in a double boiler or dissolved in boiling water. When using candle paraffin, it is recommended to add garden pitch to make the consistency more elastic and sticky.
The optimal temperature for melted paraffin is 75-85 degrees Celsius. If the temperature is too low, a thick crust will form on the cuttings that will peel off easily, while if heated too much, part of the shoot may be damaged. It's best to dip the cuttings into the paraffin one at a time to prevent them from touching each other.
Updating cuts and undercuts
The cut on grapevine cuttings should be smooth and dry. If the cut is warped or severely dry, it needs to be renewed. To do this, simply cut 1-2 cm from the base with a sharp knife. Properly treated cuttings have a longer shelf life and will produce a good harvest in the future.
Treatment with root growth stimulants
Pre-treating cuttings with a growth stimulator promotes good rooting in the soil. Sodium humate, which contains sodium salts of humic acids, is an effective root stimulant. This product influences biochemical processes. To prepare a solution for soaking grape cuttings, dissolve a teaspoon of sodium humate in 10 liters of water.
How to root correctly
Grape cuttings can be rooted in several ways. Proper rooting has a positive effect on the subsequent development of the cuttings and the fruiting of the grapevines.
Classic method of growing
Beginning gardeners are advised to follow the classic method for growing grape seedlings to avoid common mistakes. Sprouted cuttings are grown following these simple instructions:
- a layer of fertilizer is placed at the bottom of the planting hole, 60-80 cm deep, and lightly compacted;
- a seedling is placed in the center of the hole so that the upper eye is located 5 cm below the soil level;
- sprinkle a little soil and water generously;
- after the liquid has been absorbed, add the remaining soil;
- In case of autumn planting, a small mound is formed on the surface, and in spring, a small depression of 15-20 cm is made.
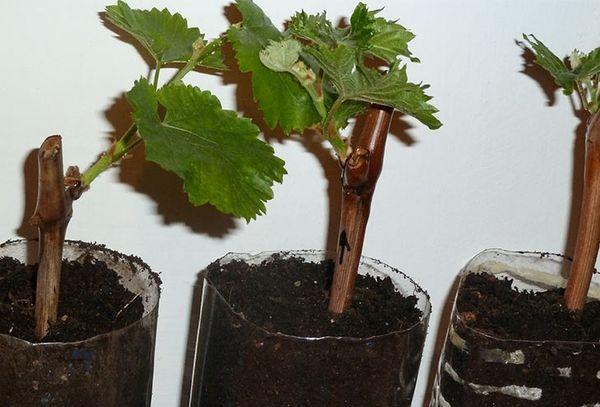
A mini-garden on a windowsill at home
If desired, you can start growing grape cuttings indoors, which will simplify the process thanks to a stable ambient temperature. To propagate grape cuttings at home, take a deep container, fill it with fertile soil and fertilizer, and plant the cutting deep.
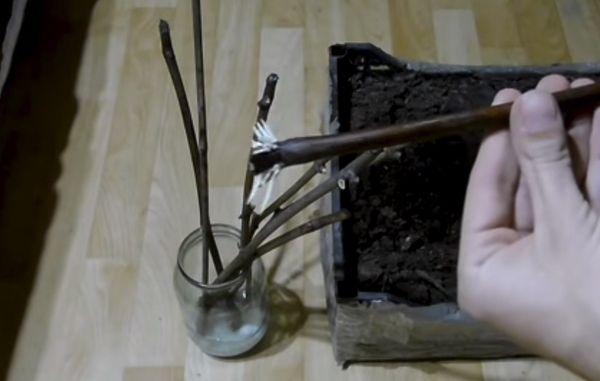
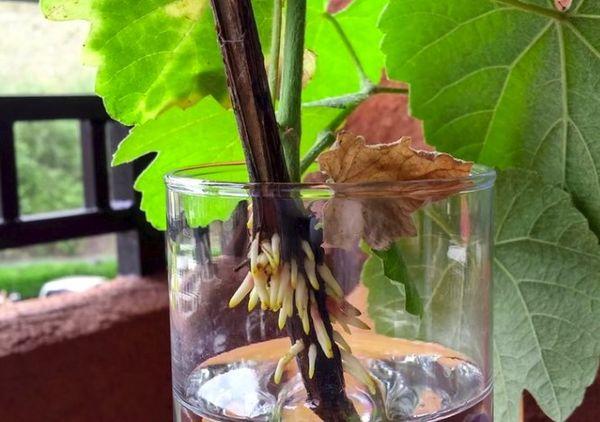
Germination in water
Before planting in soil, you can grow the seedlings in water. This will not only help preserve the seedlings but also help them develop roots in advance. If you choose to grow them in water, follow these steps:
- Warm purified water is poured into a 1 liter glass jar so that the level is about 3 cm.
- Place several cuttings inside the jar, and the cut ends should begin to ooze. While the sap is oozing, rinse the cuttings periodically until the cut ends swell.
- Add water periodically to maintain the initial level. Evaporation can be reduced by stretching plastic wrap around the cuttings.
- After 3-4 weeks, roots will begin to form. When they reach 2-3 cm, the seedlings can be transplanted into the ground.
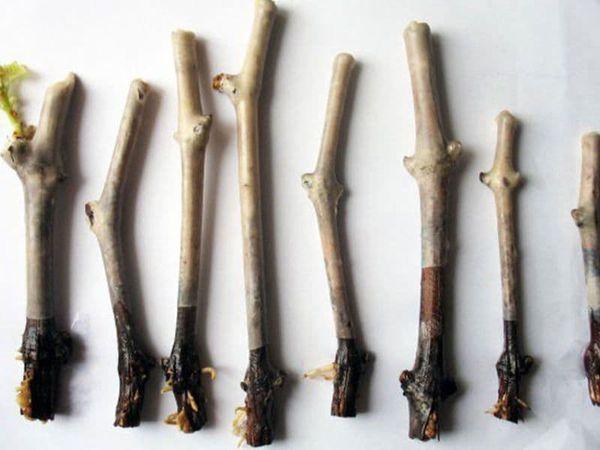
Without roots
Grape cuttings that haven't yet formed roots can be planted directly in the ground. First, assess the suitability of the cuttings by making cuts on the bud and the shoot itself. The bud should be green, and the vine should be moist. For planting, dig holes, add fertilizer, place the cuttings, and cover with soil. It is recommended to plant two cuttings in each hole. If both are successful, one can be transplanted to another location.

In a jar of water with aeration
Growing seedlings in a jar of water provides aeration for more vigorous growth. To germinate cuttings this way, leave the containers on a windowsill and regularly ventilate the room. This will keep the water warm and the tips of the cuttings cool.
Kilchevaniye
The rooting process improves root formation. The terminal bud on cuttings is better prepared for growth, so it often develops before roots begin to emerge. As a result, the shoots stop growing and may die. Kilchevanie helps preserve the cuttings and accelerates their proper development.
If you need to root a small number of cuttings, prepare a hole the depth of which corresponds to the length of the cuttings themselves. Place a layer of sand at the bottom of the hole, and insert the cuttings upside down. Then backfill the hole, and build a layer of sawdust and soil on top. Cover the hole with a glass pit and leave it there until planting time.
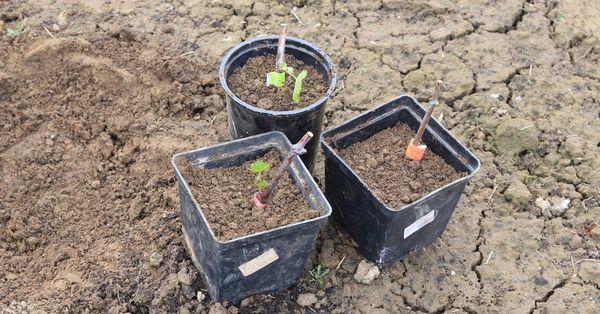
In the ground
You can germinate grape cuttings in soil at home. To do this, fill a suitable container with soil, mix it with fertilizer, and plant the cuttings deep. Once the shoots begin to grow and develop roots, transplant them into separate containers to prevent them from interfering with each other.
In a peat tablet
When using peat tablets to root cuttings, pre-treat the plants with a growth stimulant. Alternatively, you can dilute potassium permanganate with water. Then, place the cuttings in the tablets and wrap them in a damp cloth. To prevent moisture evaporation, you can place them in plastic bags. Rooting time in peat tablets is 3-4 weeks.
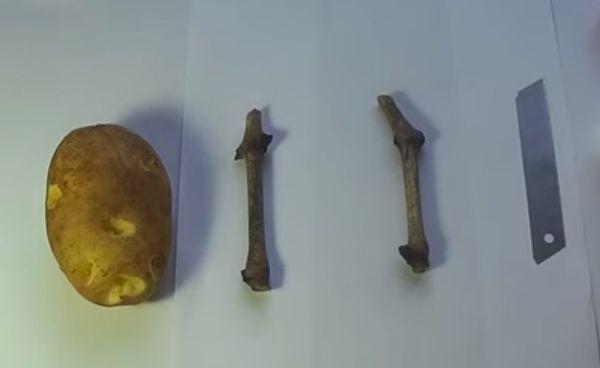
In potatoes
An unusual rooting method involves using potato tubers. To do this, cut out all the eyes on the potato, make a hole for the cutting, and secure it in place. Then, leave the tubers in a warm place for the cutting to take root after the potato rots.
Planting in open ground
Seedlings that have developed strong roots can be transplanted into open ground for further growth. To ensure vigorous growth and a bountiful harvest in the future, several factors must be considered. Specifically, preparatory work, optimal timing, and the selection of a suitable planting pattern are crucial.
Recommended timeframes
Seedlings can be transplanted to their permanent location in spring or fall. When planted in spring, they are placed in the ground after the snow has melted and the risk of frost has passed. This allows the plants to adapt well to the new conditions and begin to grow around mid-July.
In the fall, seedlings are transplanted into the ground during September. It's important to do this promptly so the plants have time to establish themselves before the first hard frost.
Preparing the planting hole
The optimal dimensions of a planting hole for grape bushes are 70 x 70 x 70 cm. For spring planting, you can begin preparing the hole well in advance, beginning the previous fall. A layer of mineral fertilizer is placed at the bottom of the hole, combined with organic matter.
Planting diagram
The planting pattern should be carefully chosen to avoid wasting time reorganizing the vineyard. Using single-strip trellises 2 meters high, all developing shoots can be planted on a single plane. Leave 12-14 cm between shoots. If you plan to have 25-30 shoots on each vine, the trellis should be at least 3.5 meters long.
Soil requirements
The quality, nature, and properties of the soil directly affect the growth of grapevines. Loose, quickly warming soil is considered most suitable for grapes. Gravelly or light sandy soil is also suitable. It is not recommended to plant grape seedlings in marshy, compacted, or heavy soil.
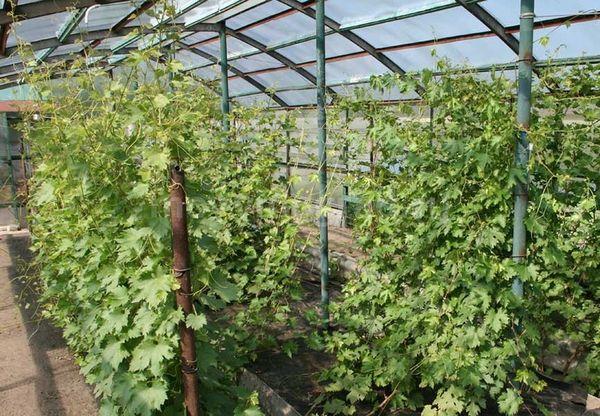
Features of planting in a greenhouse
In cold climates, planting grapes outdoors is not recommended, as the vines will not develop properly. A greenhouse is the optimal solution. For indoor planting, early-ripening varieties are recommended. Varieties with dense clusters are not suitable, as they are more likely to be affected by fungus due to poor ventilation.
The seedlings are prepared according to a standard pattern and placed in the greenhouse in rows, ensuring at least 0.5 m of space remains from the greenhouse walls. Leave at least 1 m between rows, as the plants will grow rapidly. You can plant grapes in a small greenhouse in the far corner and let its shoots grow horizontally along the wall.
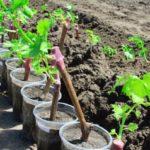
How to put in school
A grape nursery is a plot of land where seedlings are planted from cuttings. The site is chosen in a sunny, well-ventilated area. To grow grapes, the soil in the nursery must be loose, light, and fertile. The area is dug to a depth of 40 cm, fertilized, mounds are made, and the cuttings are planted in them.
Post-landing care
After completing planting work, it is necessary to provide the plants with comprehensive care.
Correct and timely agricultural technology has a positive effect on the development of grape vines and crop yield.
Mulching
Covering the area around grape vines with a layer of mulch helps retain moisture in the soil for a long time. Mulching also reduces the risk of fungal diseases. To maintain healthy soil, you can use sawdust, peat, manure, and straw as mulch.
Weeding
As grape vines grow, weeds appear on the soil, negatively impacting the plant's development. Regular weeding is required to address this problem. Weeds should be removed as they grow back. To remove weeds and their roots, you'll need to use specialized tools, such as a hoe or a hoe.
Top dressing
Grapes produce a large, healthy harvest in abundance only if the soil contains sufficient nutrients. If fertilizer is added immediately upon planting young seedlings, no additional fertilizer is required for the next 3-4 years. Mature plants require the following nutrients for vigorous fruiting:
- Nitrogen. This element promotes leaf and shoot growth, so nitrogen fertilizers are especially needed in early spring, when the growing season is just beginning.
- Phosphorus. Applying this micronutrient at the beginning of flowering allows for better inflorescence development and also promotes berry set.
- Potassium. By early autumn, grapes require potassium fertilizers, which accelerate the ripening process and prepare the plantings for the upcoming frosts.
Watering
Throughout the season, grapevines are watered several times, depending on the condition of the plants. Initially, after transplanting them outdoors, it is recommended to water once a week, using warm water mixed with a complex fertilizer. After a month, you can reduce the frequency of watering to twice a month. Towards the end of summer, the vineyard should be left dry, as the vines ripen better under such conditions.

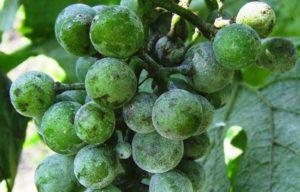
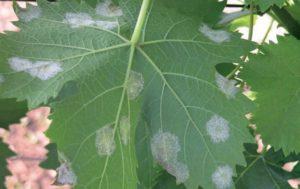
Protection from diseases and pests
Violation of agricultural practices and adverse external influences lead to pest infestations and disease. To protect crops from infections, spraying with specialized fungicides is used. Insecticides help protect grapevines from pests, and large insects can be removed manually.
Regional features
When growing grapes, it's important to consider the specific characteristics of your region. This will help you grow a healthy crop and avoid a number of mistakes.
Kuban and Krasnodar Krai
In these regions, crops can be planted at any maturity date. The main concern is the risk of drought, so watering frequency must be monitored.
Belarus
It is recommended to grow it in Belarus frost-resistant grape varietiesIt is also possible to grow the crop in greenhouses in the country.
Central Russia and the Moscow region
Early-ripening varieties are suitable for planting in the central part of the country. Mid-season and late-ripening varieties may not produce a harvest before frost sets in.
Urals and Siberia
Due to the cold climate in these regions, it's best to plant grapes that are resistant to extremely low temperatures. Winter cover is essential for care.
Related posts:
 How to grow grapes in the Moscow region in open ground without a greenhouse
 Description of the Julian grape variety, planting and care instructions
 How to plant grapes step by step, with a description of the process and care
 Description of the Krasotka grape variety, planting and care technology
 Timing and recommendations for the best way to graft grapes at home
 The ripening time of grape vines by variety, how to speed up the process, and what to treat the plant with
 Methods for planting and propagating cherries at home
 Description of 30 grape varieties for Siberia, planting and care for beginners